Organization is key when managing projects and events, including visually organizing your schedules. Using a calendar is the most common method of doing this.
But a timeline view of those events provides more details on their progress, thus easier tracking. And like in a Notion calendar, you can add Notion timeline colors to visualize data easily.
Table of Contents
Notion Timeline Colors
Adding a timeline view of your tasks or events in Notion visually organizes your schedule. With just a glance, you’ll know how long each event takes without fiddling through different tools.
You can take this visual organization further by adding colors to your Notion timeline.
Like how you add colors to Notion calendars, you can use tags as well to color-code your entries in the timeline.
Granting that you have already created a database, follow these steps to add Notion timeline colors.
1. Add a timeline view to the database.

Do this by clicking on the “+” button after the last database view you added. Then on the “New View” pane, select the “Timeline” option.
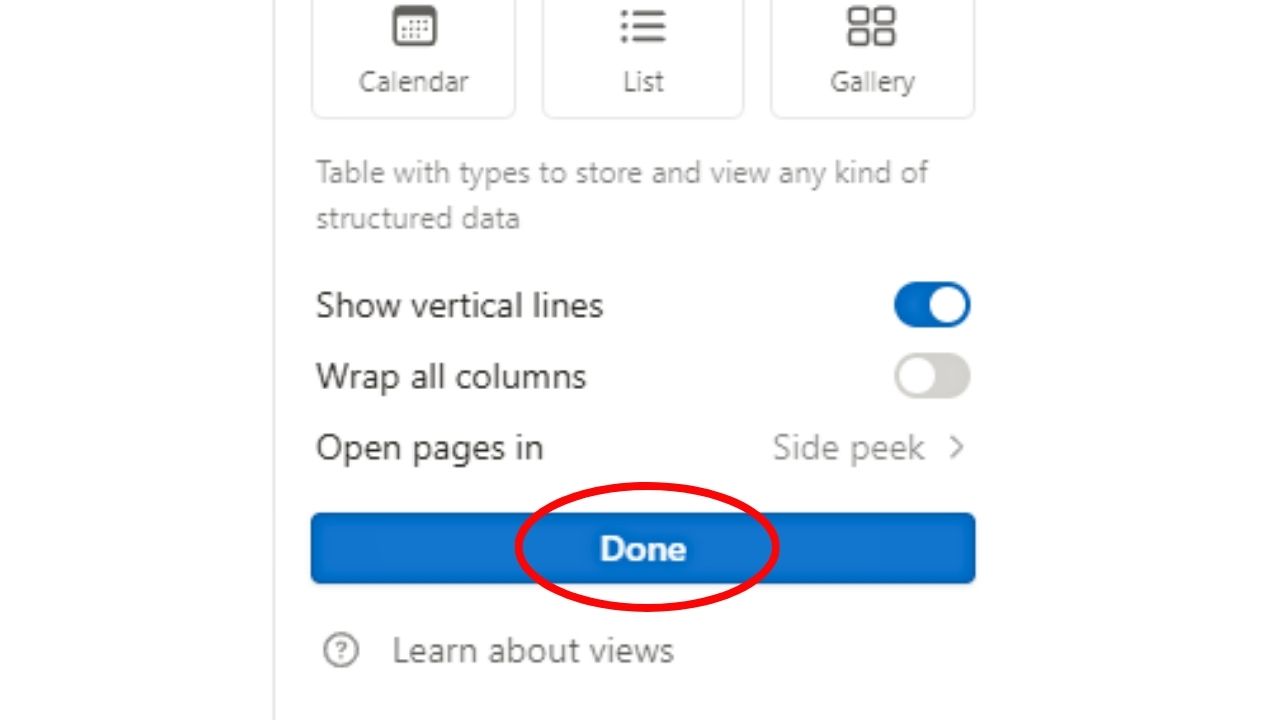
You can then choose what to show in the timeline view and how the pages will be opened once you click on an entry.
Click “Done” to close the “New View” pane.
The “View Options” pane then opens.
2. Select “Properties.”
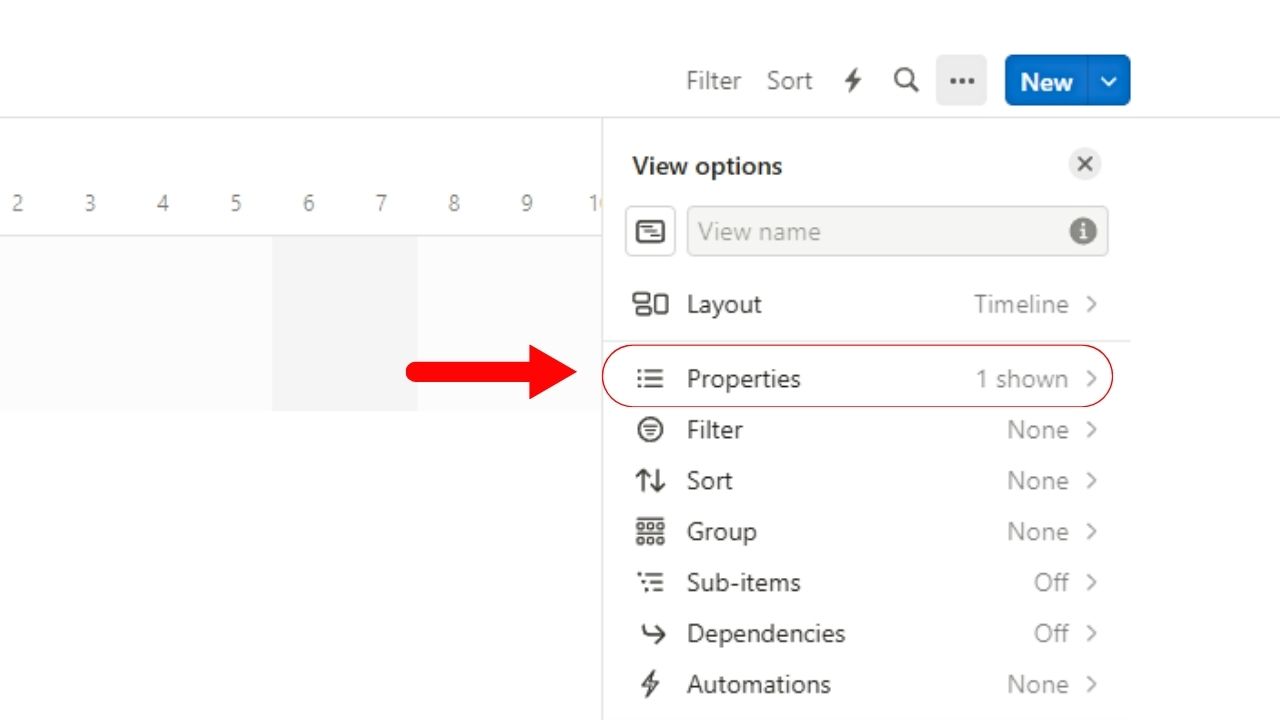
This is the second option in the “View options” pane, between “Layout” and “Filter.”
3. Click the “Timeline” tab and unhide the “Tags” or “Multi-select” property.
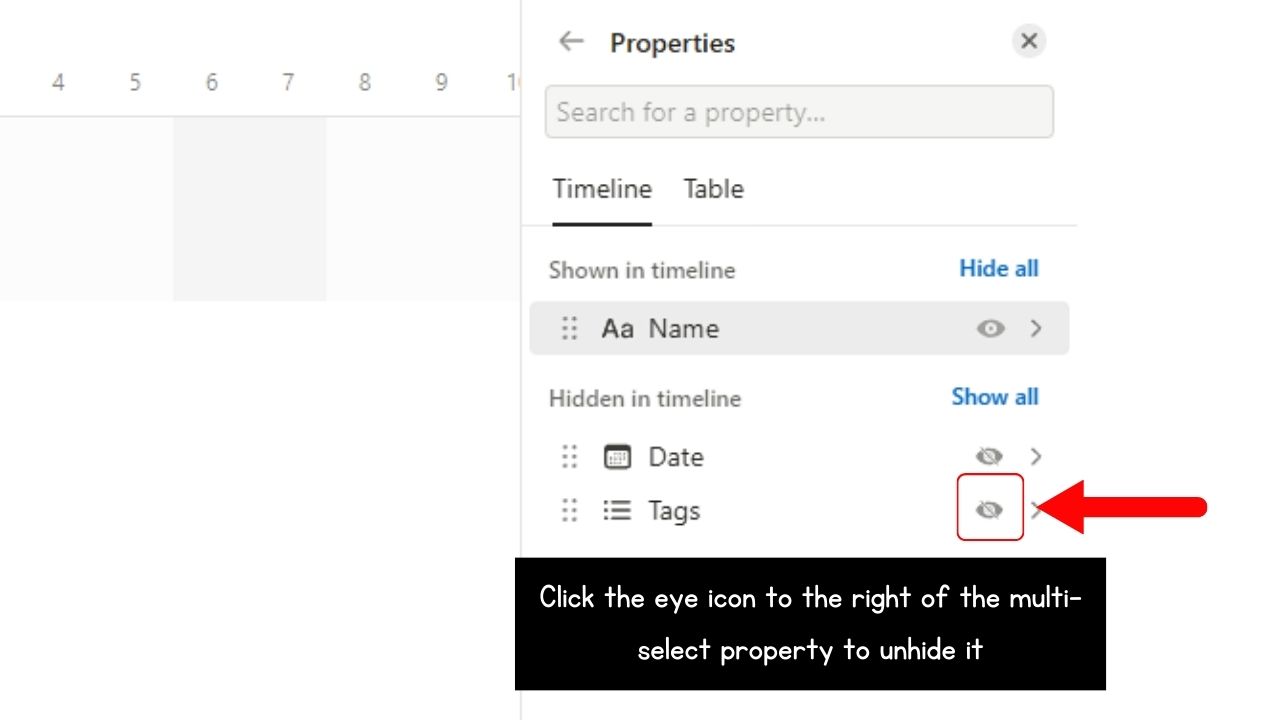
Only the “Name” property is shown on the timeline view by default. Since you want to add colors to the timeline, you need to show the “Tags” or “Multi-select” property as well.
To do this, select the eye icon to the right of “Tags” or the muli-select property. This will then be transferred to the “Shown in timeline” section after the “Name” property.
You can also show the progress bar or add checkboxes if you want easier moving of entries in the timeline.
4. Select the “Close” button.
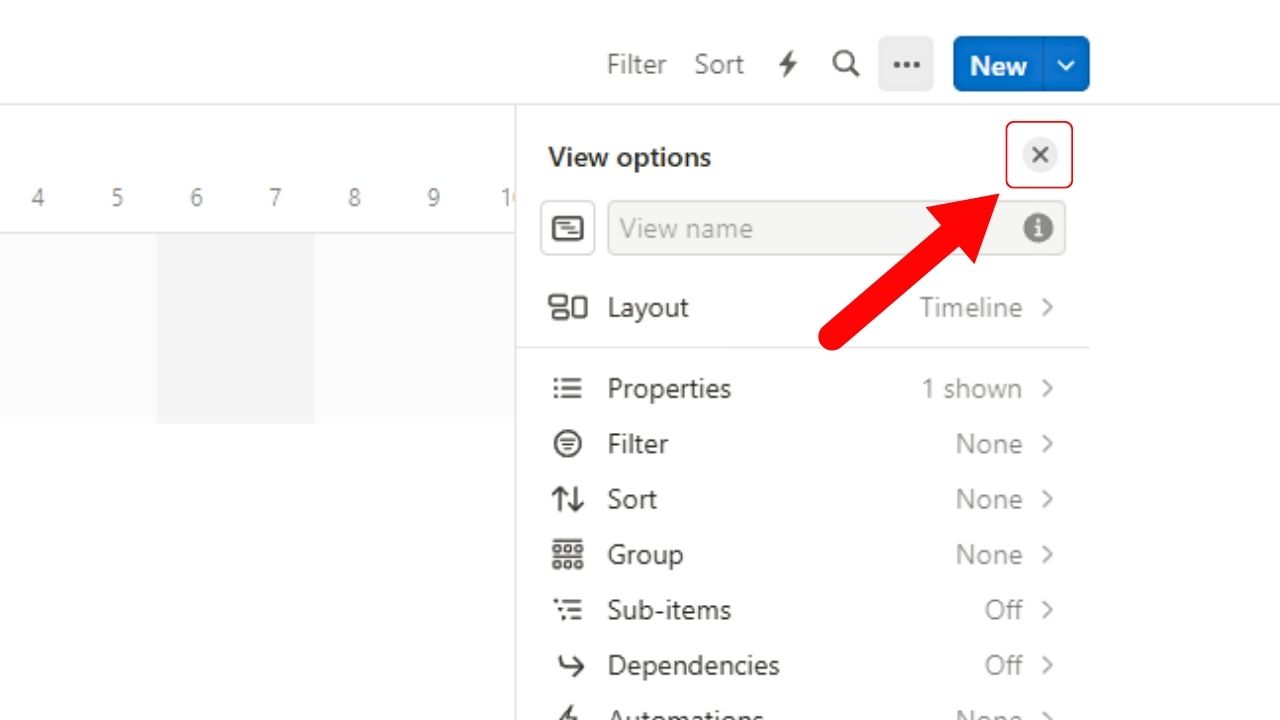
This will close the “Properties” pane, leaving you with the newly-created timeline view of the database.
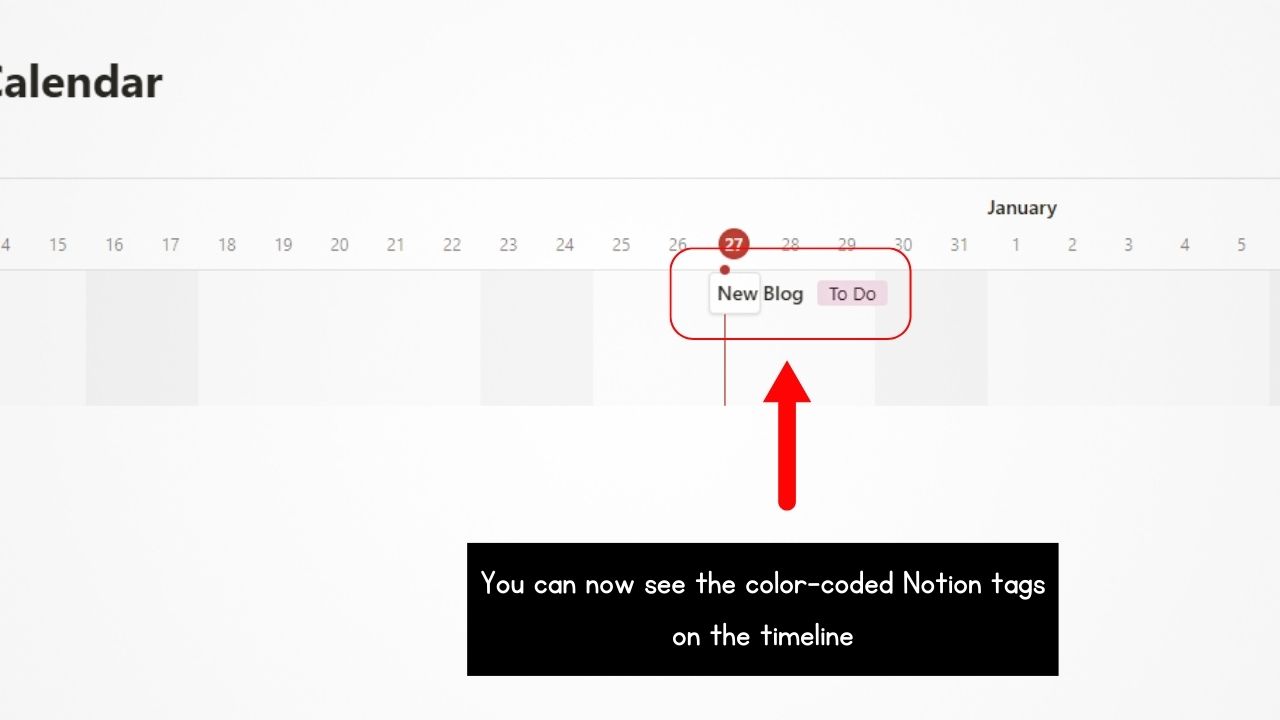
You should now see the color-coded Notion tags you added to the timeline entry.
5. Edit the entries on the timeline.
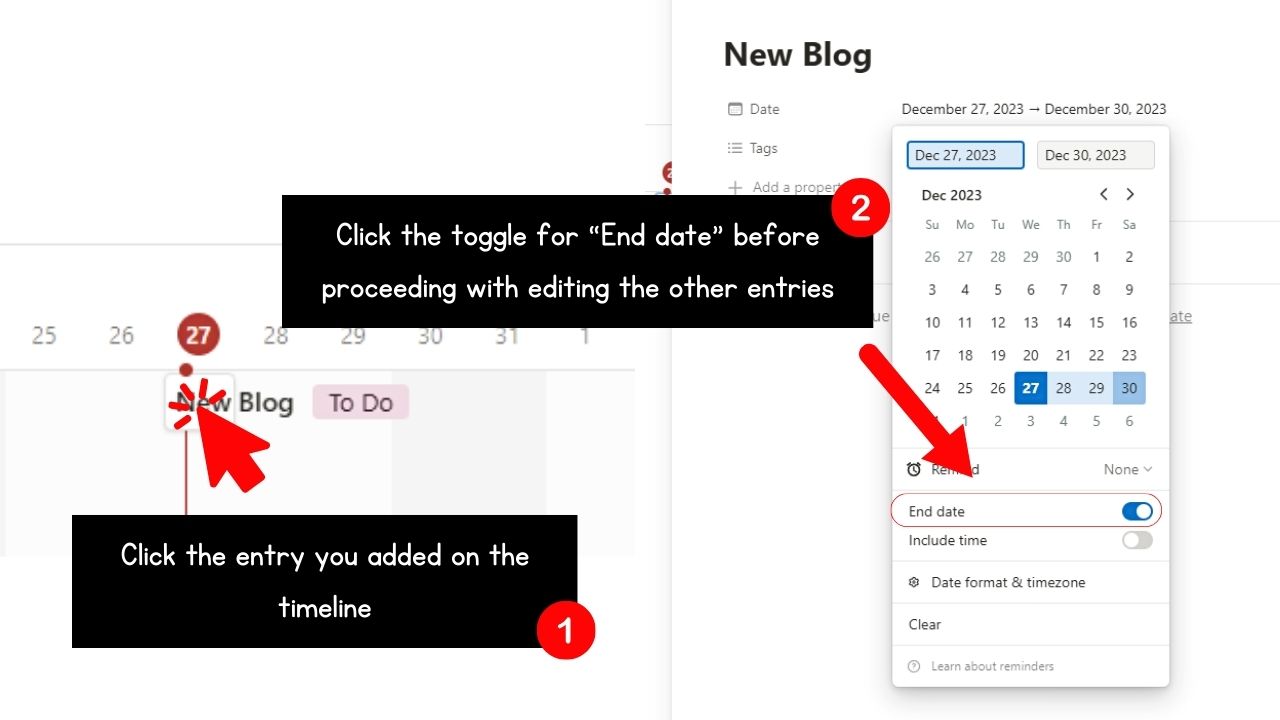
Do this by clicking on the task, project, or event entry on the timeline. You should see a new page open.
You can then click the “End date” toggle so that both the start and end dates of that entry are seen on the timeline.
You can also click the toggle for “Include time” if you want. Then click outside of the “Adjust date” pane to proceed.
6. Assign colors to the tags.
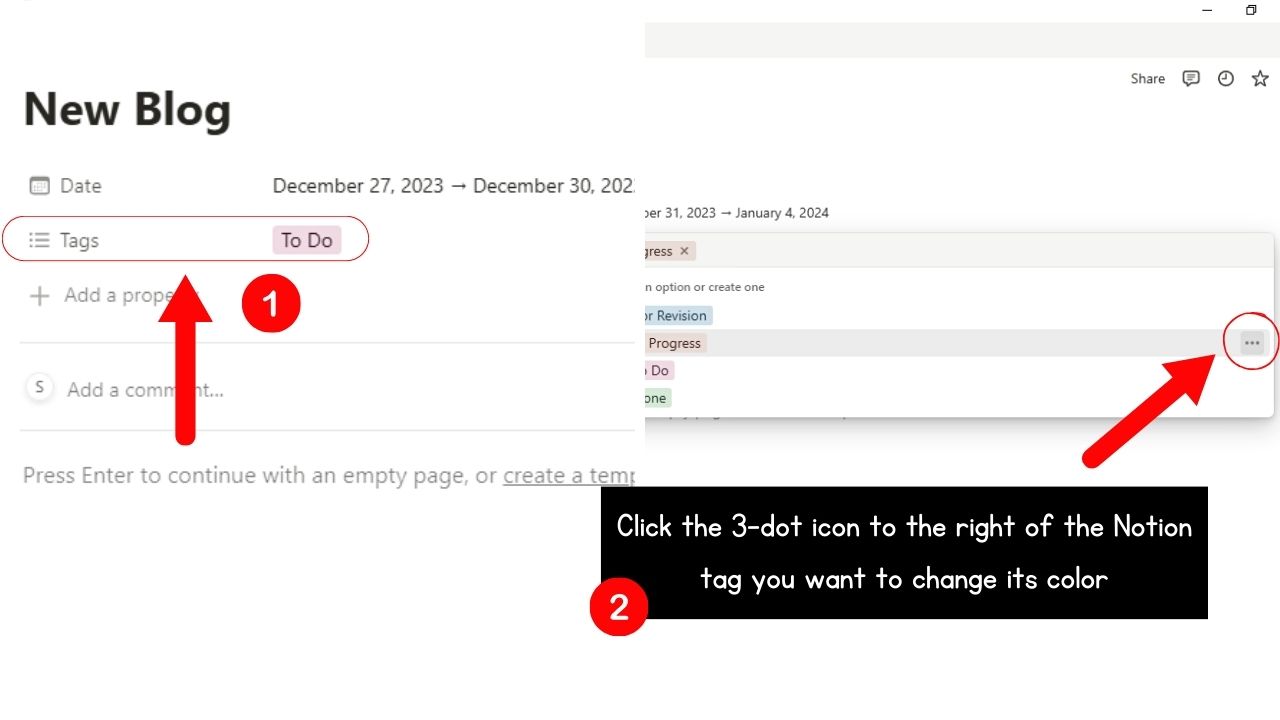
Select the “Tags” property and click on the status option you want to assign for that entry.
To change the tag’s color, select the 3-dot icon to the right of that Notion tag.
Then click on any color found in “Colors” found on the dropdown menu.
Once the color is selected, a checkmark appears. You can then click outside of the dropdown menu to exit it.
7. Close the timeline entry window.
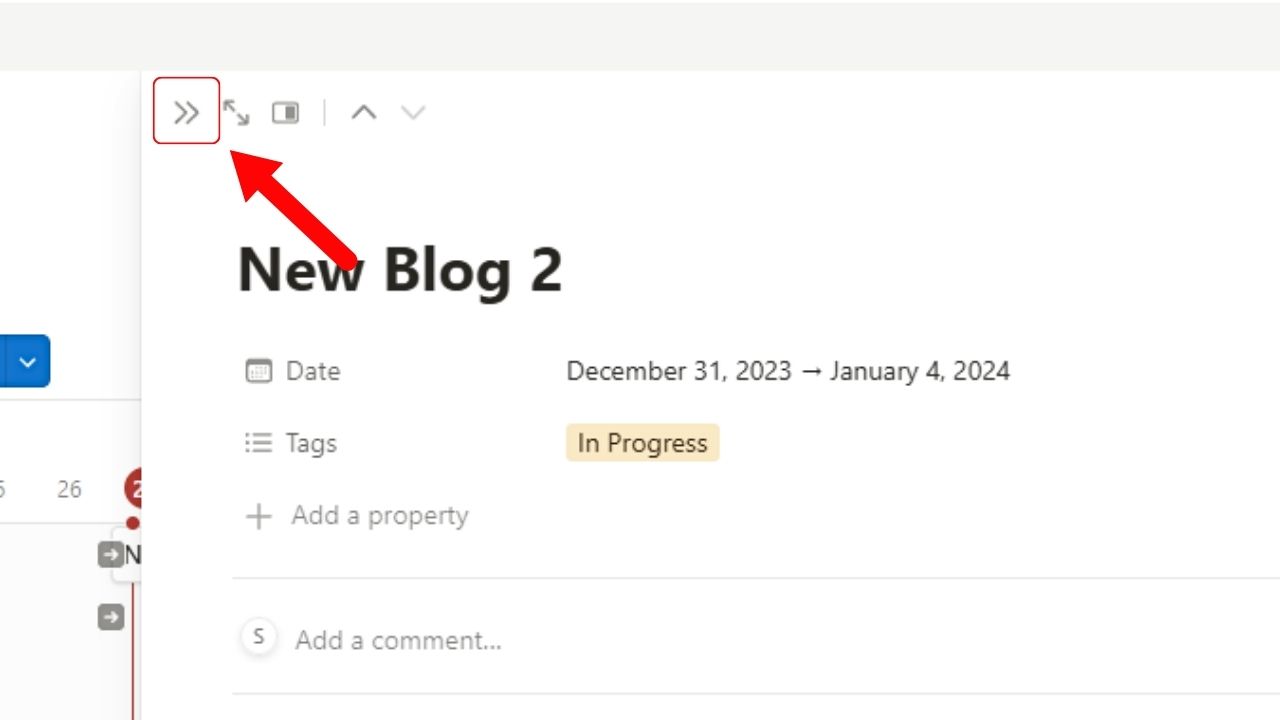
If you opened the timeline entries as side-peek pages, click the right-facing double caret symbol on the top left corner.
If you opened the timeline entries as center peek pages, click anywhere outside of the window to close it.
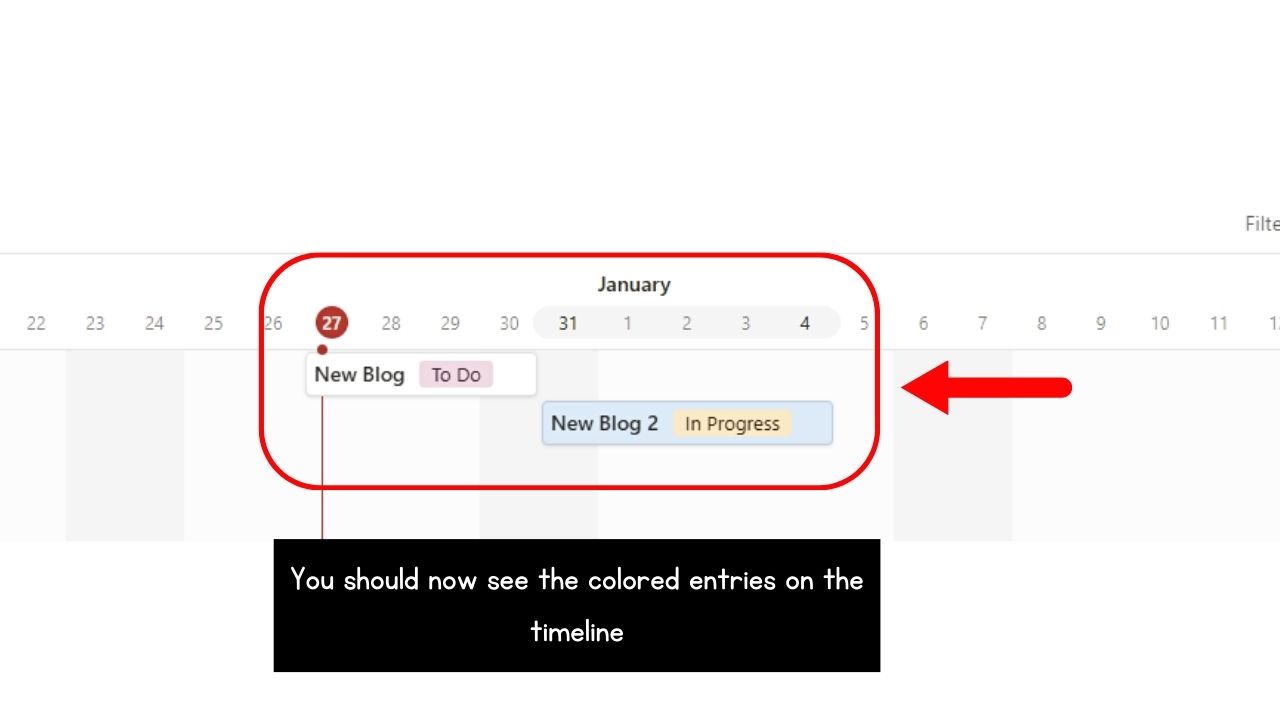
By now you should see the timeline entries you added, complete with the colored Notion tags you assigned to them.
Conclusion
Gantt charts in Notion are one of the best ways of visually presenting the timeline of projects or events. But to fully harness their full potential, you can maximize the use of Notion tags to color code each event or task.
This way, you can check where you’re at with your projects, allowing you to change course should you find you’re behind on your set deadlines.
