If you want an organized Notion workspace, adding tags is the best way to categorize your content. In this way, you can retrieve content and streamline your workflow.
Don’t fret, as this guide walks you through the process of adding tags in Notion effortlessly.
Table of Contents
How to Add Tags in Notion
Note: Before you add tags in Notion, ensure that you have created your database (table). Tagging is only available in a Notion database.
Once you have opened a Notion page, you can add tags using one of the three methods below. The good thing is all these methods apply to both the desktop and mobile apps of Notion.
Method 1: Adding “Select” or “Multi-Select” Property Columns
This method is useful when creating a database from scratch on a new page or workspace.
1. Choose the “Table” option.
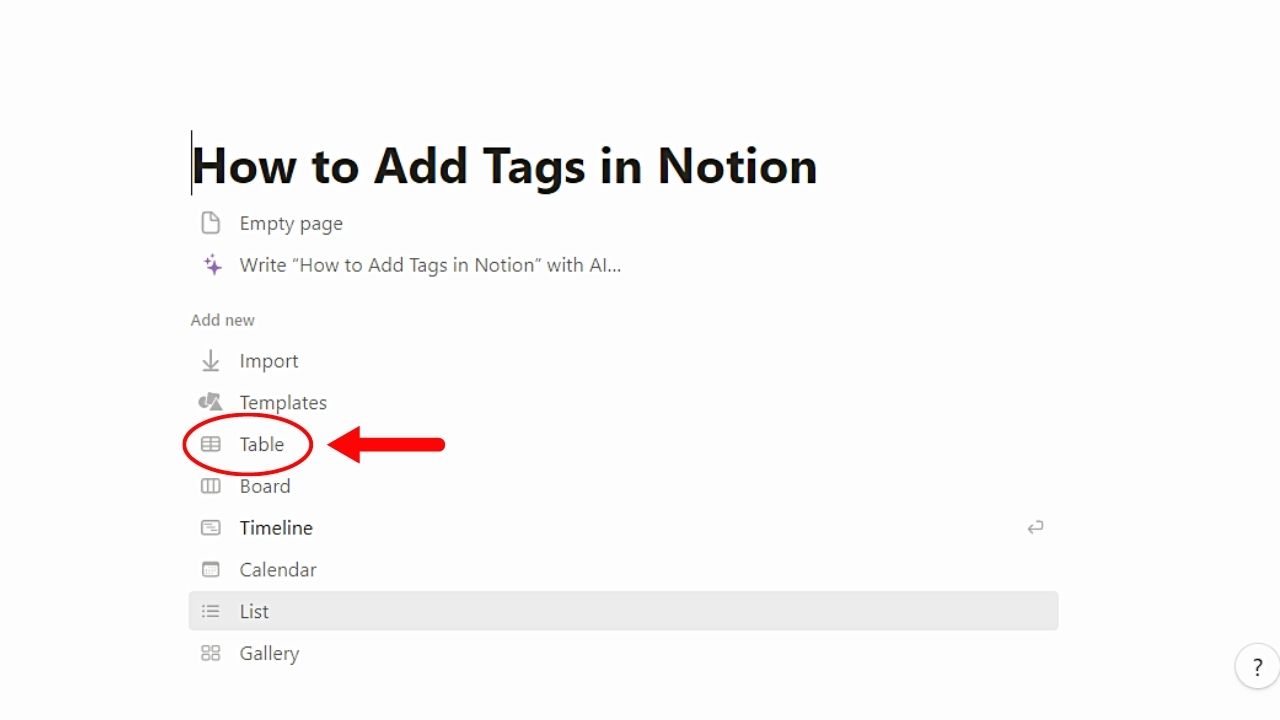
You’ll find this option under the “Add new” section when opening a new page in Notion.
2. Select “New Database.”
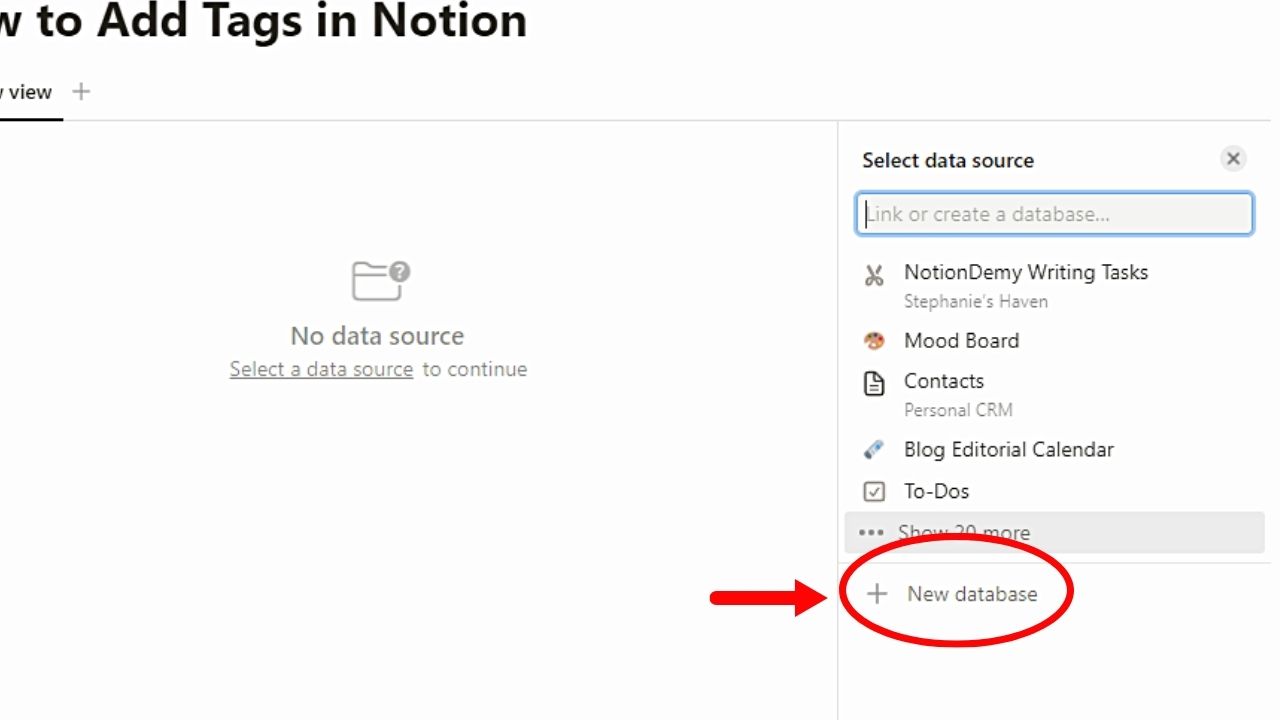
This option appears as the last option with the “+” sign to its left below the list of data sources that you add to the page.
3. Click the “+” button.
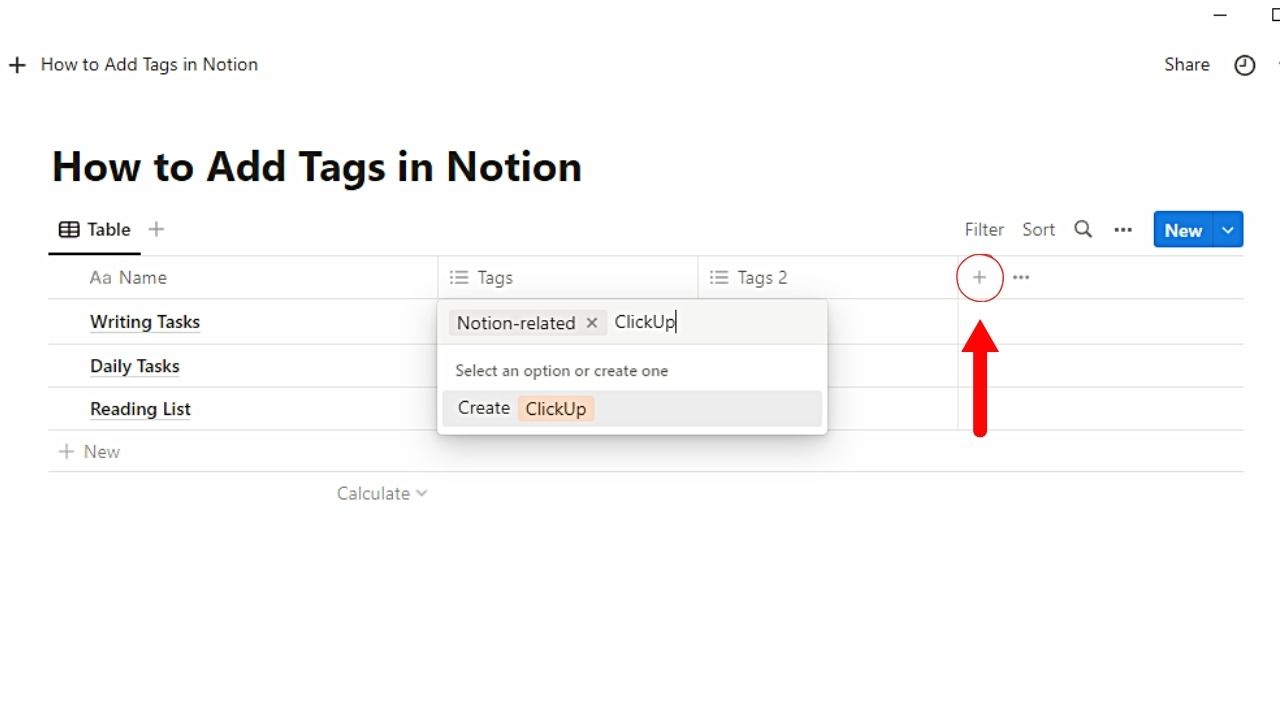
You’ll see this to the right of the last column of the database you added. This opens a dropdown menu allowing you to add a new property to it.
4. Choose “Select” or “Multi-Select.”

These are the 3rd and 4th options on the “Type” list on the “New Property” menu.
5. Type the name of the new column on the database.
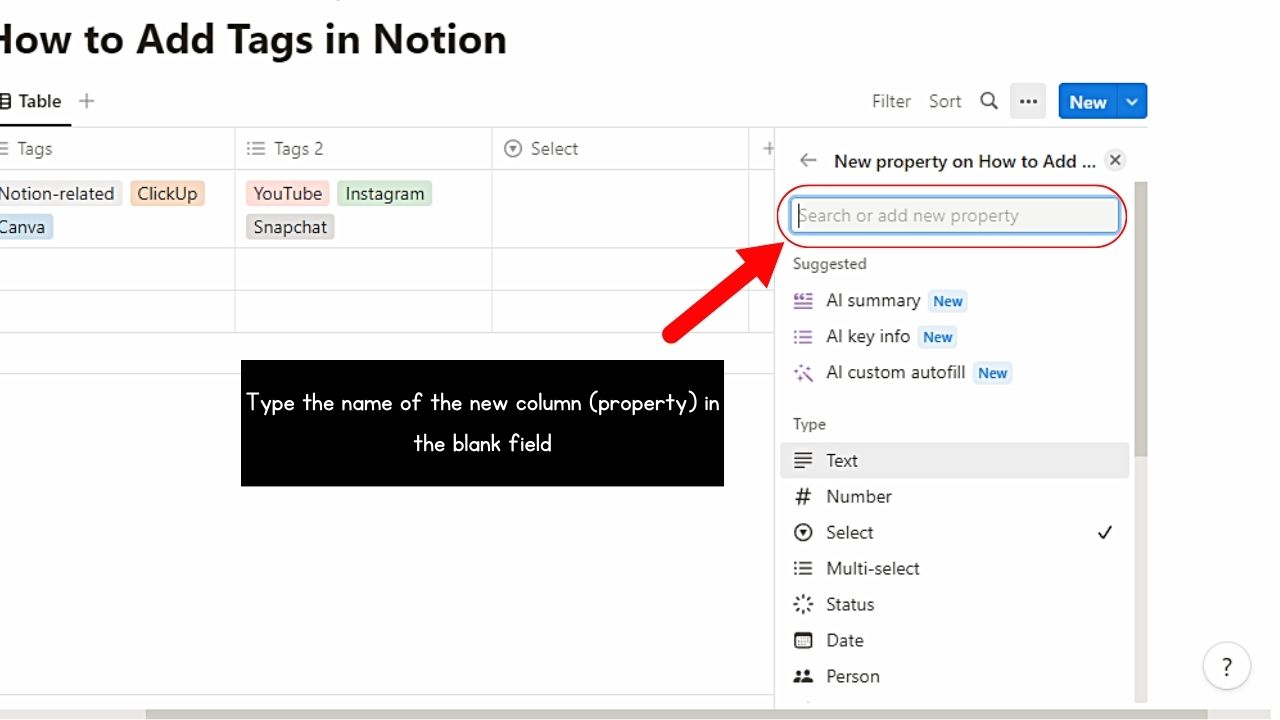
6. Select “Add an option.”
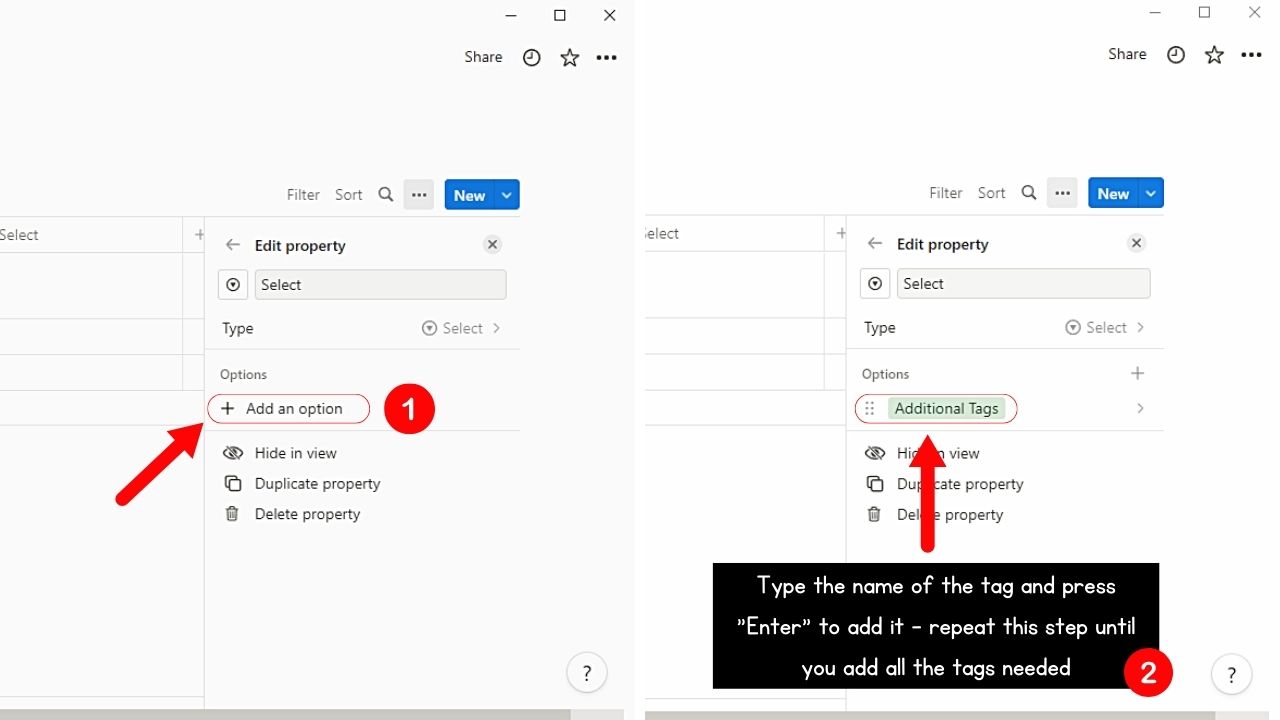
Then type the tags you want to add on the blank field. Make sure to press “Enter” after to add the tags you created. Repeat this step until all the tags you have added all the tags needed.
If you want to change a tag’s color, click the 3-dot icon to the right of that tag and choose the shade on the menu.
Once done adding the tags, click outside the menu to close or exit it.
Method 2: Typing Directly into a Cell of a “Multi-Select” Property Column
This second method is helpful for those who already added a database in their Notion workspaces.
1. Click on a cell in the new column.
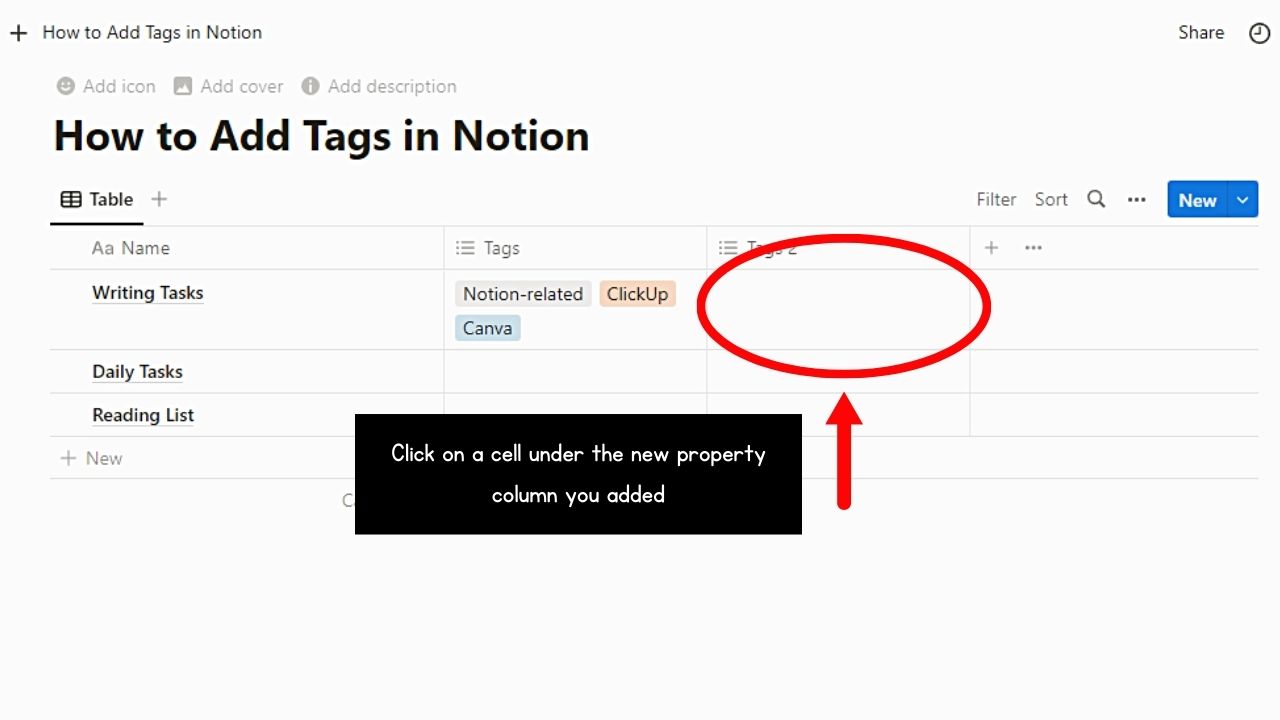
This opens the “Select an option or create one” menu.
2. Type the tag name and tap the “Enter” key.
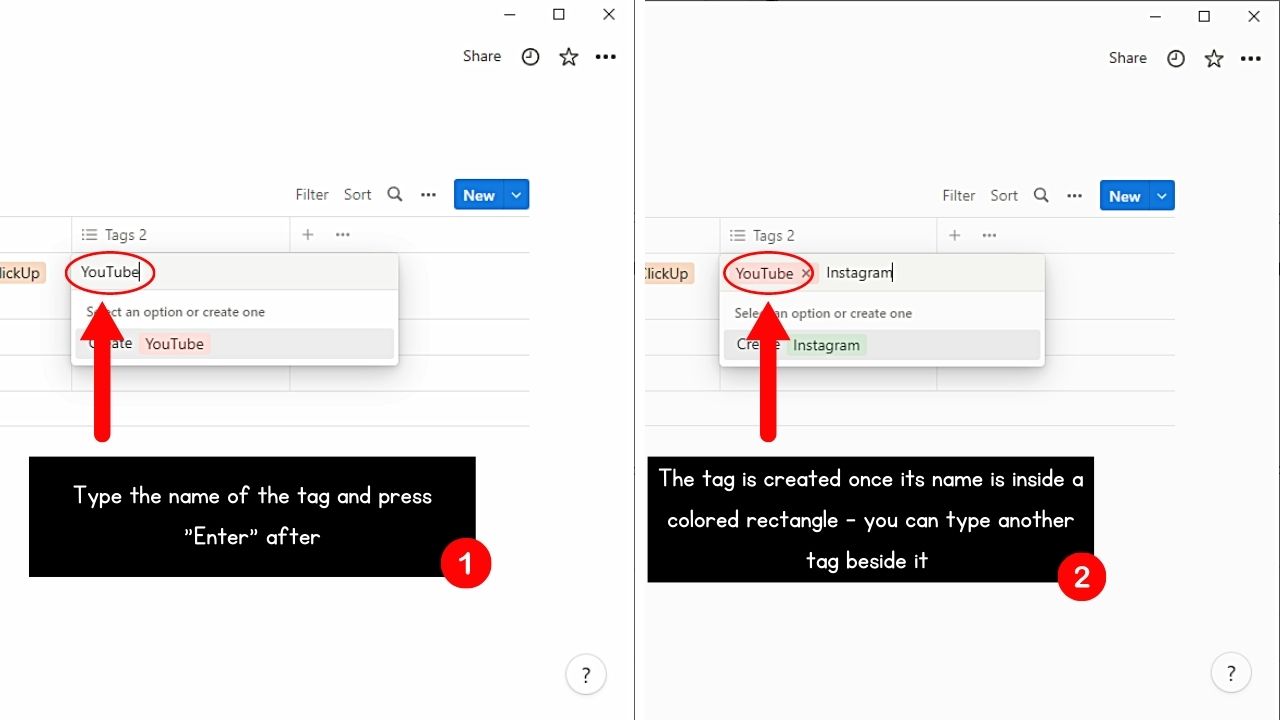
Pressing the “Enter” key ensures you have properly added the tag. You’re successful once the name of the tag appears inside a colored rectangle.
Repeat until all the tags you need are added for that cell.
Method 3: Dragging Existing Tags into the Next Cell
This method is best for quickly filling a cell in a single column with the same tags. This way, the existing tags on the previous cell are copied to the one below it.
Again, take note that this method only works if the cells belong to the same column.
1. Click the cell with added tags.
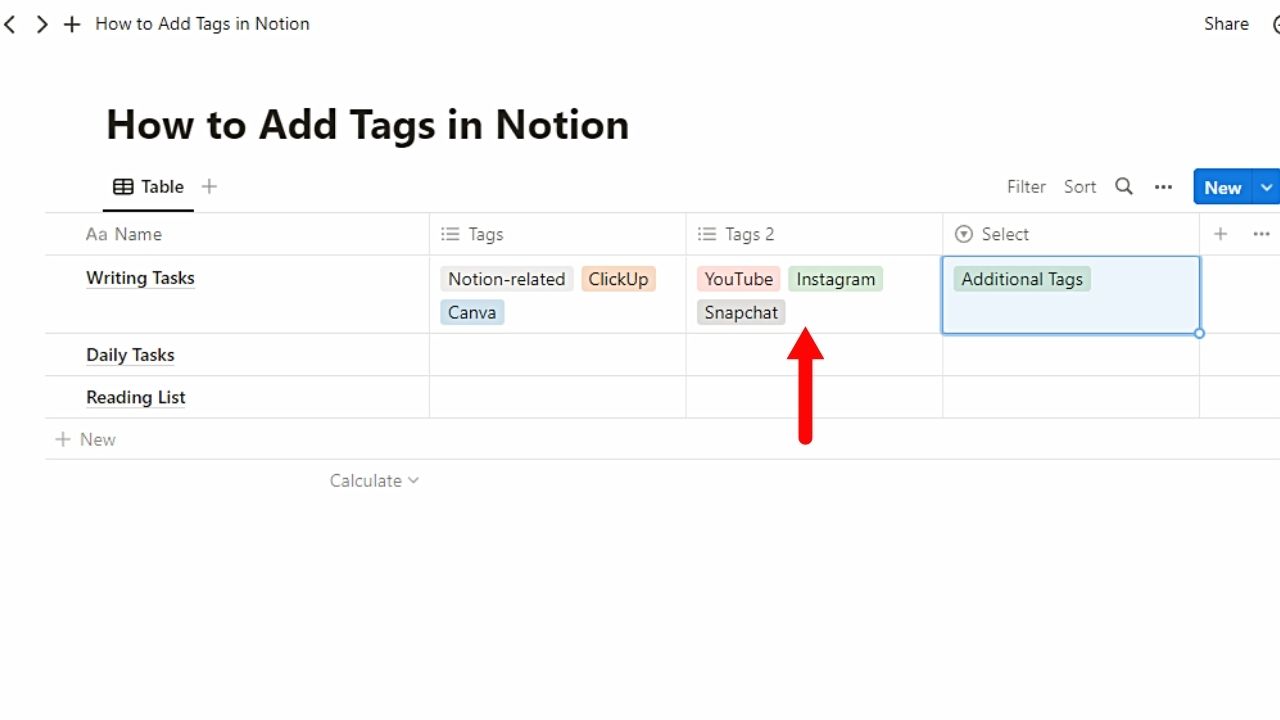
This highlights the cell and everything inside it.
2. Select and drag the circle button downward.
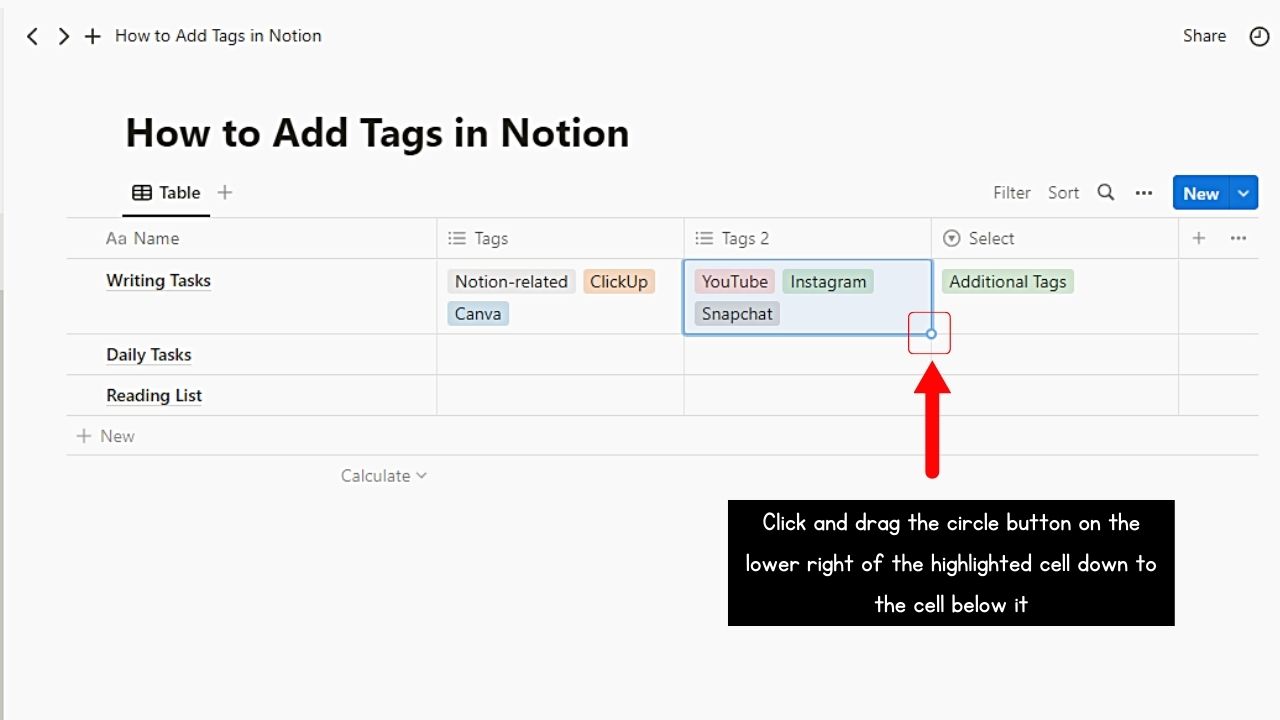
You’ll find this in the lower-right corner of the highlighted cell borders.
3. Release hold on the circle button.
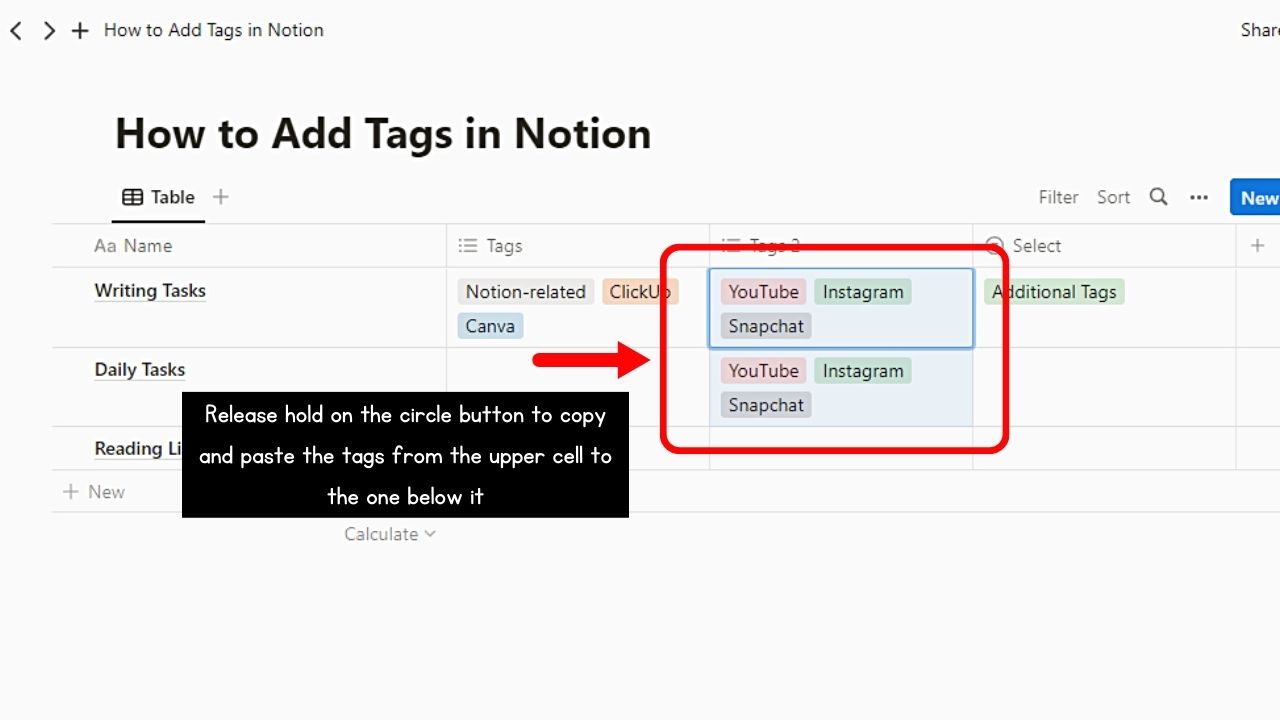
All the tags from the previous cell are copied and pasted onto the cell below it. Repeat steps 2 and 3 until all the cells of that particular column have the same tags.
How to Remove Tags in Notion
In case you added the wrong tag to a particular cell on the database, removing them is not as complicated as it seems.
One way to delete those tags is to click the “X” button beside that tag.
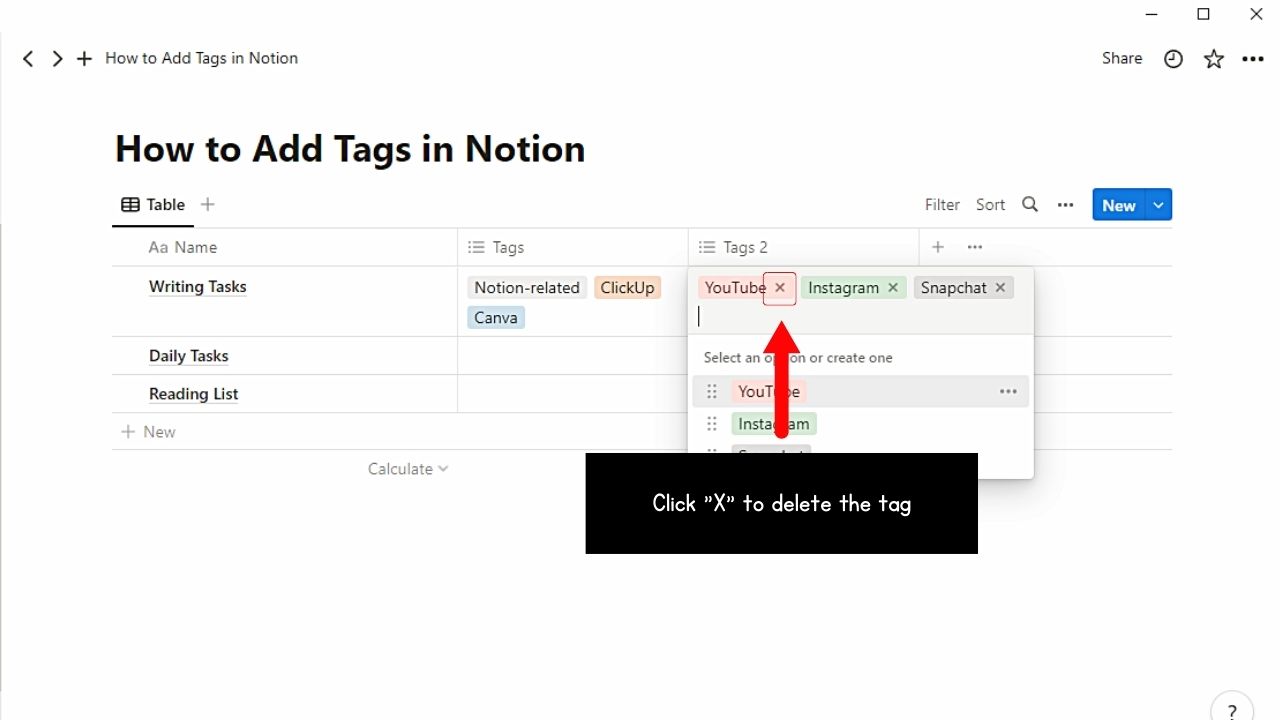
But, if you prefer the long method, click the 3-dot icon you’ll find on the right side of the said tag and choose “Delete.”
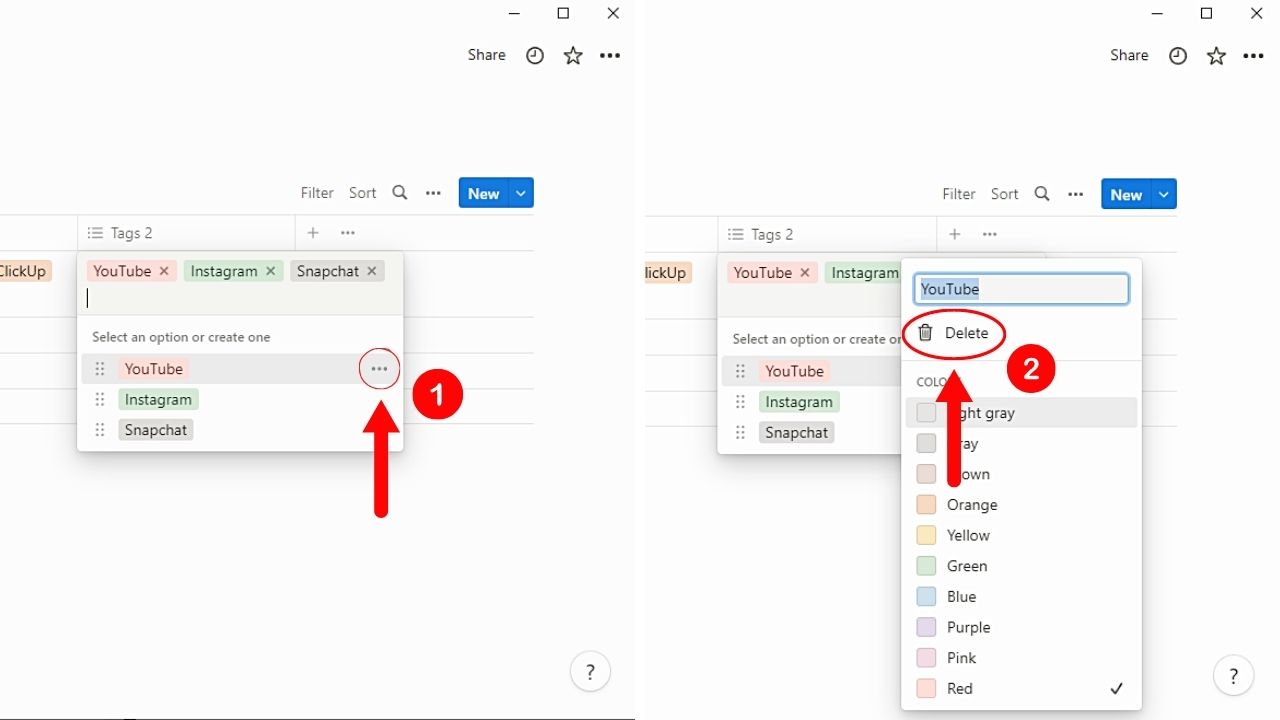
The tag is then deleted from that cell. Proceed to replace it with a new tag.
Conclusion
If you leverage adding tags in Notion, you’ll bring order and structure to your workspace in no time. Now that you can assign tags to various items, you’ll quickly filter relevant information in no time.
Take this opportunity to stay organized and boost your efficiency with Notion’s intuitive tagging system.
