Gantt charts are one of the best ways to present to your team visually the deadlines for the project you’re doing. This way, you can streamline your resources and energy on each task.
If it’s your first time making a Gantt chart in Notion, explore the steps below.
How to Make a Gantt Chart in Notion
If you’re a fan of viewing the tasks by date, you should create a Gantt chart, otherwise known as the “Timeline” view.
The best part is that you don’t have to use a third-party Gantt chart maker to create one.
You have to add a database (including duplicate databases) and add a new “Timeline” view to it.
The steps are the same whether you make one using a template or from scratch.
To make a Gantt chart in Notion, follow these steps:
1. Add a new database.

Do this by typing the “/database” command on a blank space on the Notion page.
Then select the “Database – Inline” option on the dropdown menu. You should now see an untitled database appear with its default “Name” and “Tags” properties.
2. Add a “Tasks” property to the column.

Simply change the title of the “Name” property by clicking on it. On the dropdown menu, type the property’s new title or header name.
Then click anywhere outside the dropdown menu to close it.
3. Change the “Tags” property to “Date.”
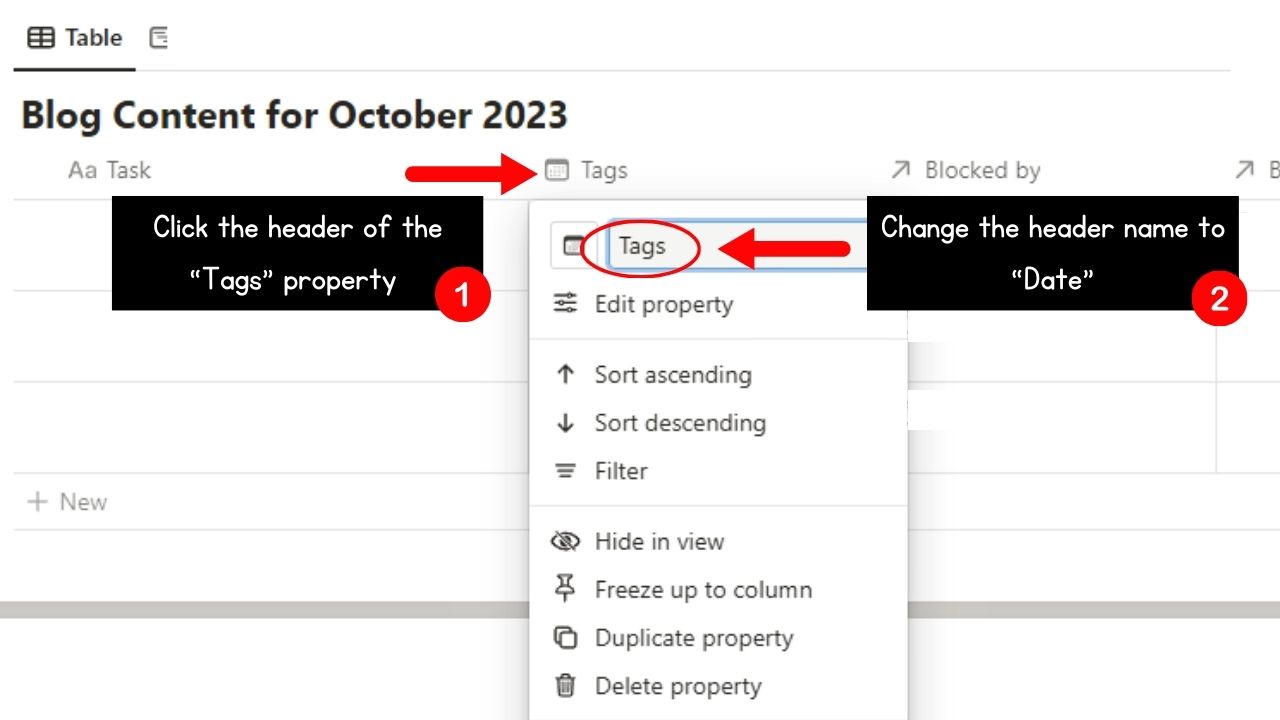
Do this by clicking the “Tags” header and changing its title to “Date.”
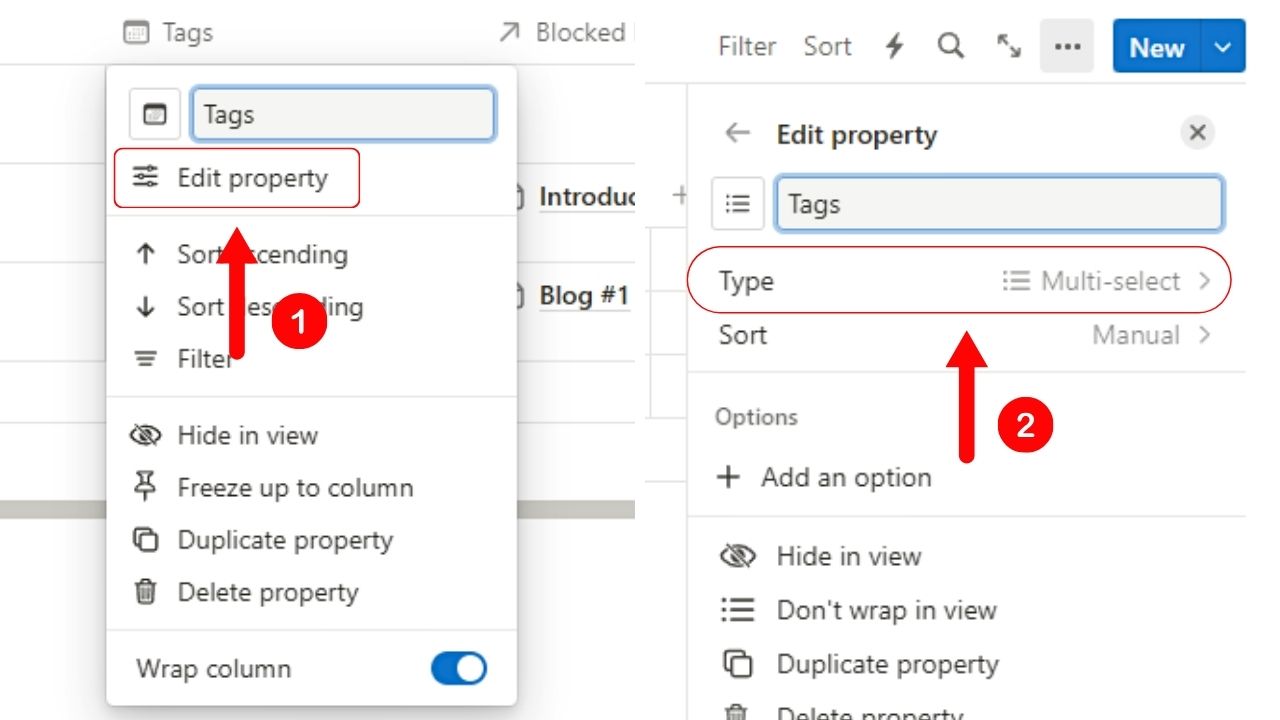
Then click “Edit Property” and select “Type.”
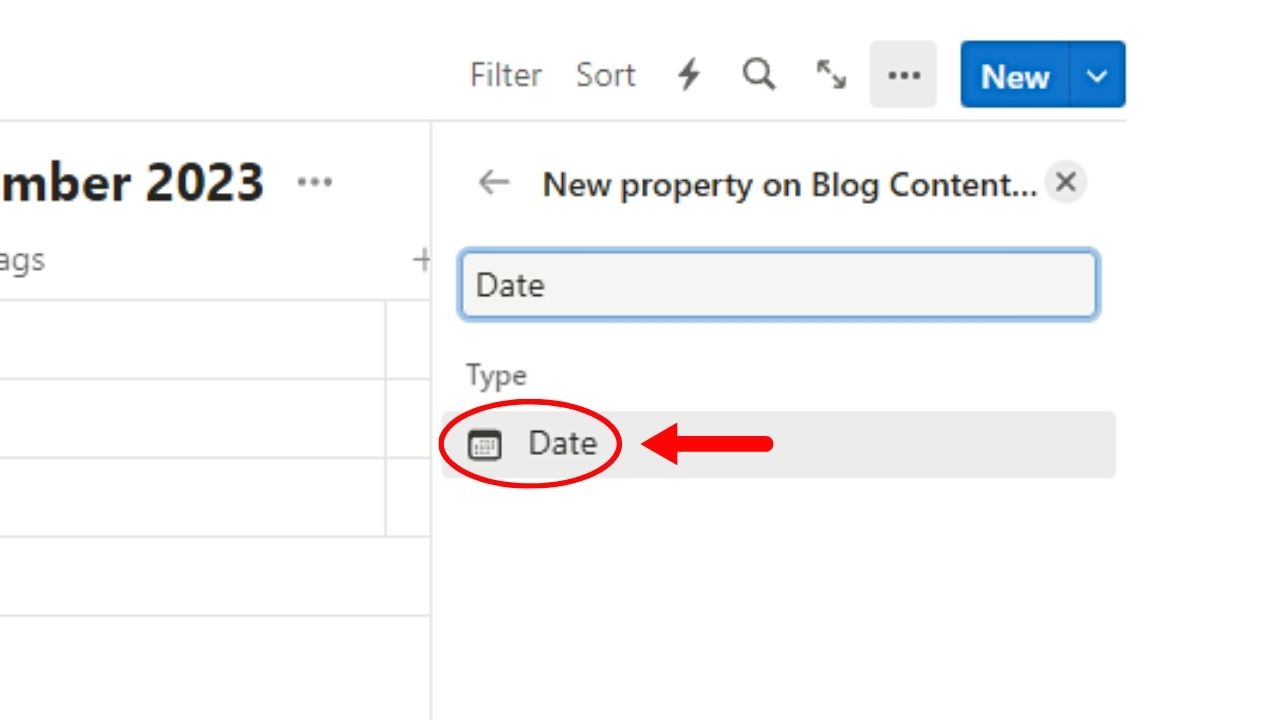
Click the “Date” option next.
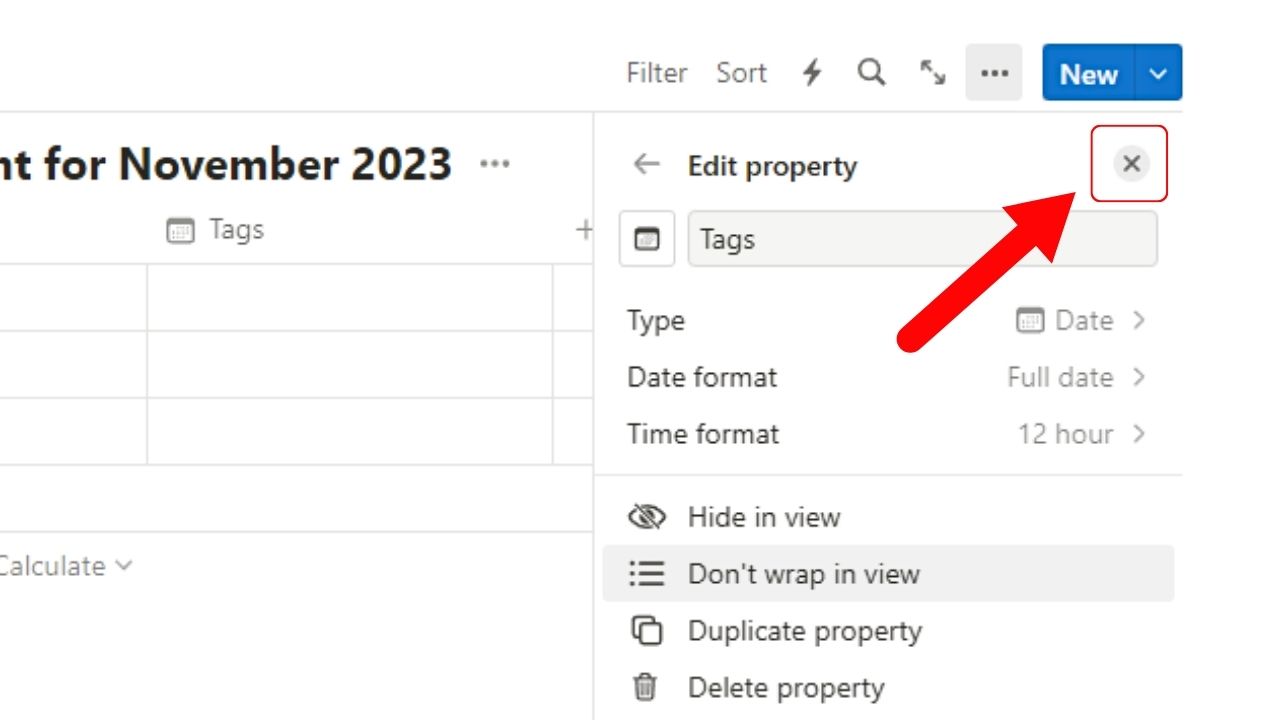
If you want, you can change the “Date format” and the “Time format” according to your preference.

Then exit the “Edit Property” pane by clicking the “Close” button. You should now see the newly changed properties on the database.
4. Fill in the database with their entries.

Add the task names and their corresponding deadlines in their respective cells.
5. Add the “Timeline” view.
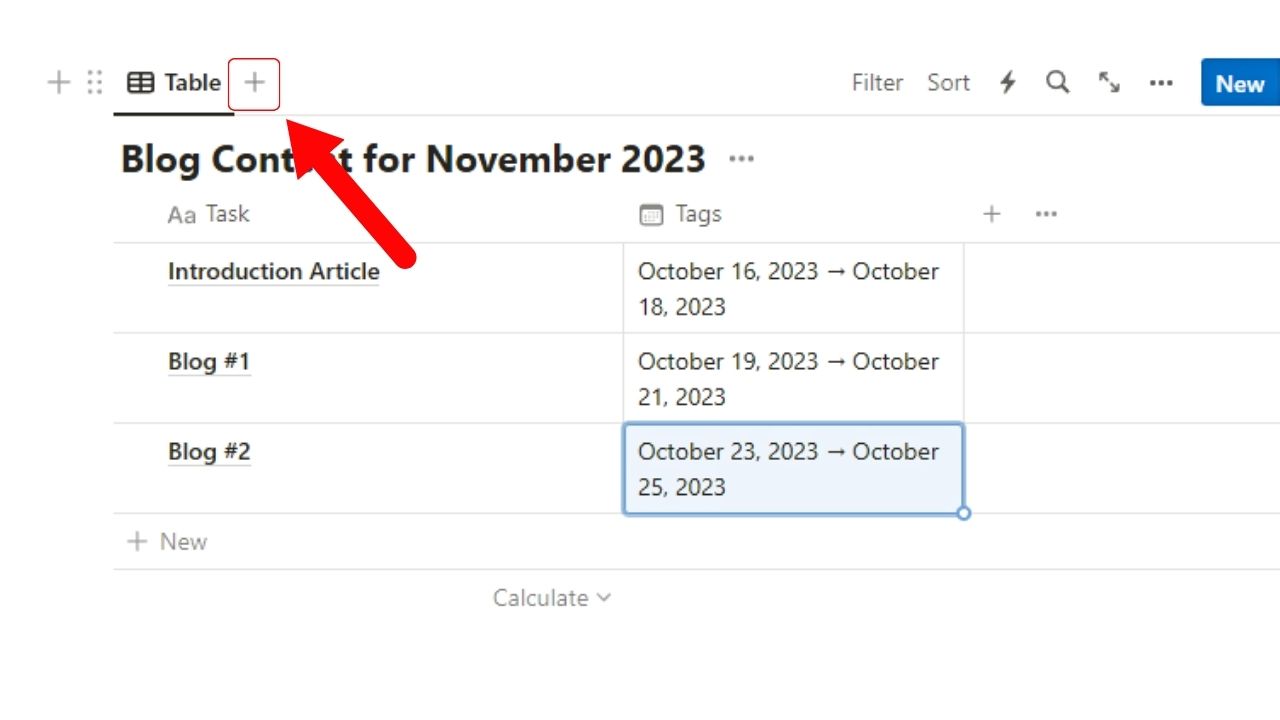
Do this by clicking on the “+” button after the “Table” view tab.
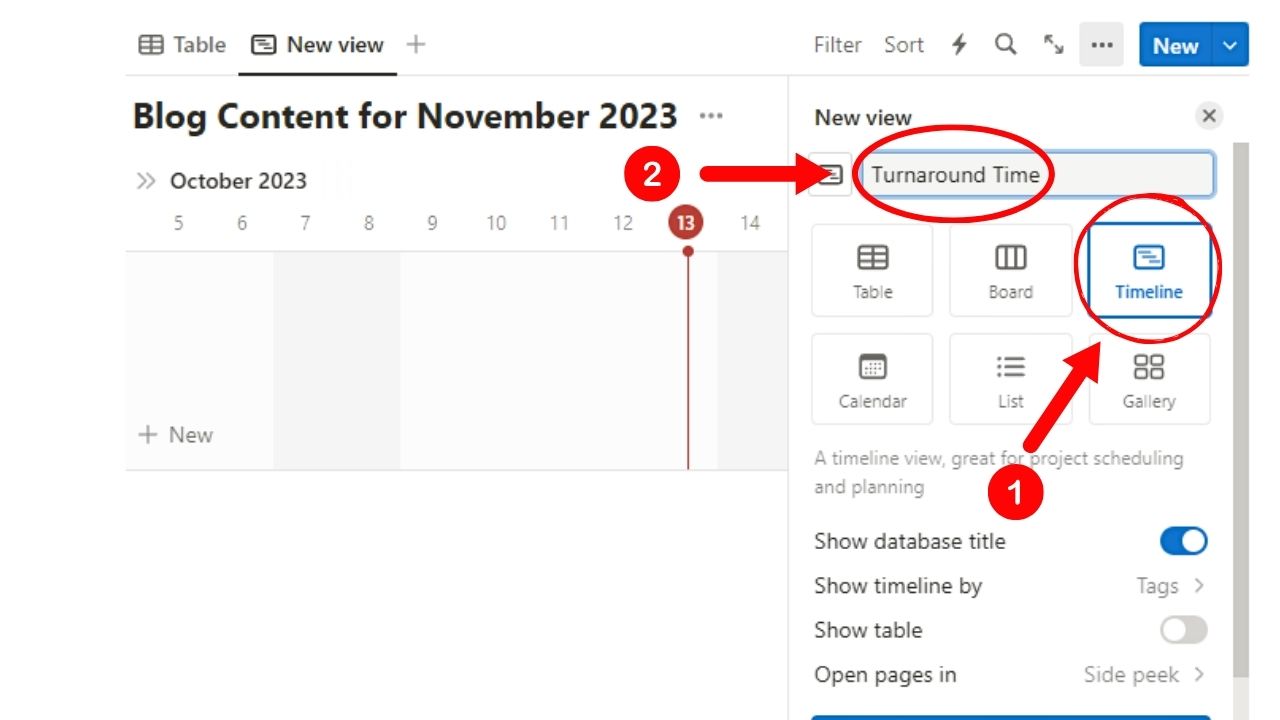
On the “New View” pane, click the “Timeline” option. Then type its new title in the “Title” field before clicking the “Close” button to exit.
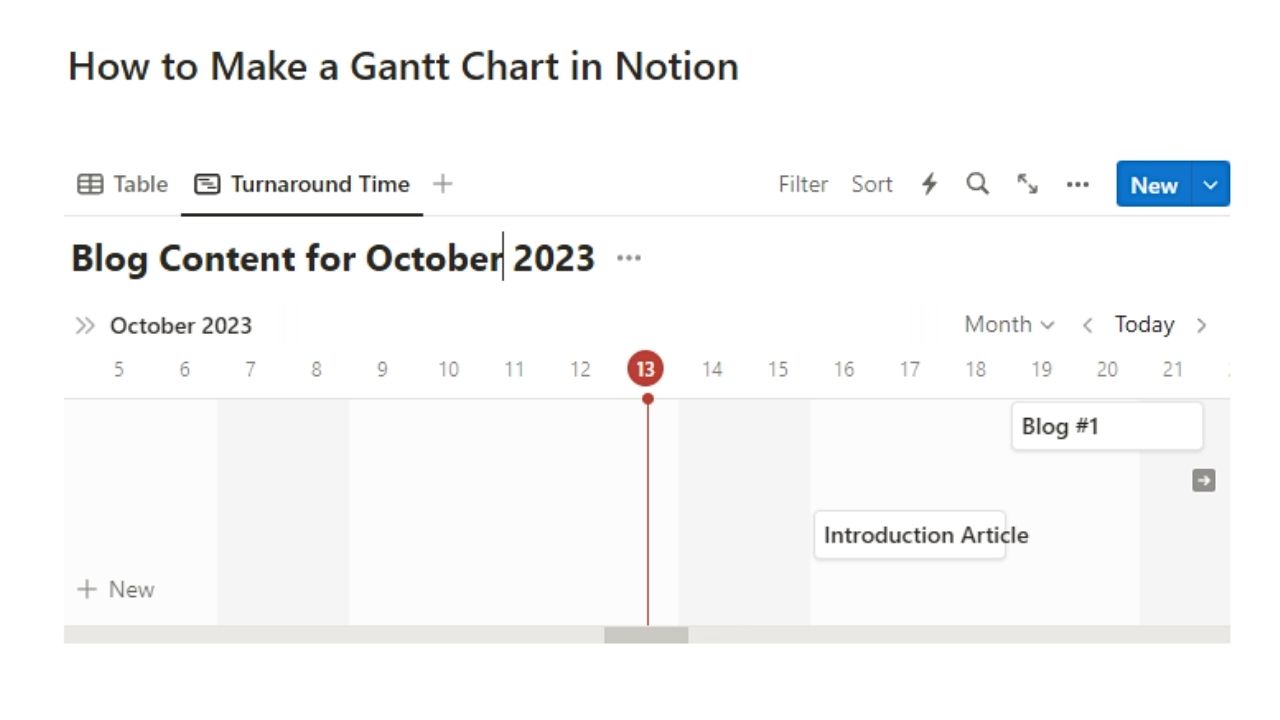
You should now see the database switch into a Gantt chart, with the entries spread across the timeline by the dates set.
6. Set the “Sort” option to “Date.”
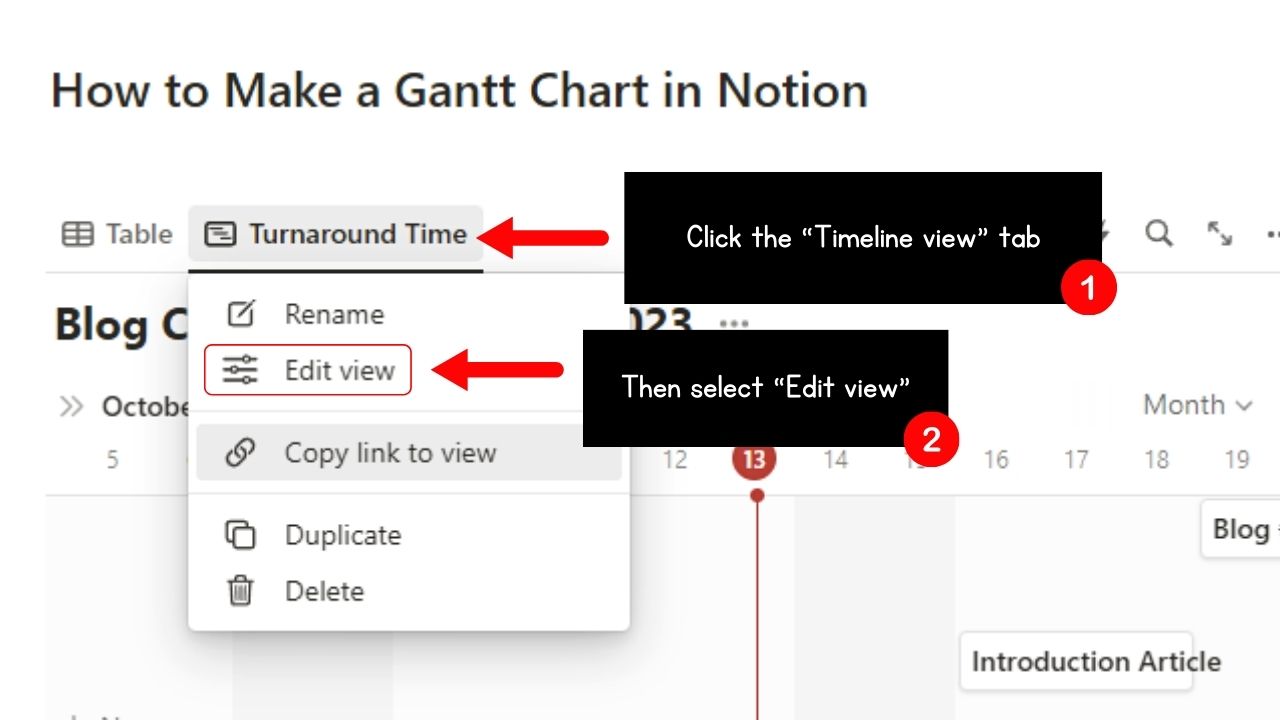
Simply click on the “Timeline” view tab and click “Edit view.”
When the “View Options” pane opens, select the “Sort” option (between “Filter” and “Group”). Then click “Date.”
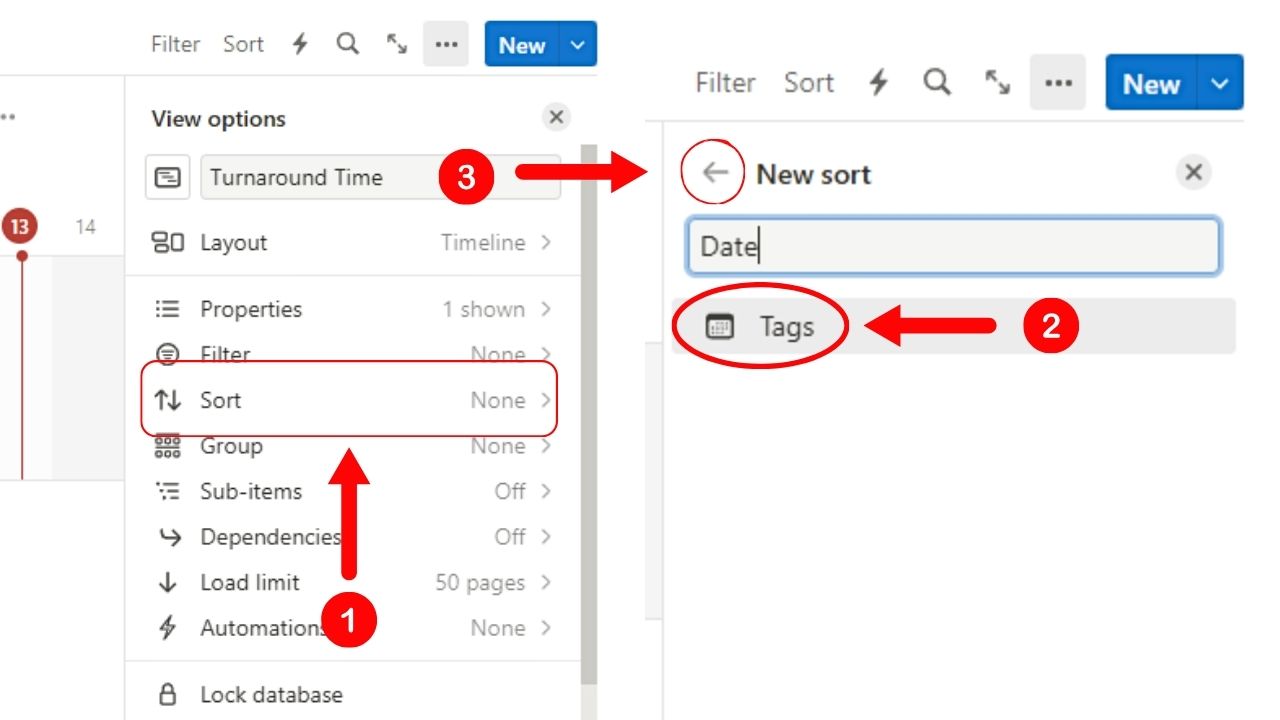
This option allows for the timeline entries to be sorted by date.
Exit the “Sort” pane by clicking the left-pointing arrow.
7. Add “Dependencies.”
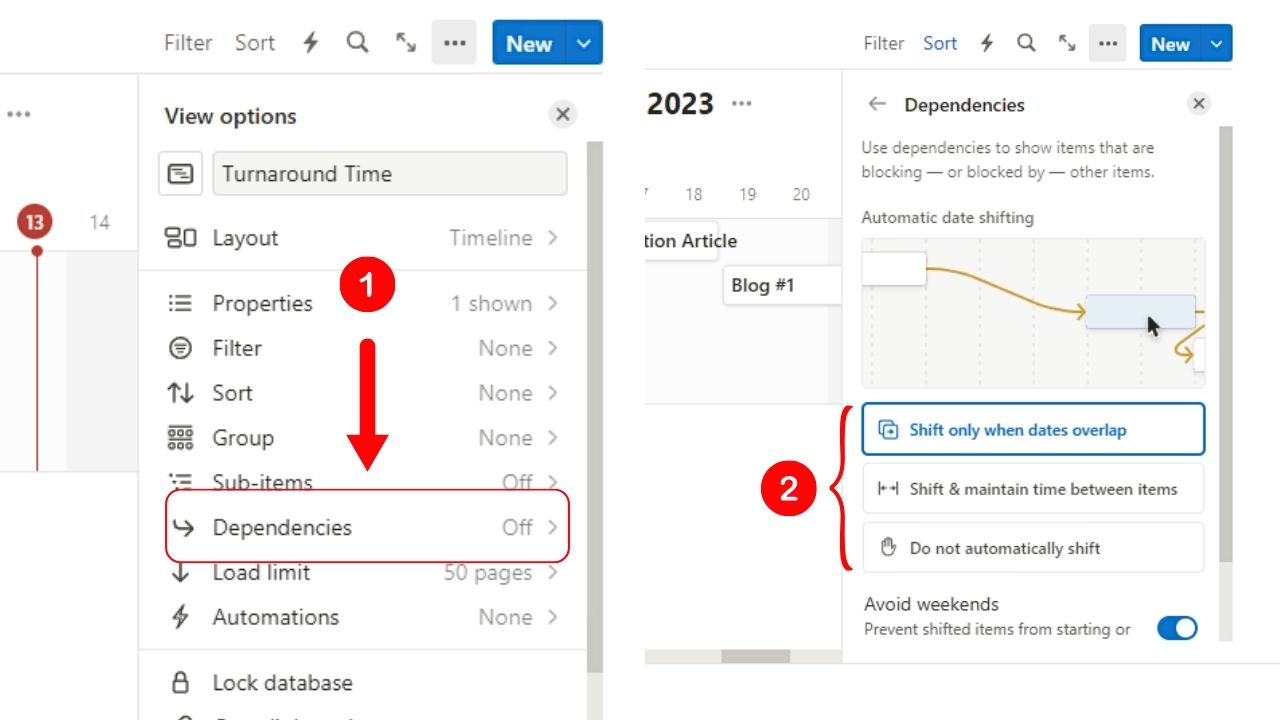
Doing this allows you to connect the tasks within your Gantt chart. Think of it as one task being a prerequisite to the upcoming task.
Do this by selecting “Dependencies” in the “View Options” pane. Then select a dependency option from the three options available.
If you like to avoid working on the weekends, select “Shift only when data overlap” or “Shift & maintain time between items.” The “Avoid weekends” option is already activated.
Otherwise, select “Do not automatically shift.”
Then click the “Turn on dependencies” button to add the dependency you set earlier.
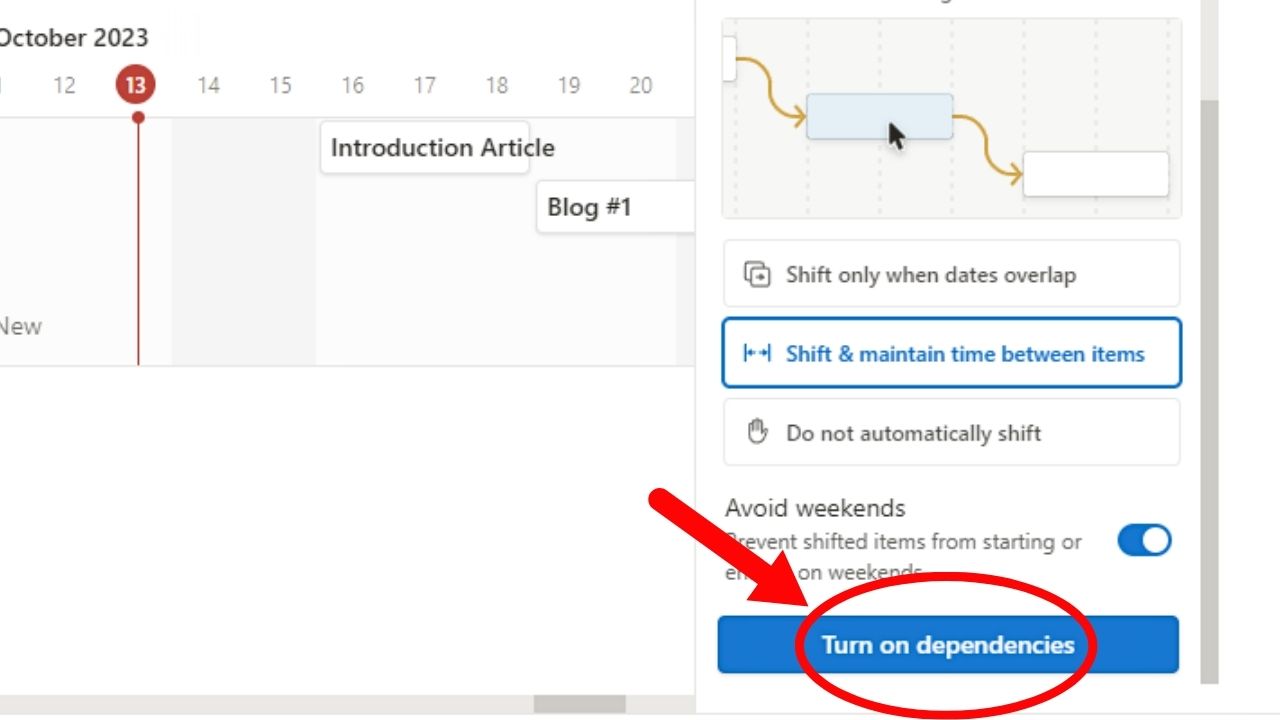
8. Connect the tasks on your Gantt chart.
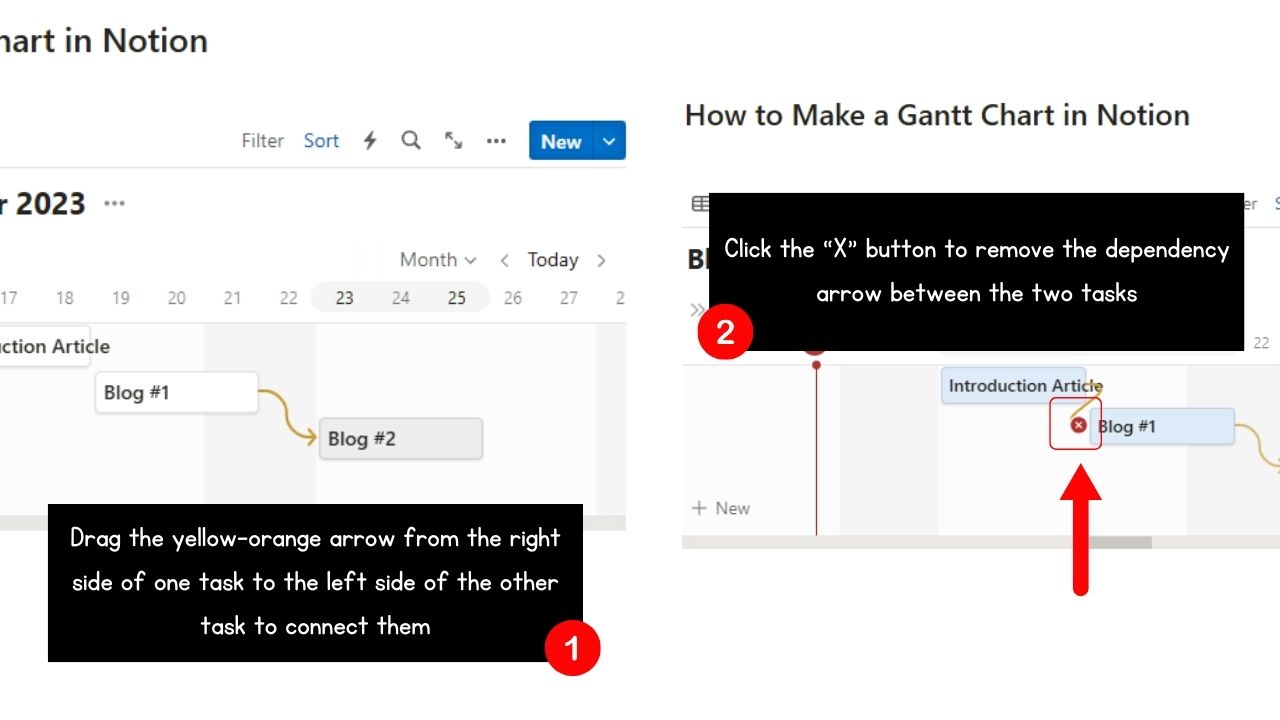
To do this, hover your cursor on the right side of one task and drag the arrow to the left side of the next task. You will then see a yellow-orange arrow connecting the tasks.
If you want to remove one of the connections, hover the cursor on the left side of a task and click the red “X” button.
Conclusion
Knowing how to create Gantt charts in Notion keeps project workers organized and in control of tasks. There’s no need to use a third-party project management tool to track all the deadlines.
Go ahead and incorporate your Gantt chart-making skills and increase your productivity straightaway!
