Having a hard time tracking your progress on weekly tasks? If you’re using Notion, you can always add checkboxes in a snap.
While you can add checkboxes using the “/todo” command, can the same be done on a table or calendar? Keep reading to find out.
Table of Contents
Adding Checkboxes in Notion — The Basics
Adding checkboxes in Notion is a straightforward process. The good thing is that you can add checkboxes to almost any type of database and page in Notion.
The easiest way to add checkboxes is to click the “+” icon under the page title. From there, a dropdown menu appears. Scroll down and select the “To-do list” option. You will then see a blank to-do list entry with a checkbox beside it.
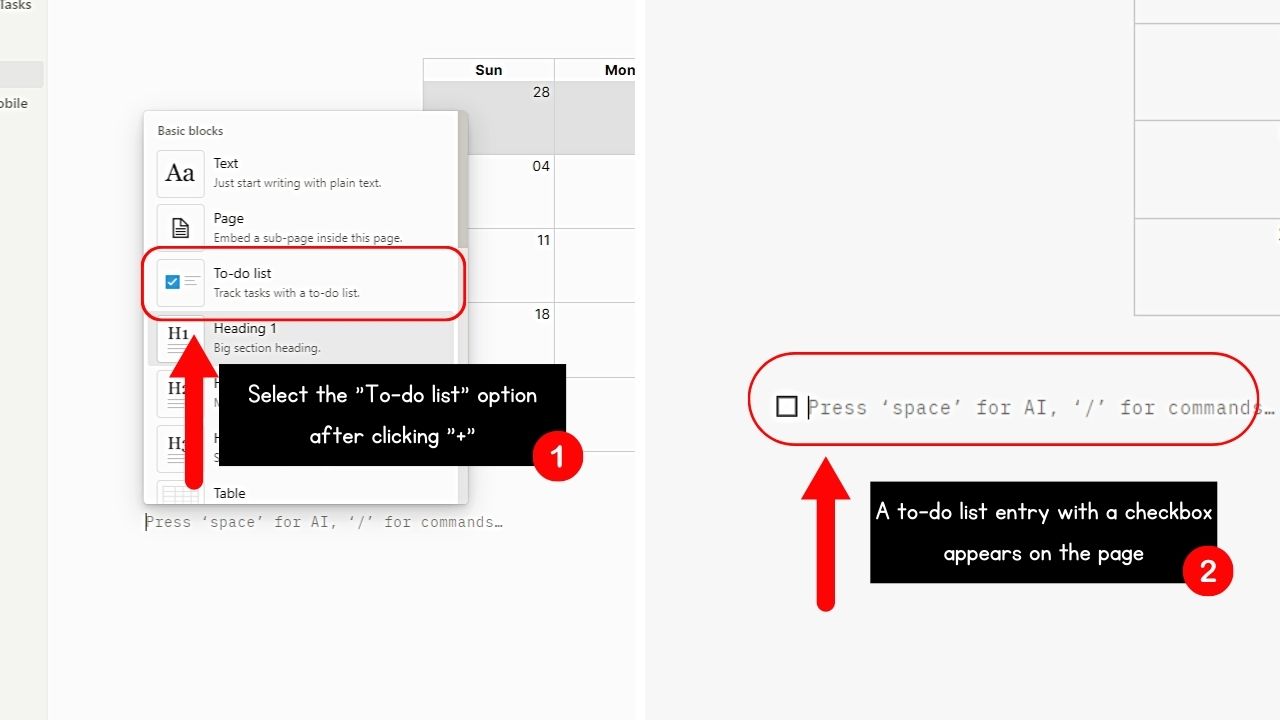
Type beside that to-do list entry and press “Enter” to add a new one.

Another way to add checkboxes is by opening a “Habit Tracker” template. From the name itself, this template helps you keep track of your daily habits. After opening a page, click the “Templates” option and select “Habit Tracker” in the left-side panel.
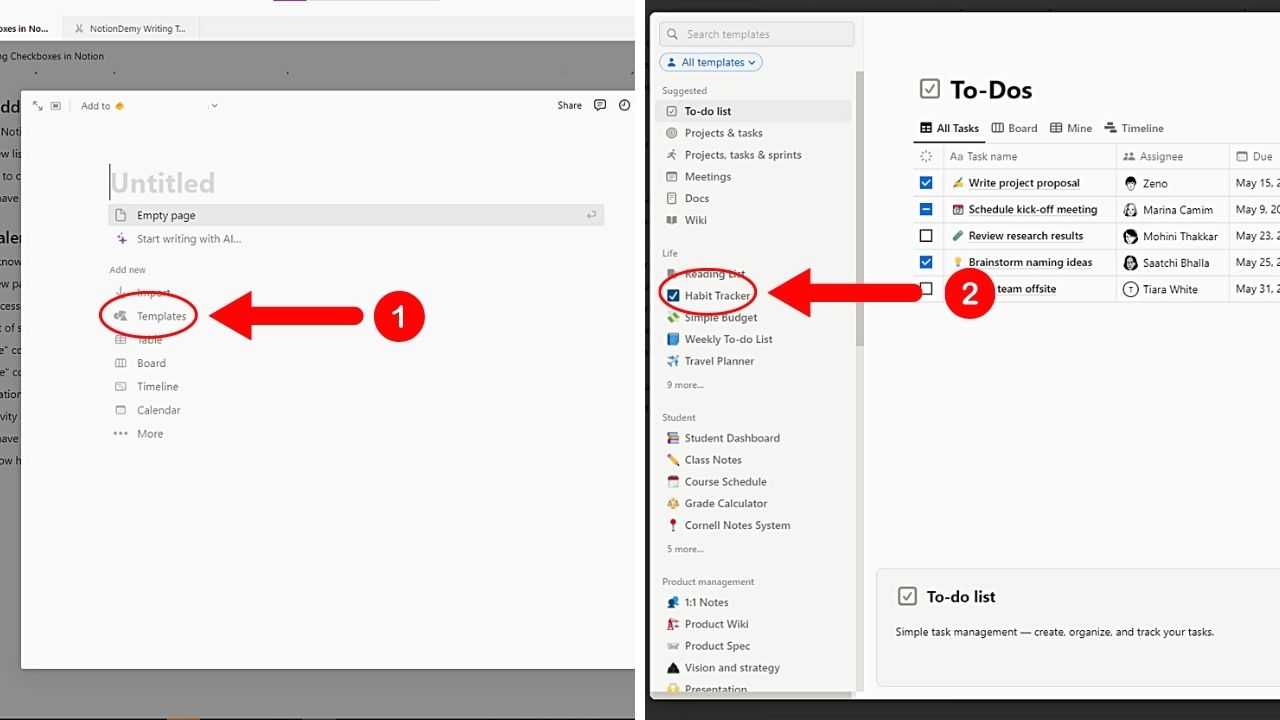
Select the “Get template” button to make the habit tracker appear on that Notion page. You’ll initially see a gallery view of the habits listed by date with the checkboxes to their left. You can then edit the entries and change the tracker’s view to your liking.

How to Create Checkboxes in Notion Table
Adding checkboxes on an empty Notion page is easy. But adding those same checkboxes to a table is a tad more challenging unless you know the basics.
Open a Notion page with a table in it. If you haven’t made one, type the “/inline” command and select the “Database – Inline” option. A blank inline table then appears.
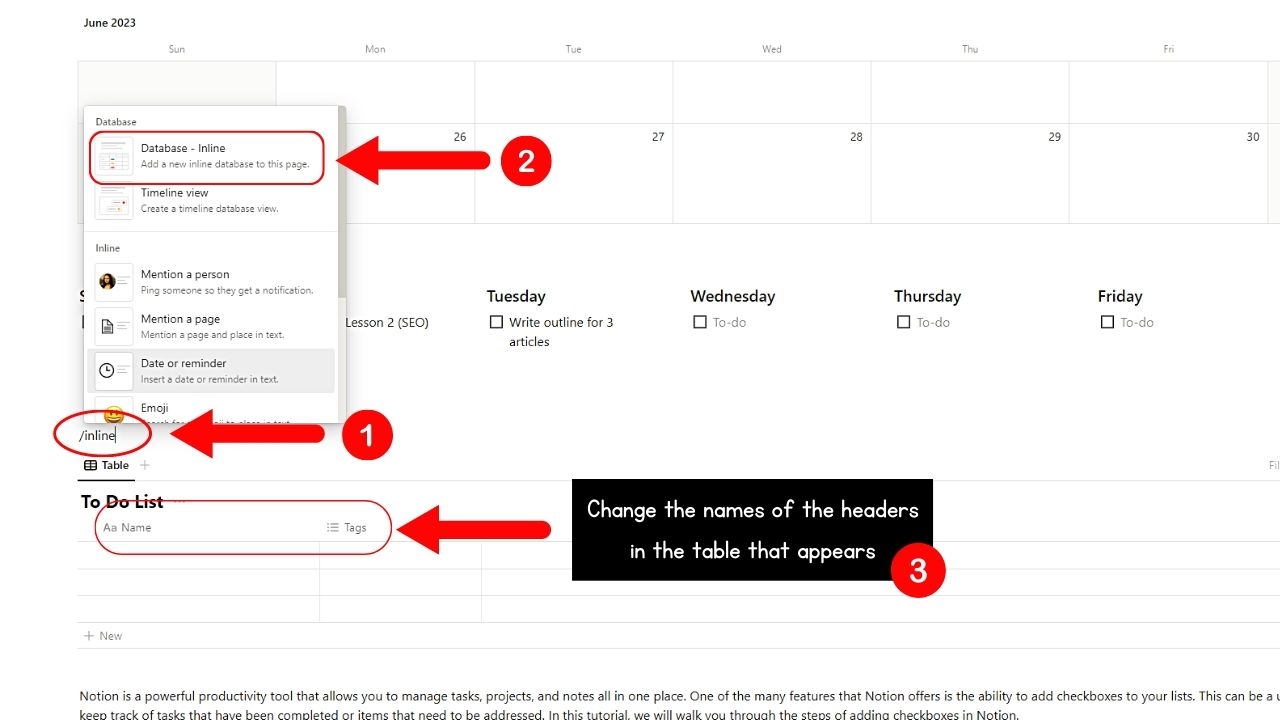
Then start adding entries to that table. By default, the only properties added are “Names” and “Tasks.” But you can change the header names by clicking and typing new ones in it. You can even add tags if they’re applicable.
Then add checkboxes to the Notion table you made with these steps:
1. Click the “+” icon and select “Checkbox.”
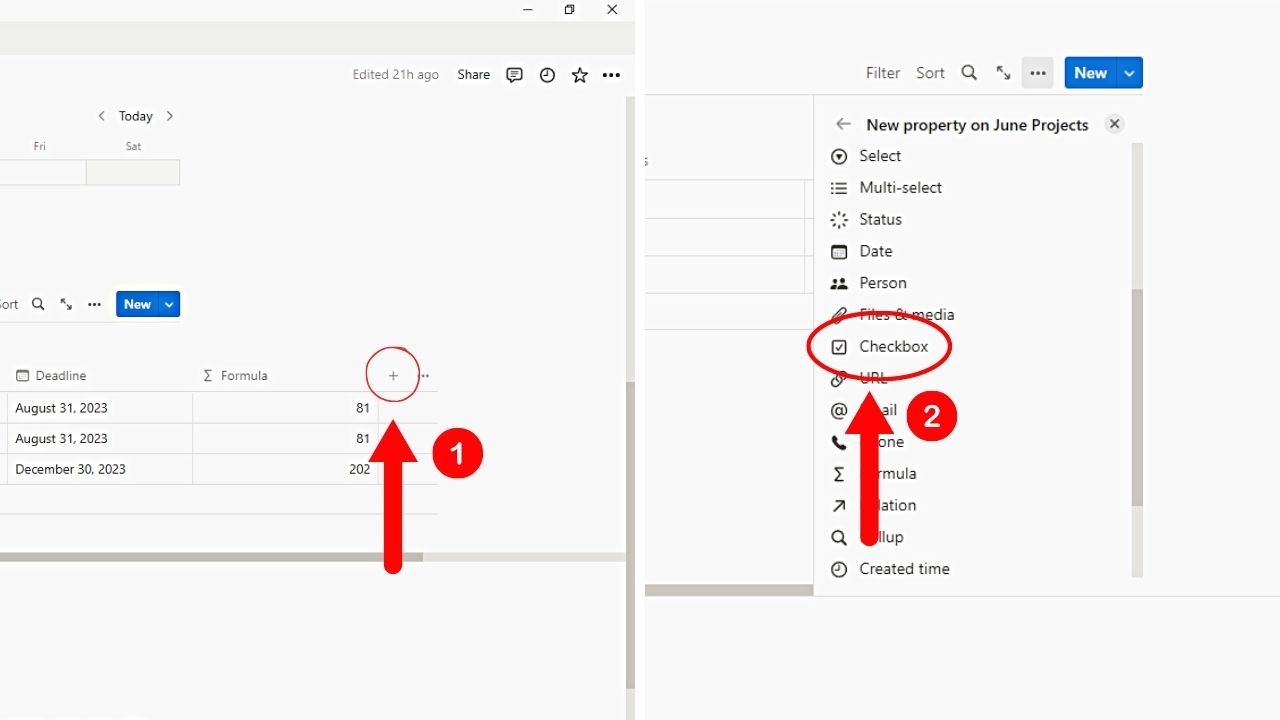
You’ll find this button after the last property on the table you created. Then select the “Checkbox” option.
2. Rename the property header name.
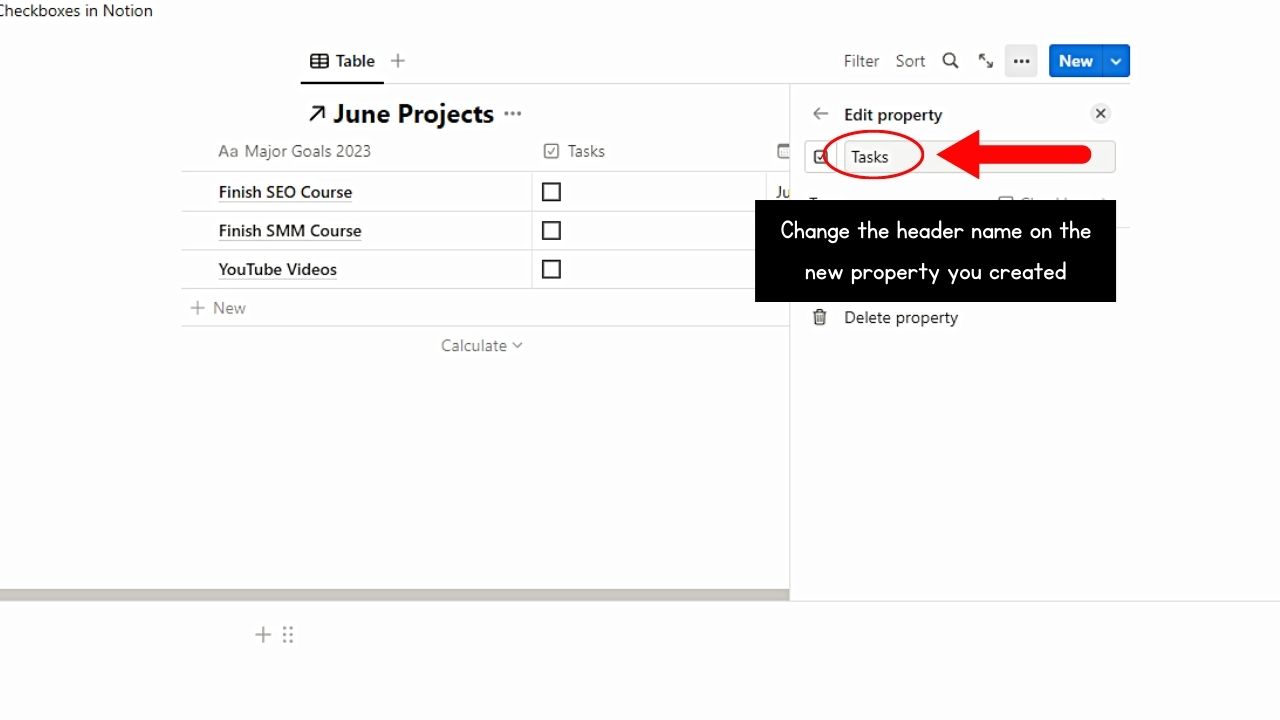
Simply type inside the blank field to change the header name of the new property.
3. Select the “X” button.
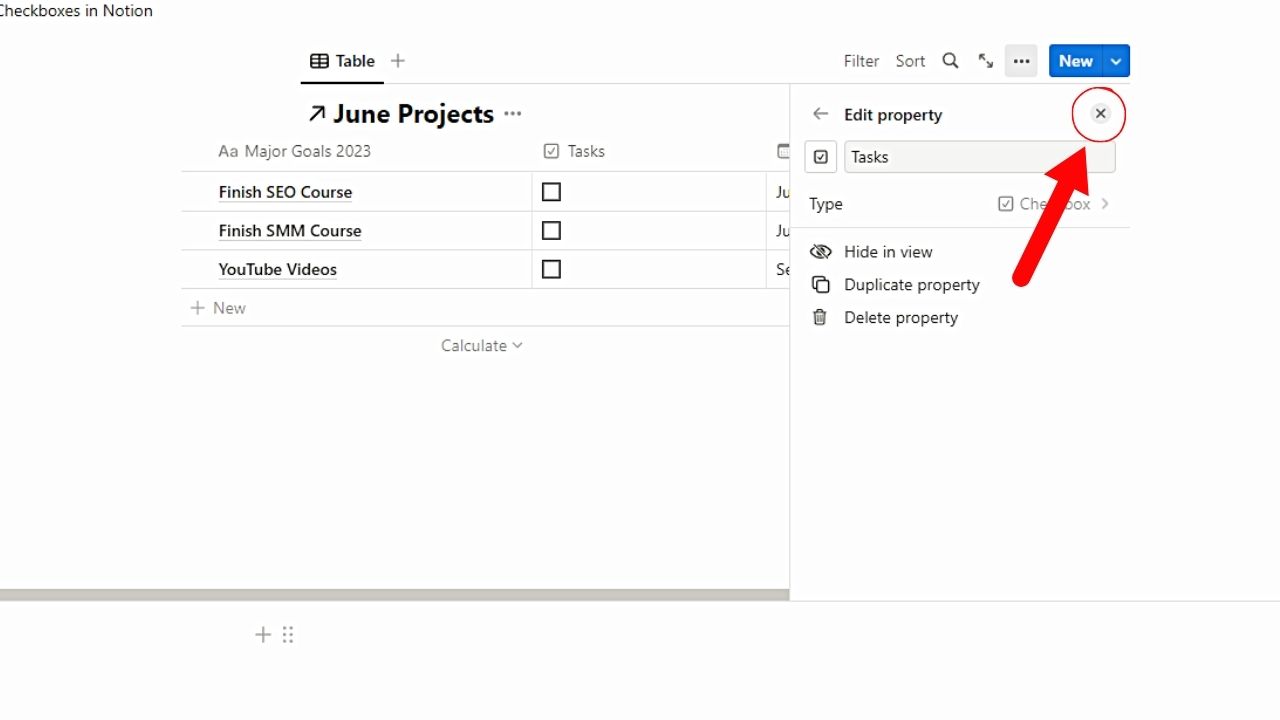
This will close the right-side panel, allowing you to see the new property added to your Notion table. By now, you’ll see checkboxes appear beside the table entries.
4. Click and drag the 6-dot handle of the checkbox property created.
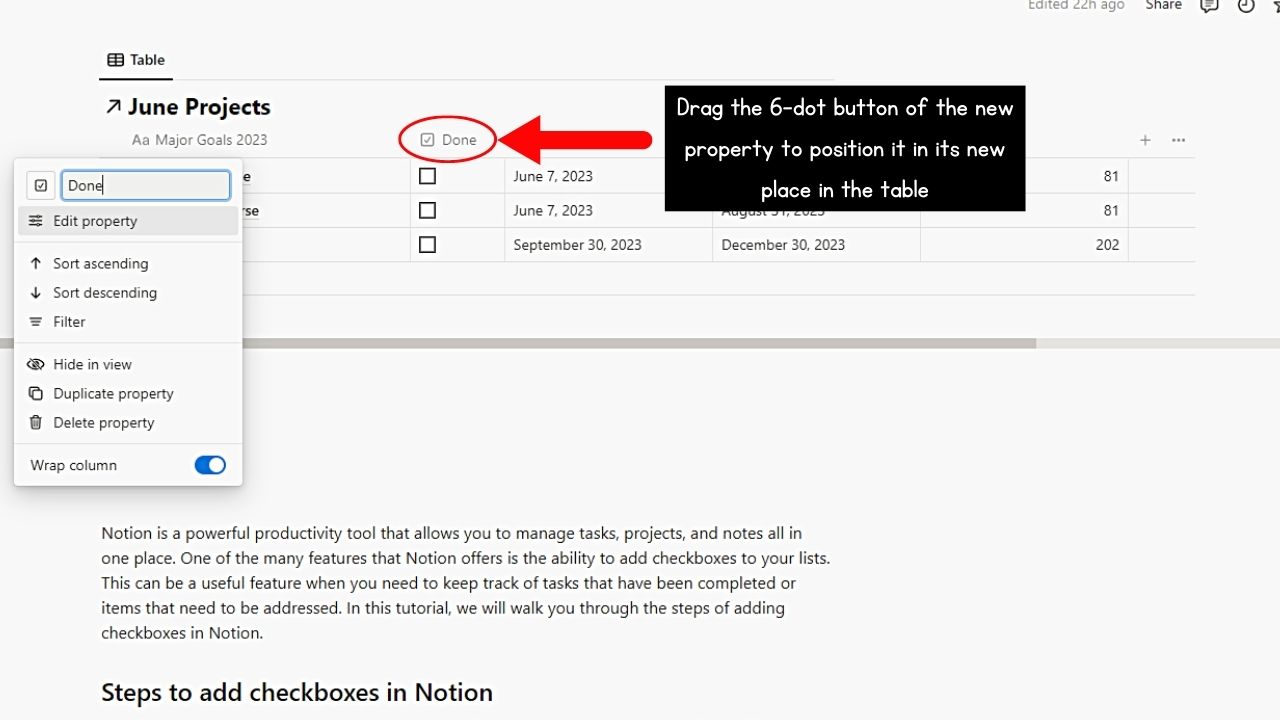
This repositions the new column or property where you want it to be.
Repeat those 4 steps until you have added all the checkbox property columns you need. Just don’t forget to add a “Date” column in your table if you plan to add a calendar view to it.
How to Create Checkbox in Notion Calendar
The calendar view in Notion helps keep track of all the things we need to do on a monthly or weekly basis. To add one, type the “/calendar” command and select “Calendar view” from the menu.
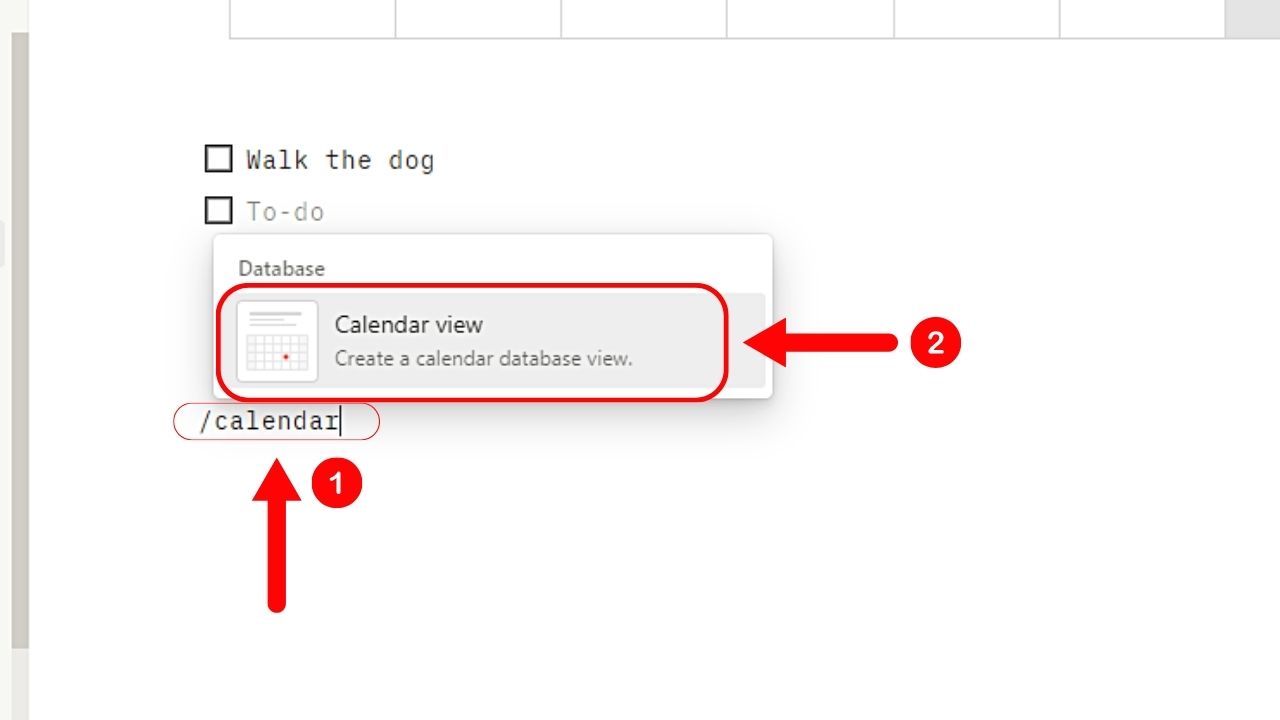
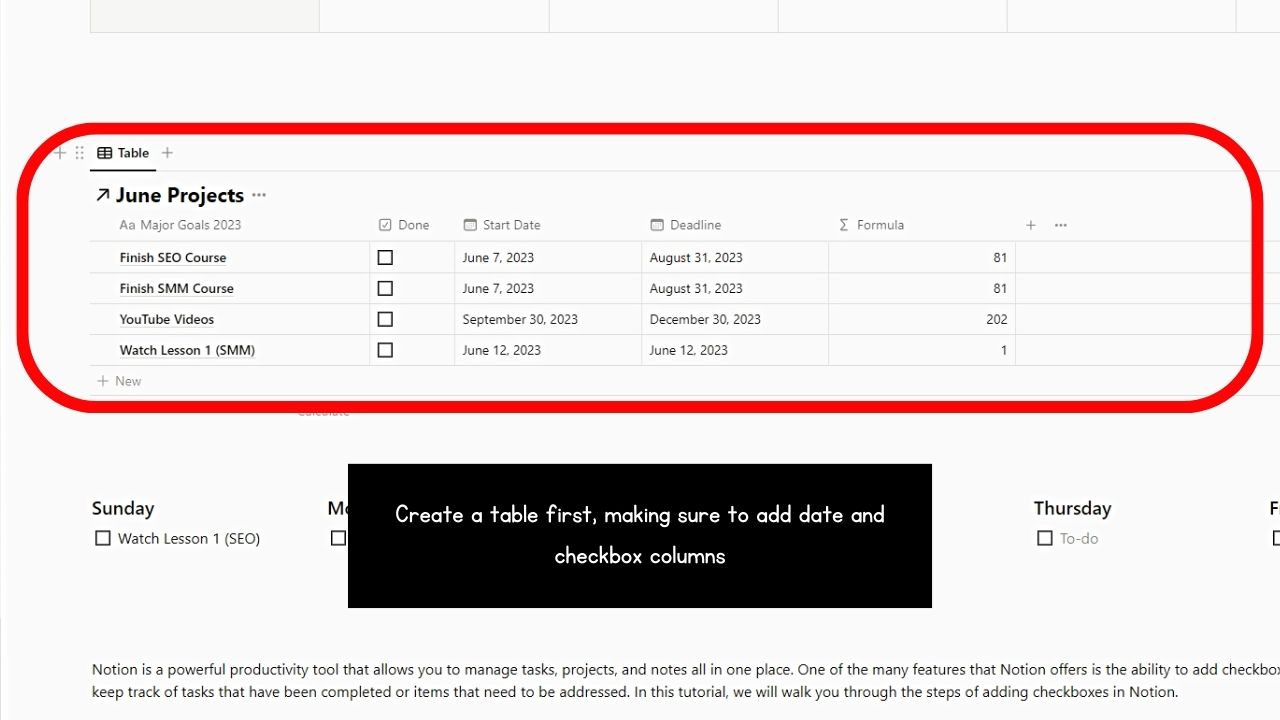
But if you want to add checkboxes in one go, make an inline table first (or any database) with date and checkbox columns. Though you can create a table by adding columns, you cannot switch it to a calendar view later.
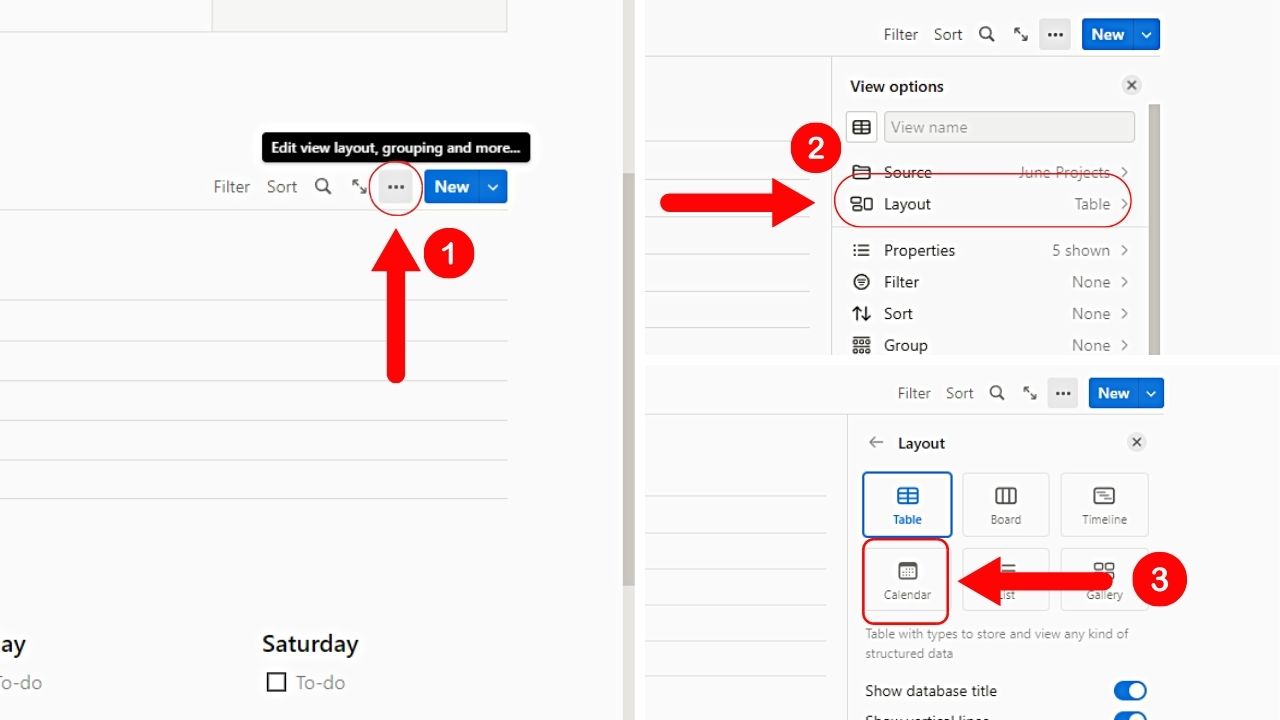
Once done, click the 3-dot icon on the top-right corner of the table and choose “Layout.” Then select “Calendar” from the layout options.
You can even switch to a weekly view by clicking the “Show Calendar as” option and choosing “Weekly.”
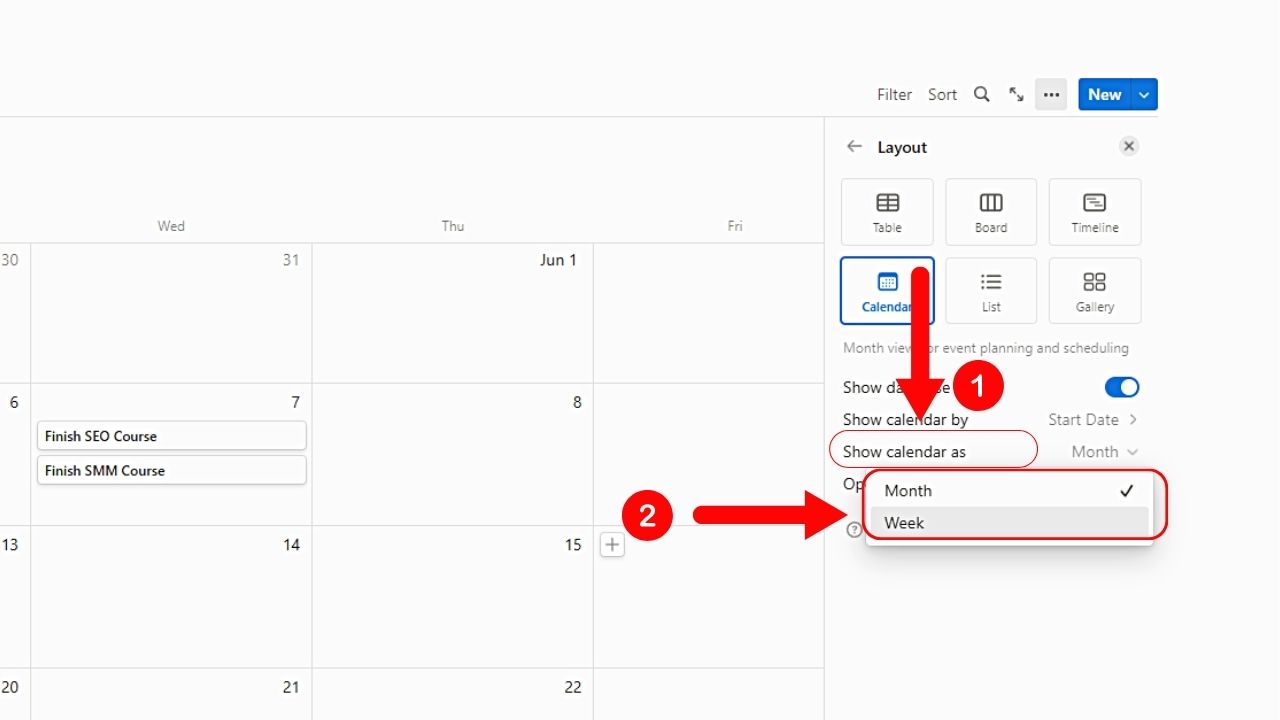
But for sample purposes, we’ll stick with the “Monthly” view layout. You’ll then see the respective tasks listed under the dates they’re assigned.
To make the checkboxes appear on the calendar, follow these steps:
1. Click the 3-dot icon.
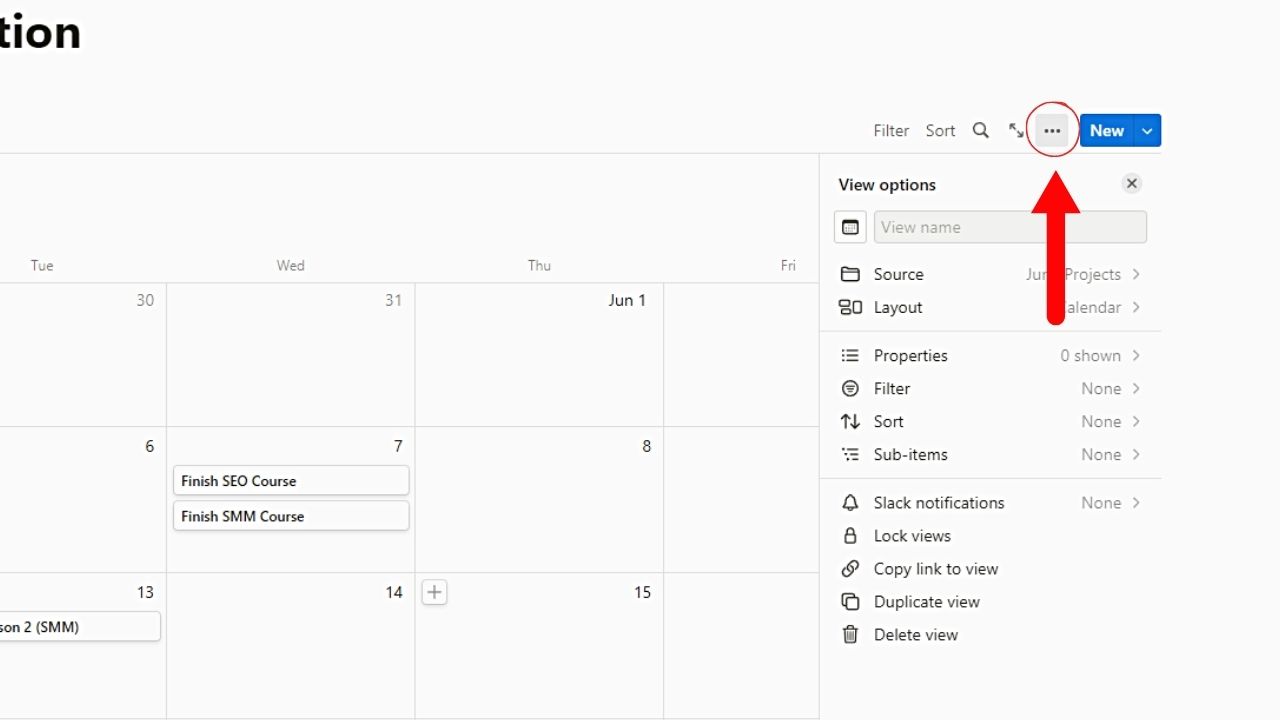
You’ll find this 3-dot icon on the upper-right of the calendar to the left of the “New” button.
2. Choose “Properties.”
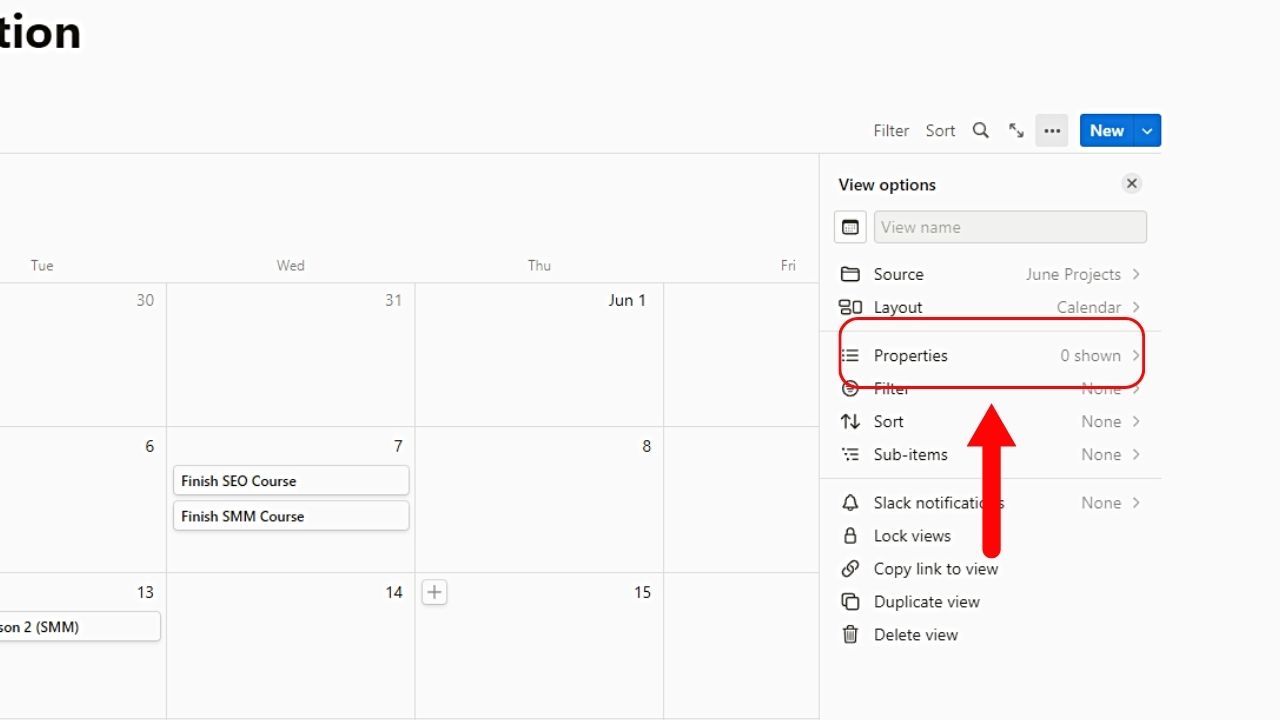
This is the third option in the “View Options” menu between “Layout” and “Filter.”
3. Select the “Show All” button or the eye icon beside each entry.
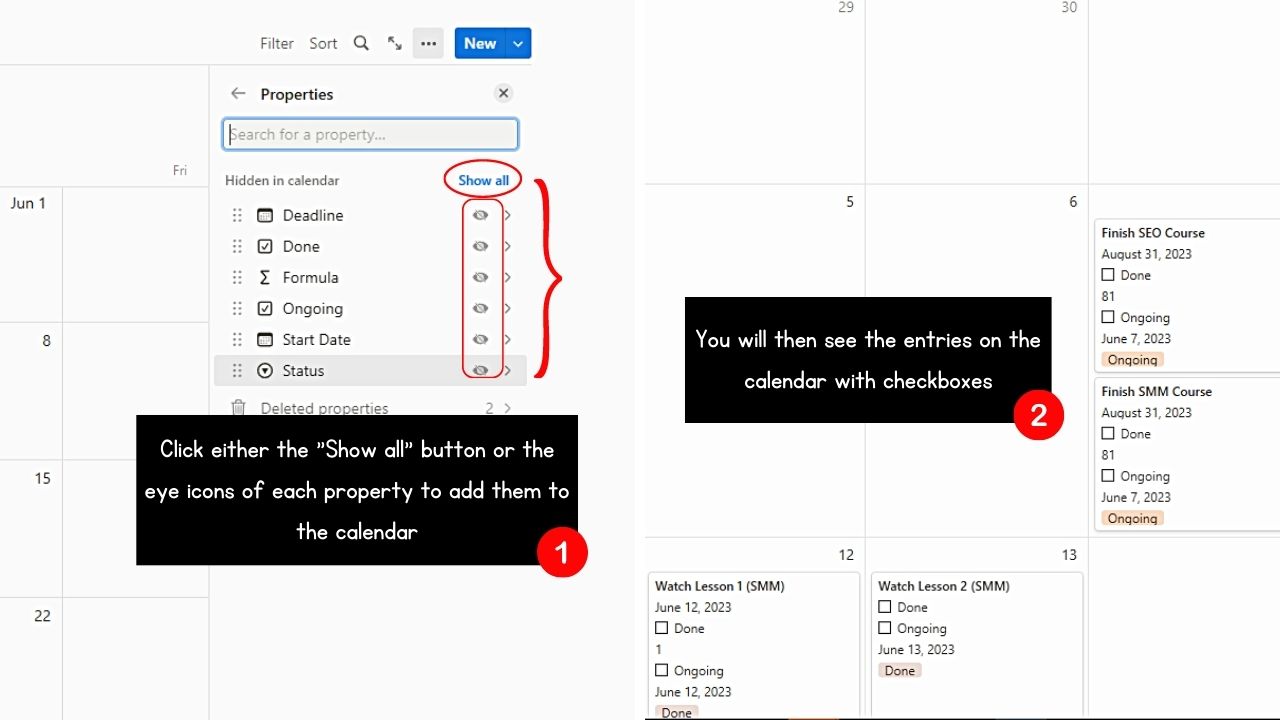
By default, all the properties are hidden in the calendar view. But clicking the eye icon beside each property will make it appear on the calendar. This includes the checkbox property added earlier.
If you want to show all properties in one go, select the “Show all” button instead. Now that you see the checkboxes within the calendar cells, you can click on them when you finish a task.
Conclusion
Adding checkboxes to your Notion calendars and tables is an effective way to stay organized. This ultimately helps in keeping track of your progress and having a clear overview of your work.
Hence, you’re guaranteed to have an effortless method of managing any tasks you have.
