Adding a calendar to your Notion workspace is simple. Either you sync your Google Calendar to Notion or create a calendar based on a database.
But if you want to make your calendar visually appealing, you can add color to Notion calendar with these simple steps.
Table of Contents
How to Add Color to Notion Calendar
It would be nifty to color certain events on your Notion calendar so you can easily spot them at a glance. But unlike other tools where you can easily add colors to days on the calendar, it isn’t feasible with Notion at the moment.
But, there is a workaround to somehow achieve that and add color to the events on your Notion calendar.
Granting that you have already created a database, follow these next steps.
1. Add a “Multi-Select” property.
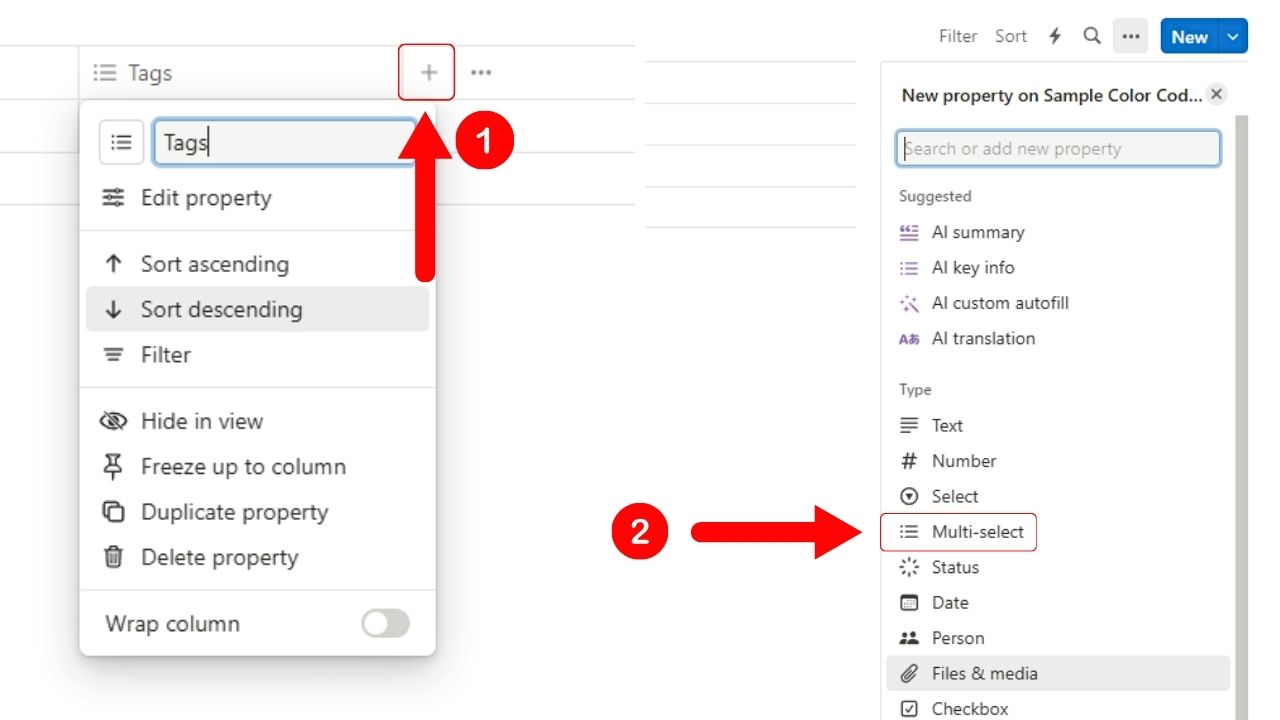
If you create a new database, you’ll find the “Tags” multi-select property already added.
If, for some reason, you don’t see this “Tags” property, simply click the “+” button after the last property on the database and select “Multi-select.”
Or, if you prefer changing an existing property into another type, click on its header name. Then select “Edit Property” on the dropdown menu.
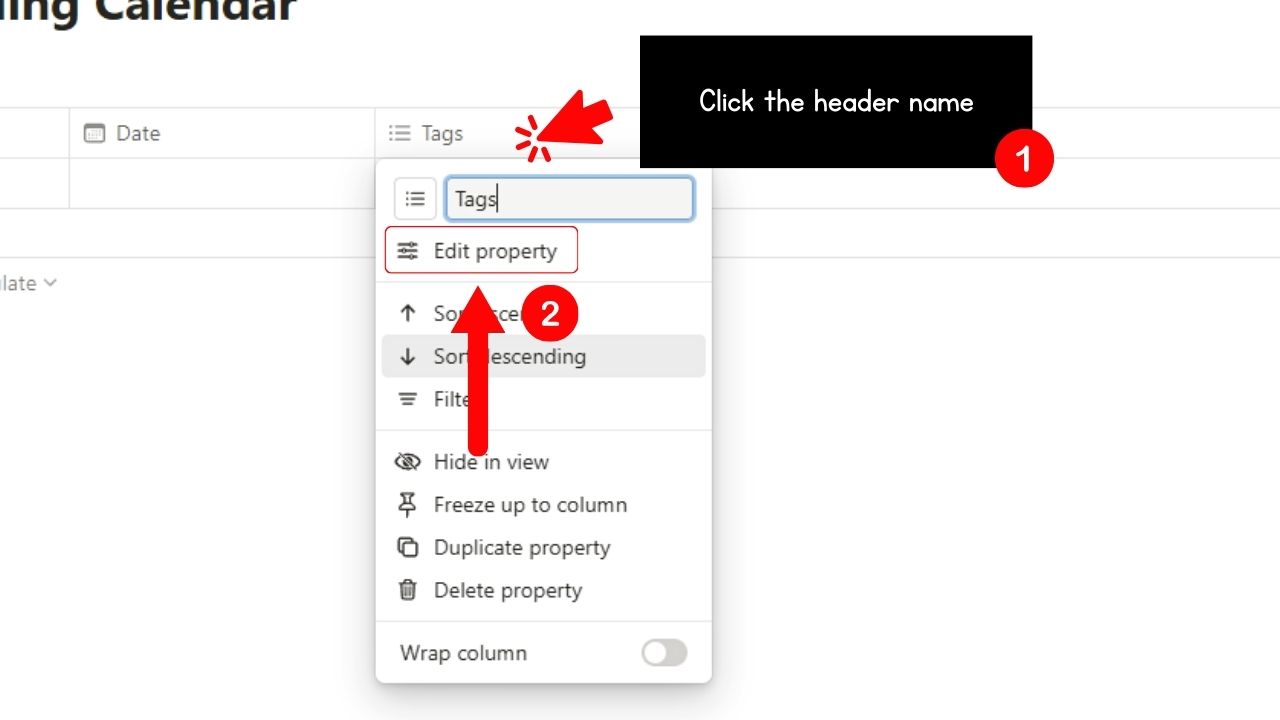
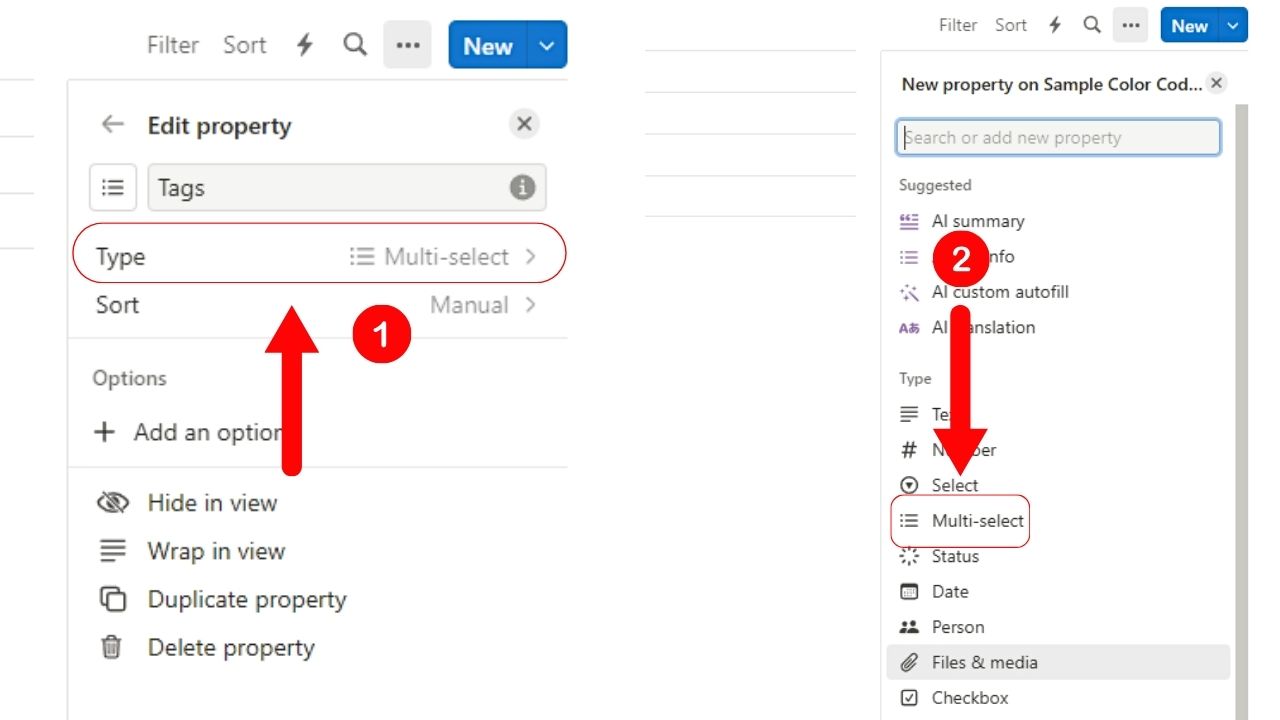
Click “Type” and select the “Multi-select” option.
2. Select “Add an option.”
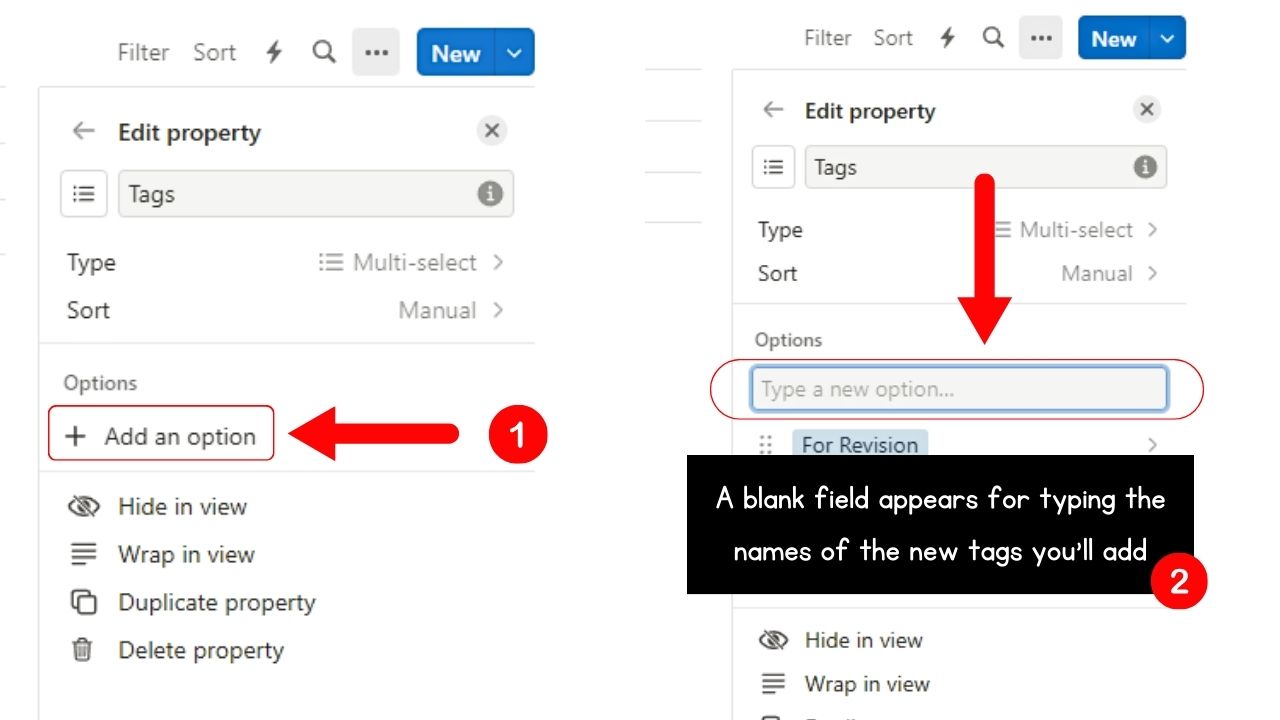
You’ll find this under the “Options” section of the “Edit Property” pane.
A blank field then appears, allowing you to type inside the tags you want to add.
3. Type the names of the Notion tags and tap “Enter.”
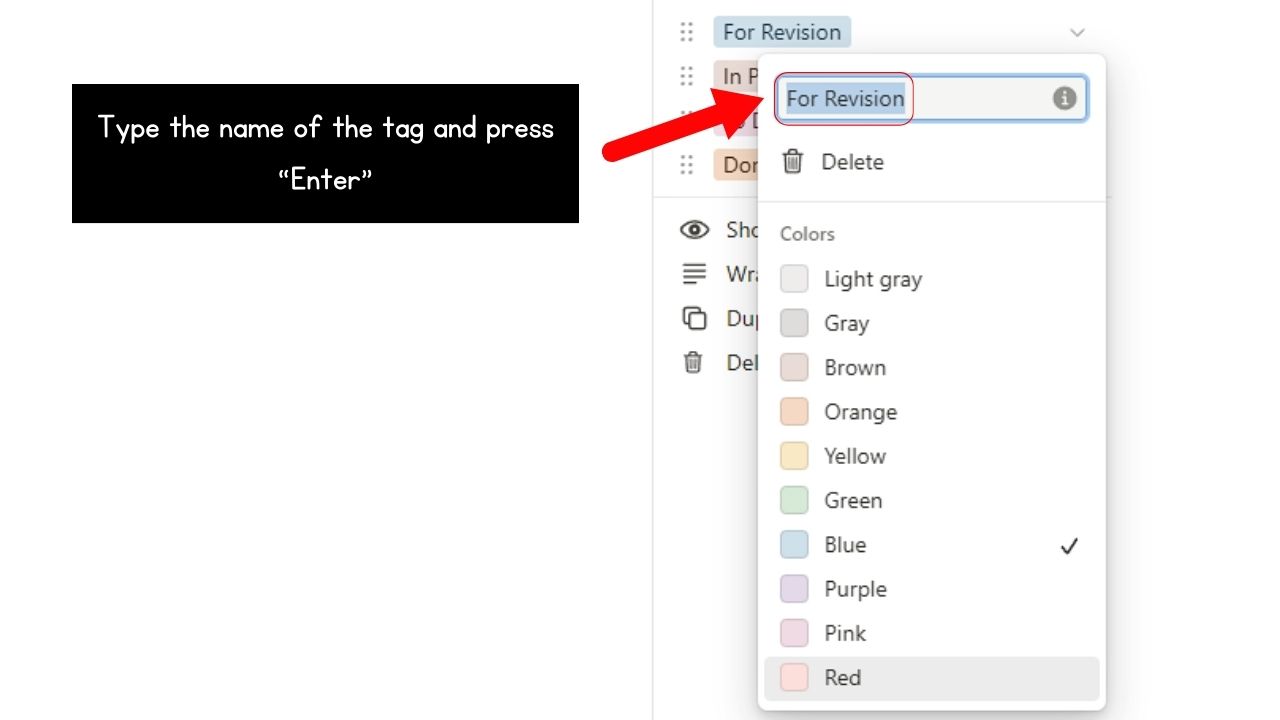
After pressing “Enter,” Notion automatically assigns a random color for that tag.
You can continue with this step to add all the tags you need first before changing the colors assigned to them.
4. Select a new color for the Notion tag or tags added.
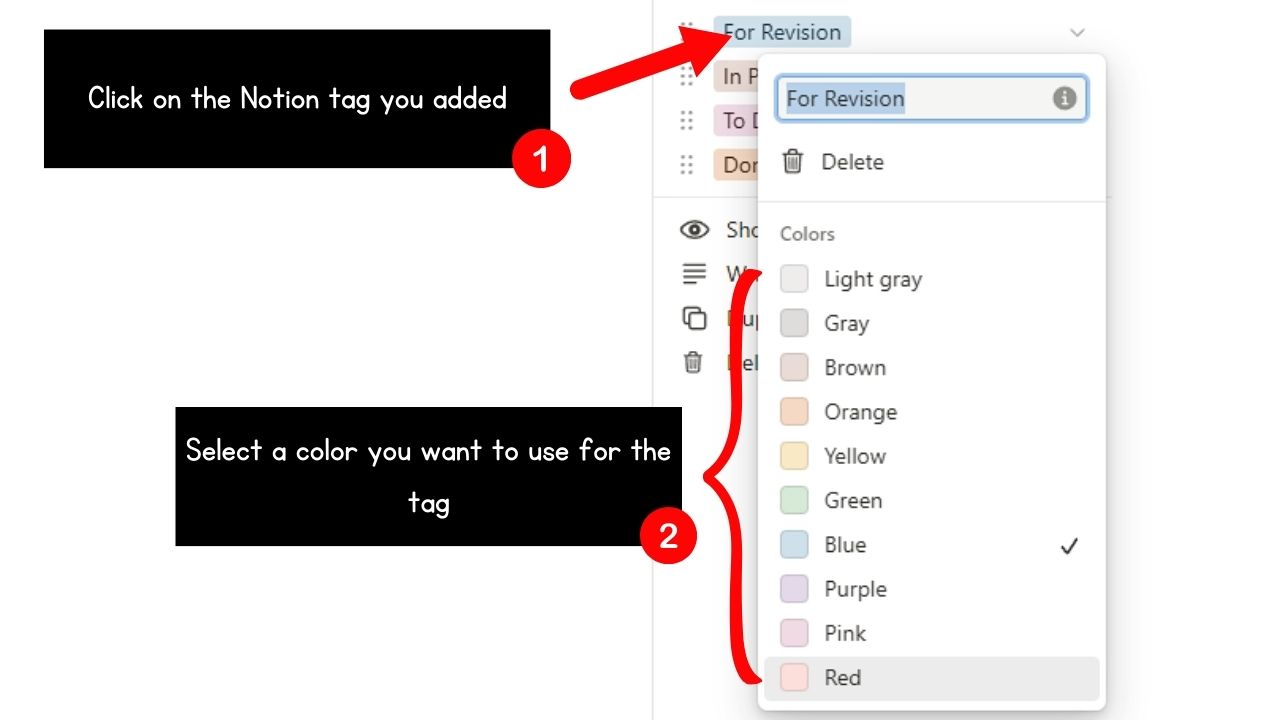
Click on the Notion tag until you see a dropdown menu with all the color options in it. Just click on a color you want to use, and you will see a checkmark beside it.
You will also see the new color selected applied to the Notion tag you’re editing. Click anywhere outside the dropdown menu to exit the “Colors” pane.
Then repeat this step until you have assigned your preferred colors to all the Notion tags you added.
5. Click “Close.”
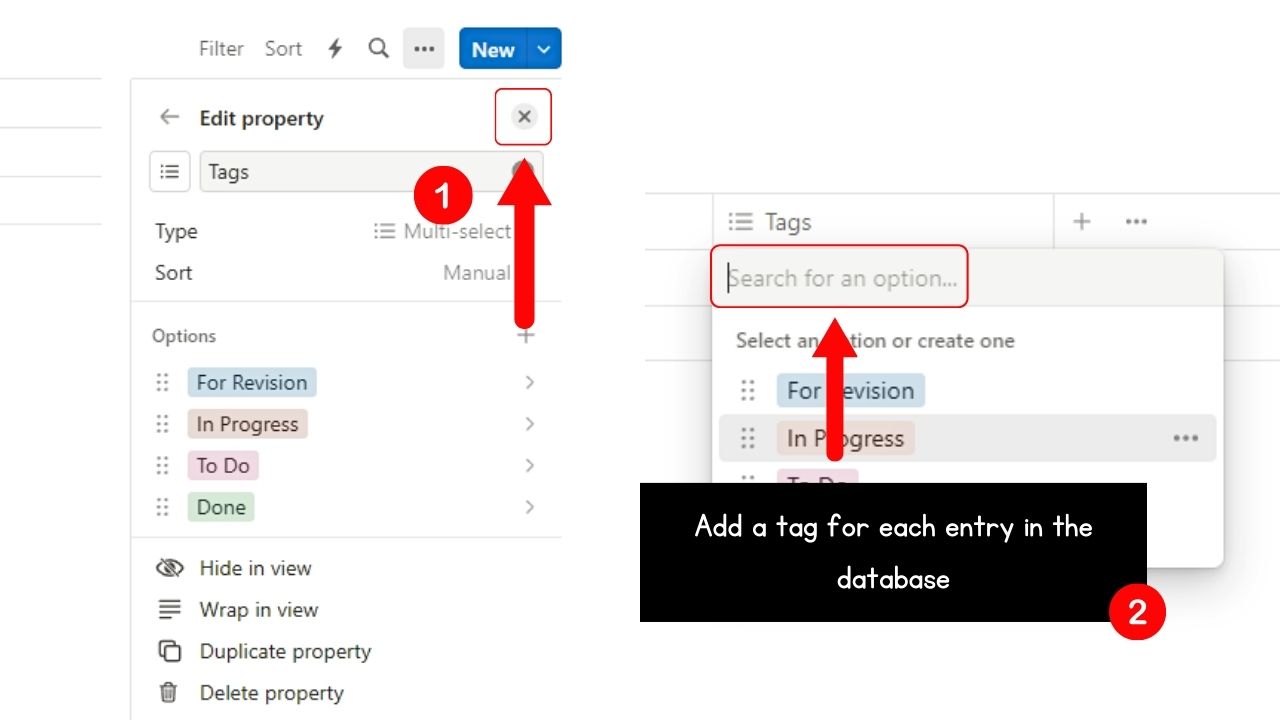
This closes the “Edit Property” pane.
Then add the corresponding Notion tags for each entry in your database.
6. Assign a date for the database entries.
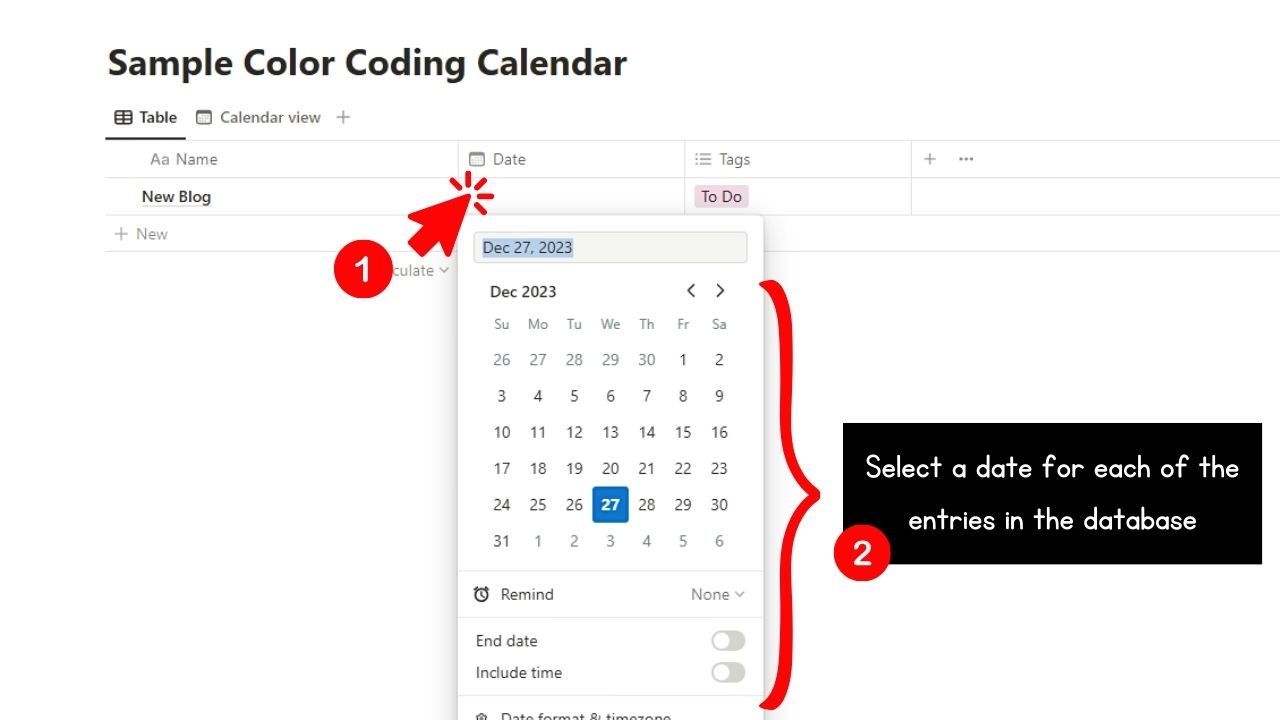
This is to make sure that those database entries will appear on the calendar you’re creating.
Just click on the blank “Date” cell and assign a date for that event or task on the calendar that appears.
After which, click anywhere outside the “Date selection” panel to exit it.
7. Add a “Calendar” database view.
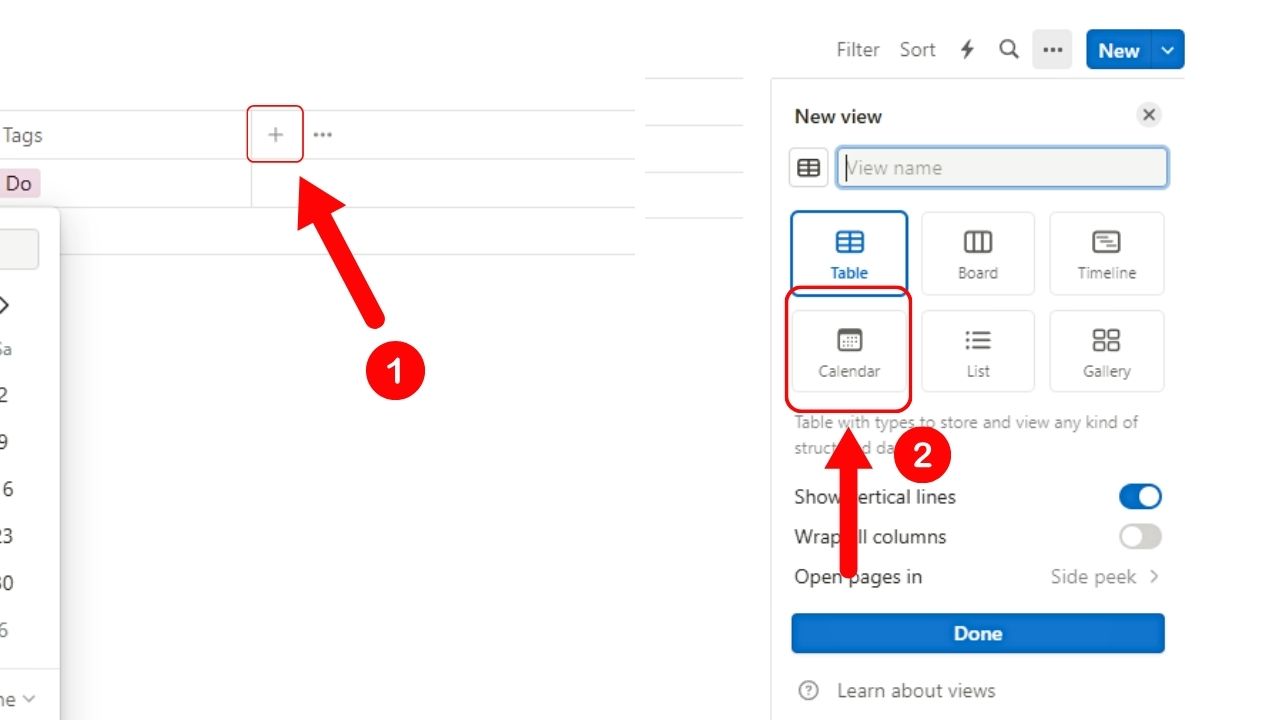
No need to add or embed a separate calendar or a calendar widget for this purpose.
Simply click the “+” button after the last database view and select “Calendar” in the “New View” pane.
8. Click “Done”
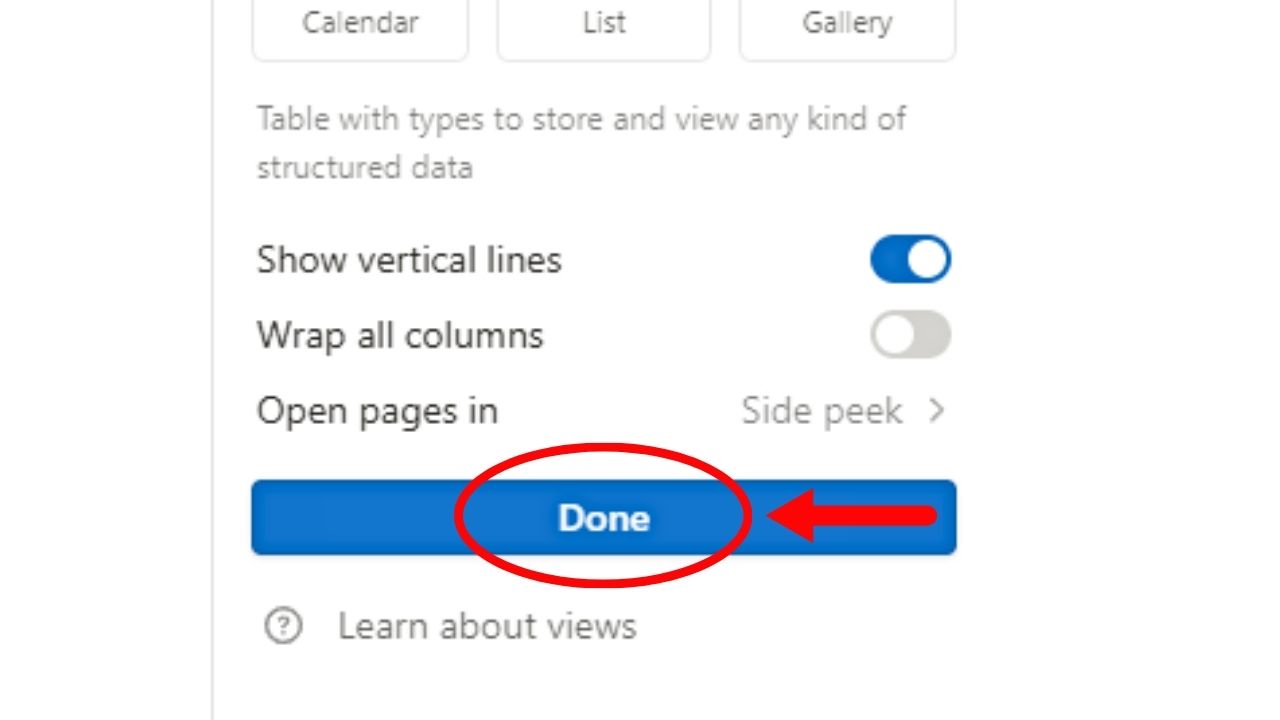
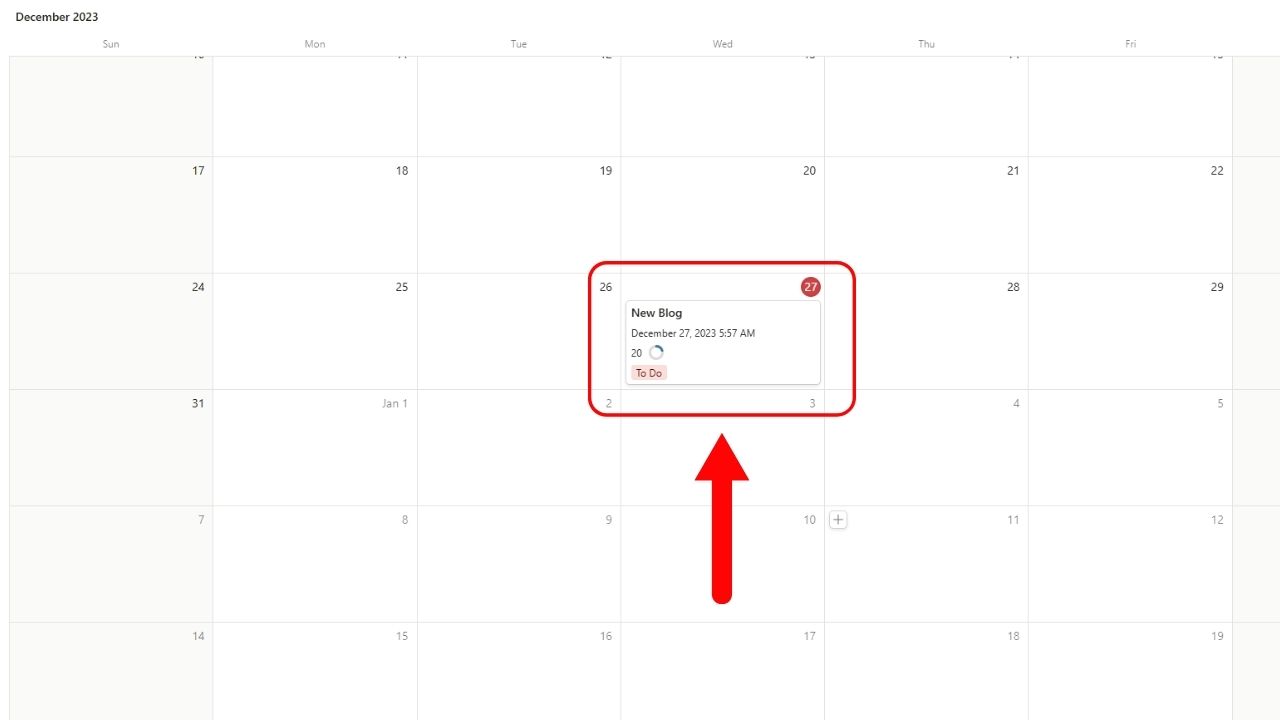
This will close the said pane. You should now see a calendar view of the database on the Notion page. Also, you should see the event or task you added with the color-coded tag under it.

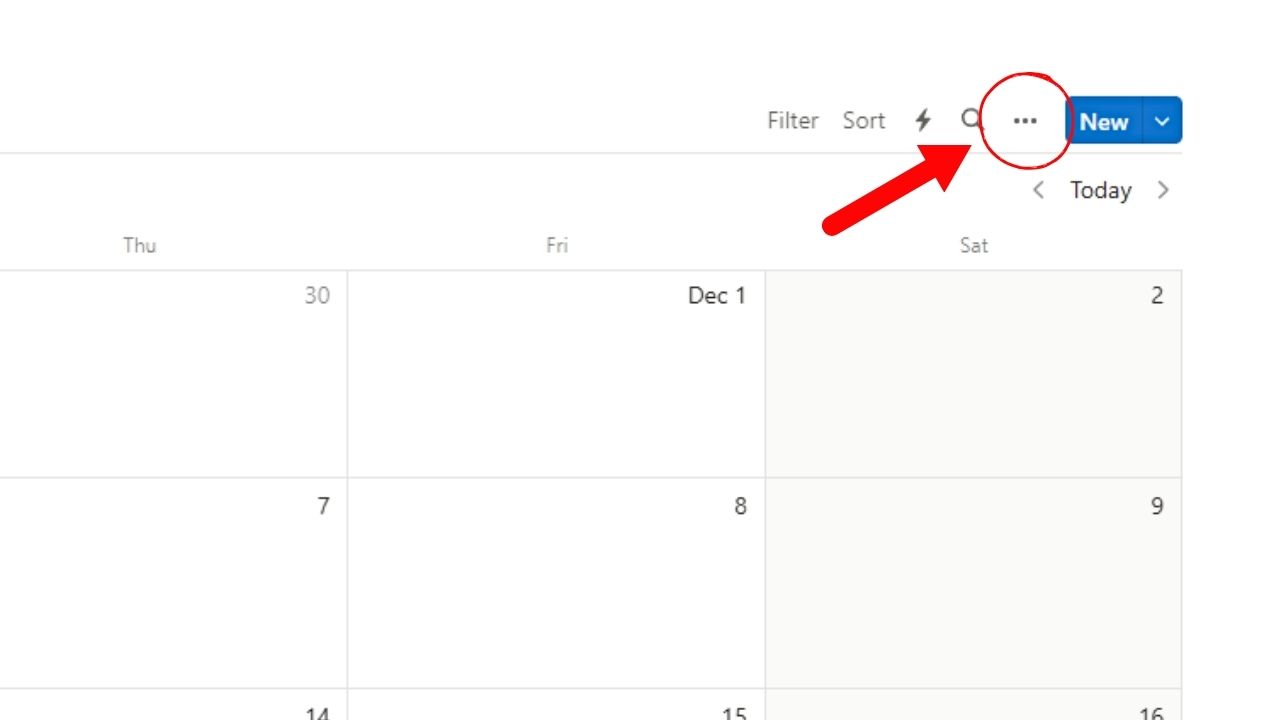
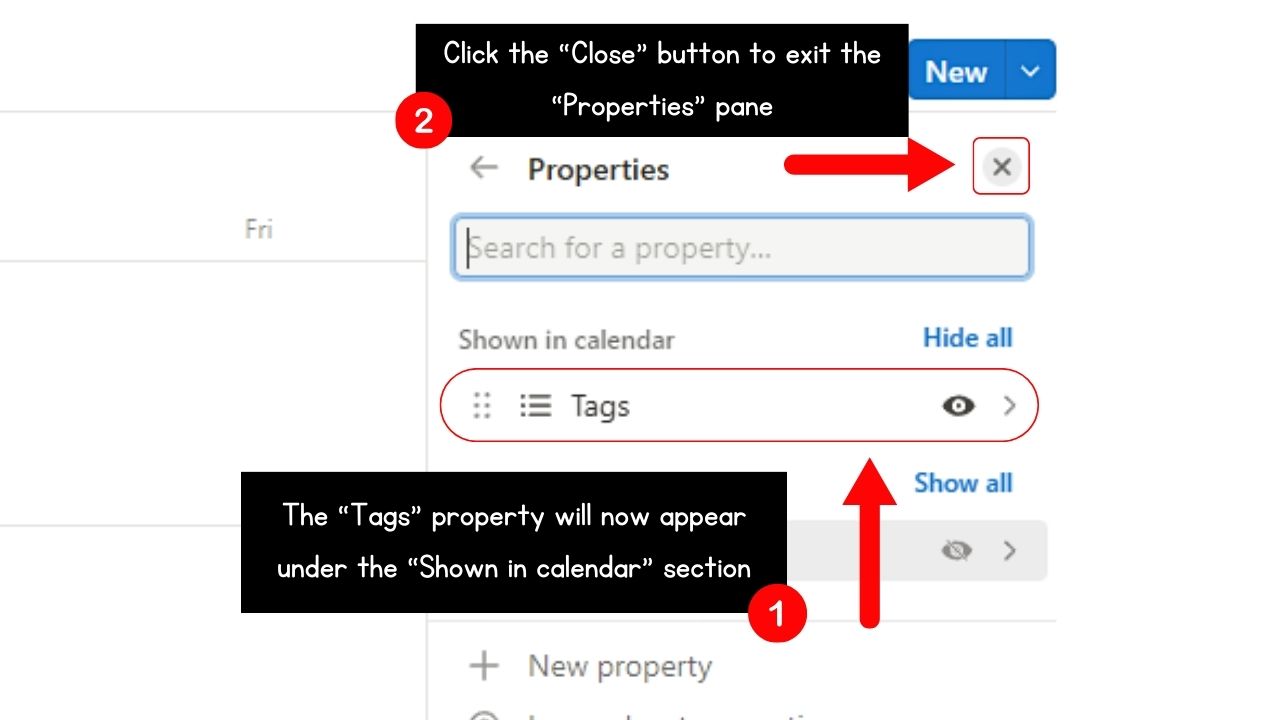
In case you don’t see the Notion tag under the task or event, select the 3-dot icon on the top right of the calendar.
Then select “Properties” and click the eye icon beside the name of the multi-select property you added (in this case, “Tags”).
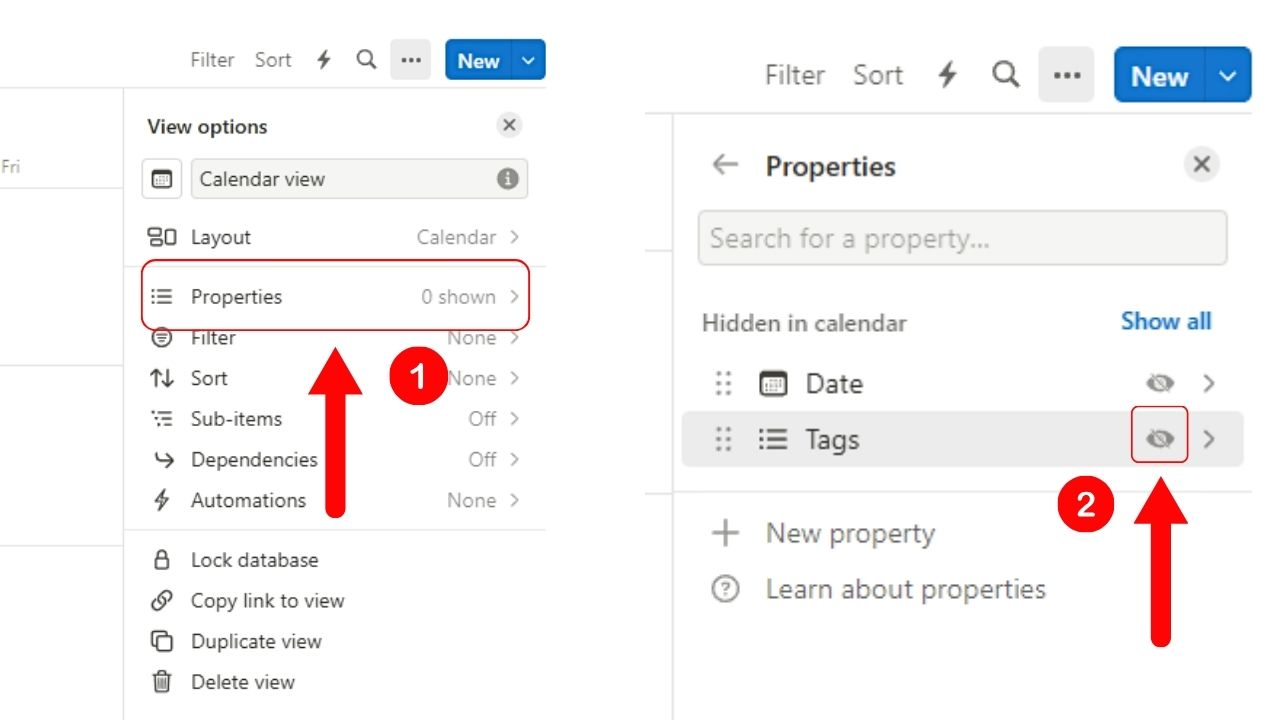
The eye icon will be highlighted and shown under the “Shown in calendar” section. Select the “Close” button to exit the “Properties” pane.
You should now see the color-coded Notion tag under the task or event on the calendar.
Now if you already have a calendar view of the database in place, the process to add colors to it is shorter.
See also: Notion Timeline Colors
How to Add Color to an Existing Notion Calendar
Granting that you have already created a new calendar page or added a calendar view of the database, do the following.
1. Click “+” on the date a new entry will be added.

This is the “Add an item” icon. You’ll find this button when you hover your cursor on the top left corner of the date on the calendar.
A blank center peek page then opens. You can then edit the details according to the task or event you’re adding.
2. Assign a tag for the new task or event entry.
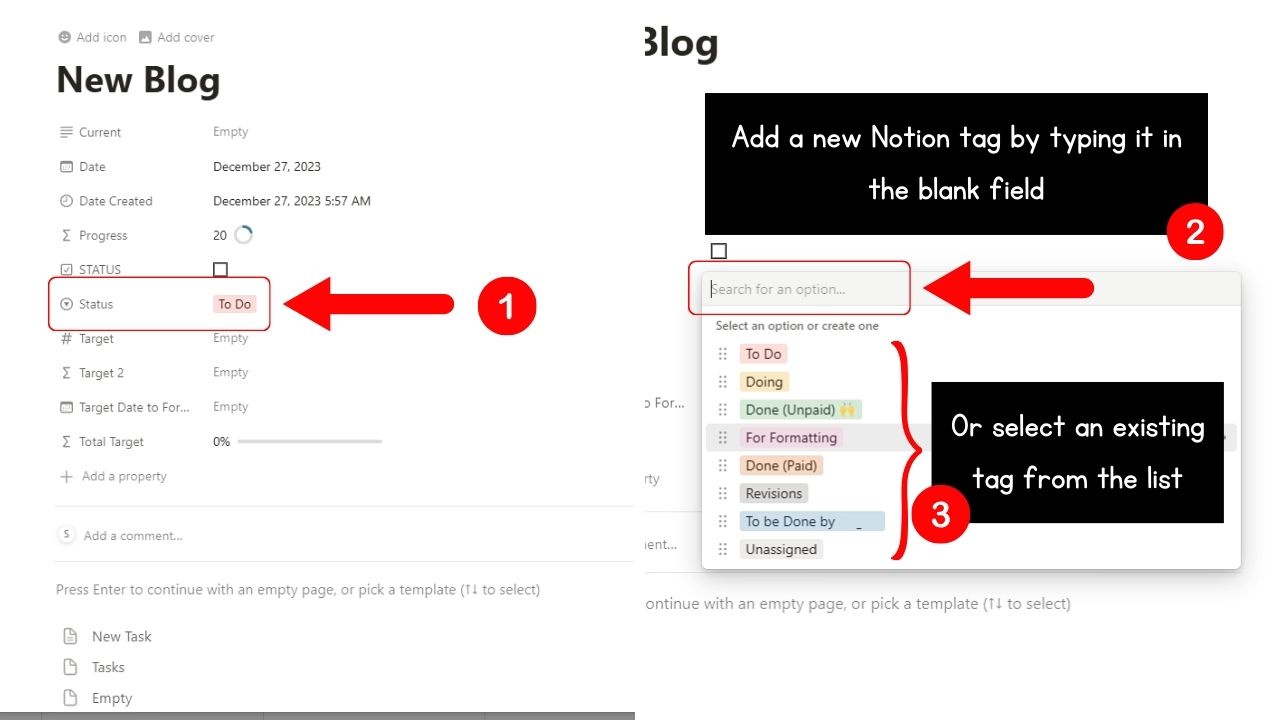
Go to the multi-select property on the center peek page and click the blank field beside it.
When all the tag options appear, you can either create a new one by typing on the blank field or select an existing tag from the available choices.
You will then see the Notion tag you selected beside the multi-select property title.
3. Change the color of the Notion tag.
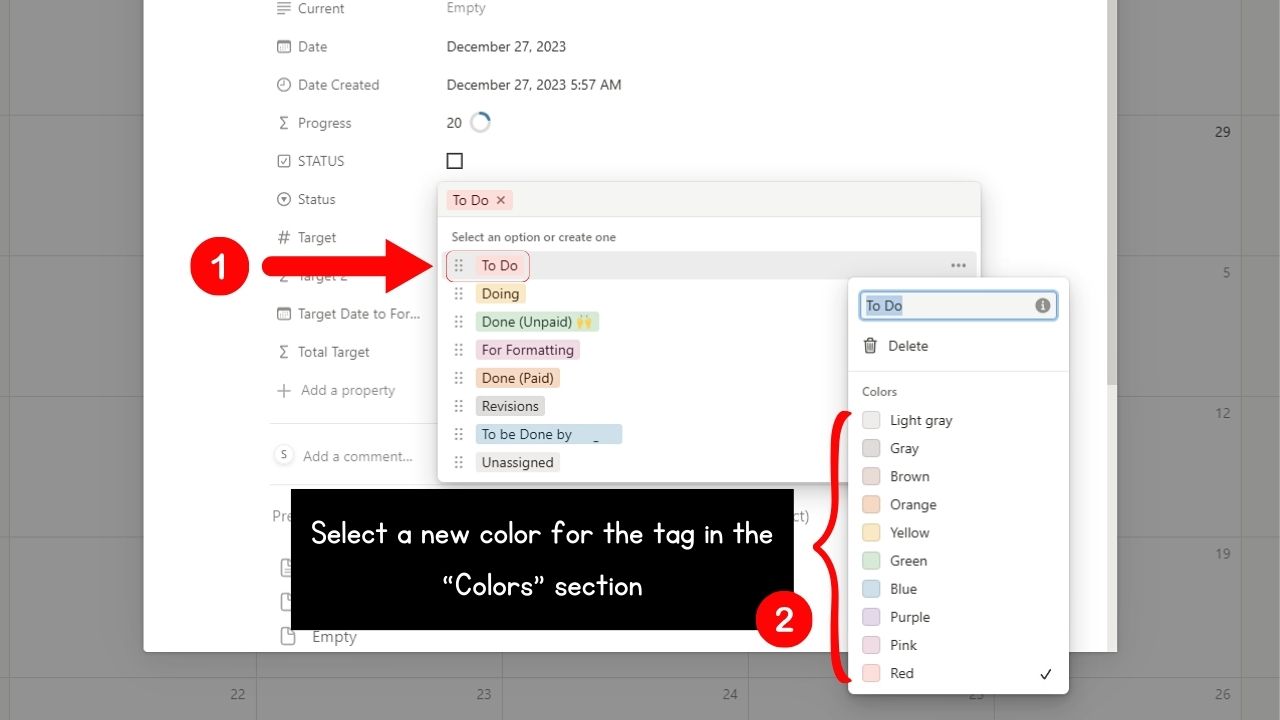
Do this by clicking on the Notion tag until the “Colors” dropdown menu appears. Select a new color and click anywhere outside the dropdown menu to exit it.
Continue editing the other details of the new task or event.
Once done, click outside of the center peek page to close it. You should now see the new task or event entry on the date you assigned it with the color-coded Notion tag under it.
Now, if you want the whole task or event entry to be colored, you can synchronize Notion with Google Calendar instead.
Conclusion
Adding color to Notion calendar is one way to make your event planning more pleasurable. Aside from that, you can use any shade of color for coding certain events so you can easily spot them when giving your calendar a skim.
So, go ahead and color your Notion calendar any way you want without compromising functionality.
