Need to keep updated with any tasks or events daily? You could sync Notion with Google Calendar.
This way you can save time, avoid double-booking, and maximize productivity. But as Notion doesn’t have a native integration with Google Calendar, you have to learn the best ways of syncing them.
Table of Contents
Synchronize Notion with Google Calendar
Adding a calendar to Notion can be done by either opening a calendar embed block or by installing calendar widgets.
But these methods aren’t synchronized and are usually in “View mode” only. What event you add on Google Calendar or Notion won’t be reflected on the other app.
If you want a true 2-way sync between these apps, you have to make use of third-party integrations.
Synchronize Notion with Google Calendar Using Make
Make is a nifty tool that you can use for free to sync your Google Calendar with Notion.
This is because Make already has software processes that connect both tools for seamless data transfer — no coding needed.
You just have to establish whether Notion databases are already made. If yes, select the “Create new Google Calendar events from Notion database items” template.
If you don’t then the “Create Google Calendar events from Notion” option is best for you.
For demonstration purposes, we’ll go with the second option as it’s simpler. So after making an account with Make, do the following steps.
1. Click “Templates” and select “Create Google Calendar events from Notion.
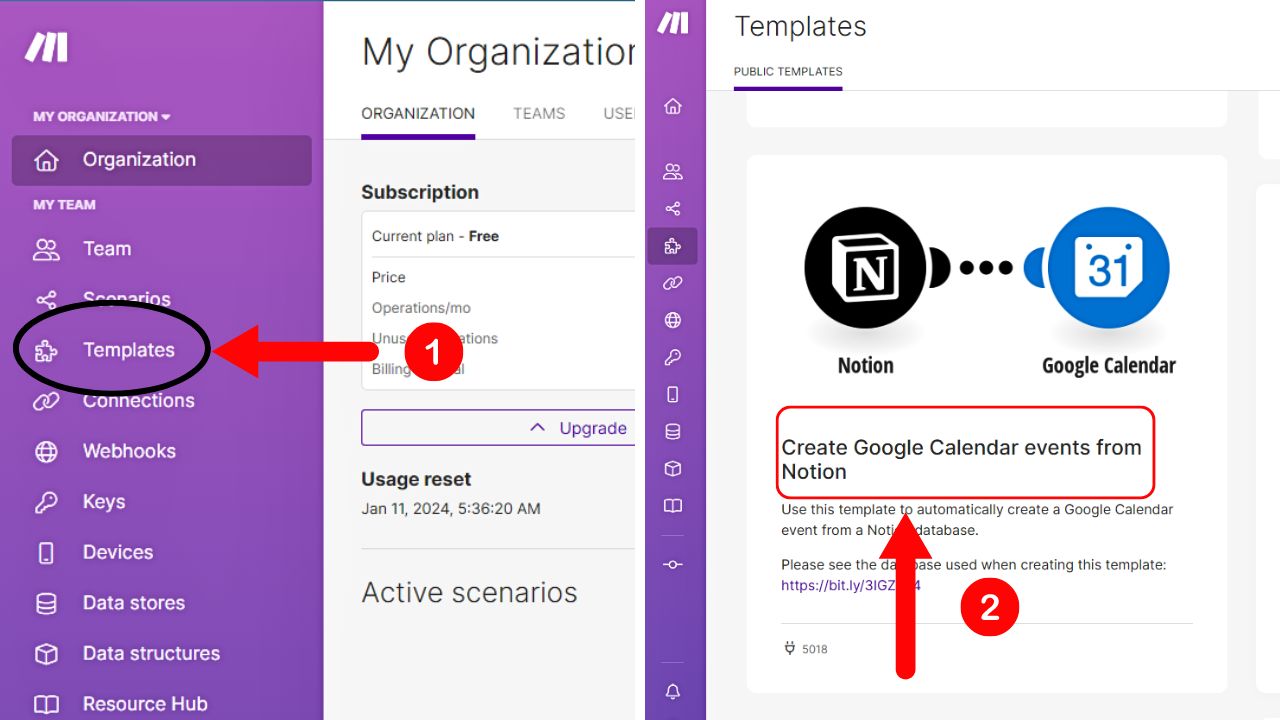
“Templates” is found in the “My Team” section of the left-side panel, between “Scenarios” and “Connections.”
Then scroll down and click the “Create Google Calendar events from Notion” option. The editing page then opens.
2. Duplicate the database template.
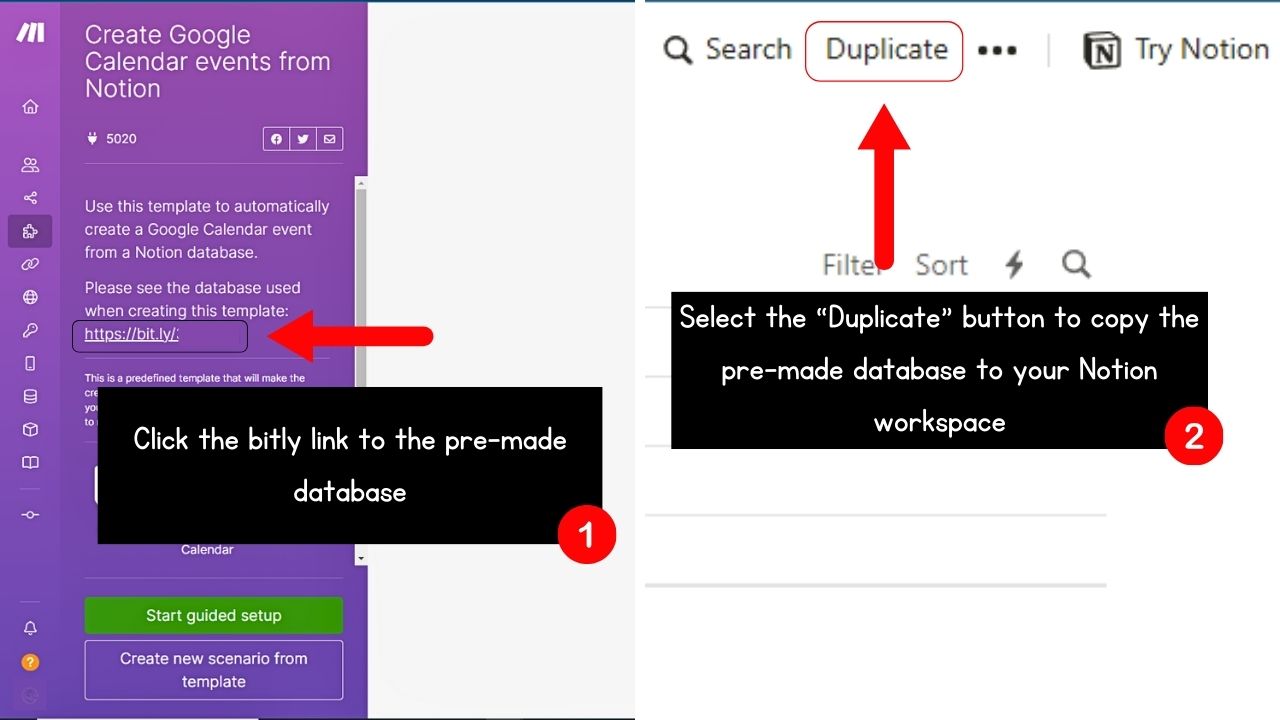
You can ultimately skip this step if you plan on using your database from Notion.
But since I just want to show how this works, I’m going to duplicate the database named “Google Calendar” to my workspace.
3. Select the “Start guided setup” option.
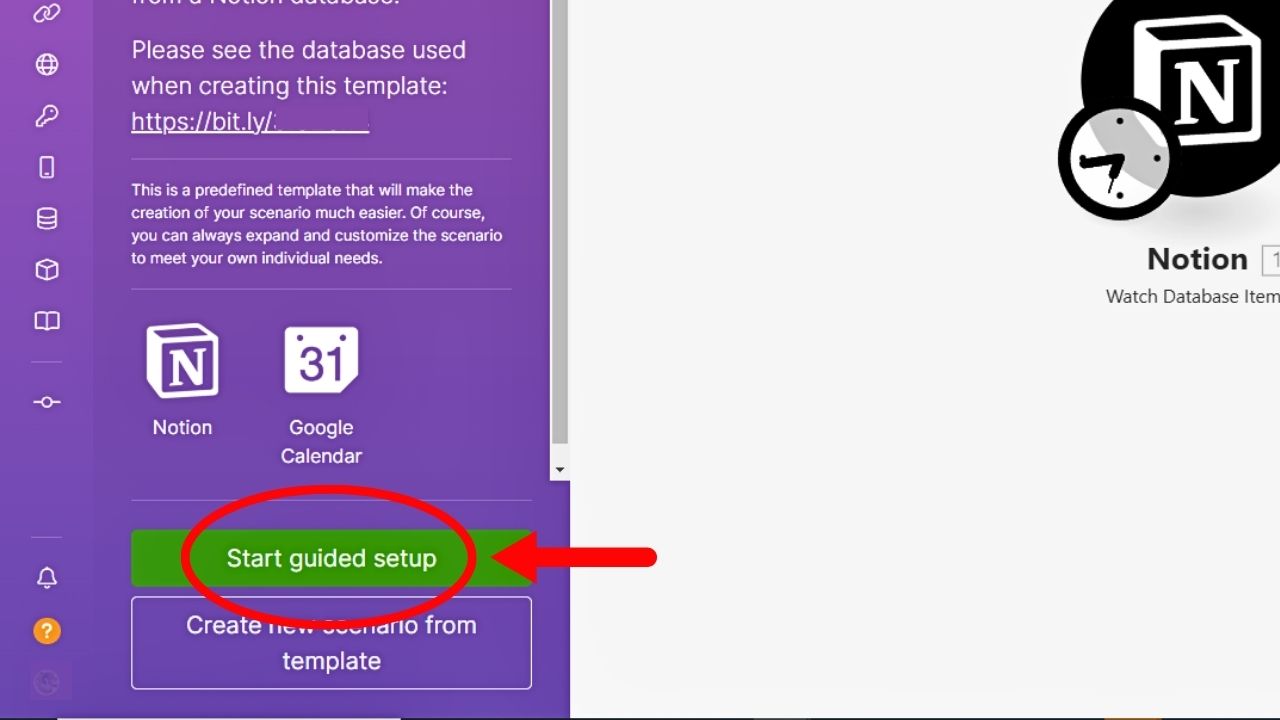
This is best for those syncing Notion with their Google Calendar account for the first time.
4. Click the “Notion” icon and select a connection.
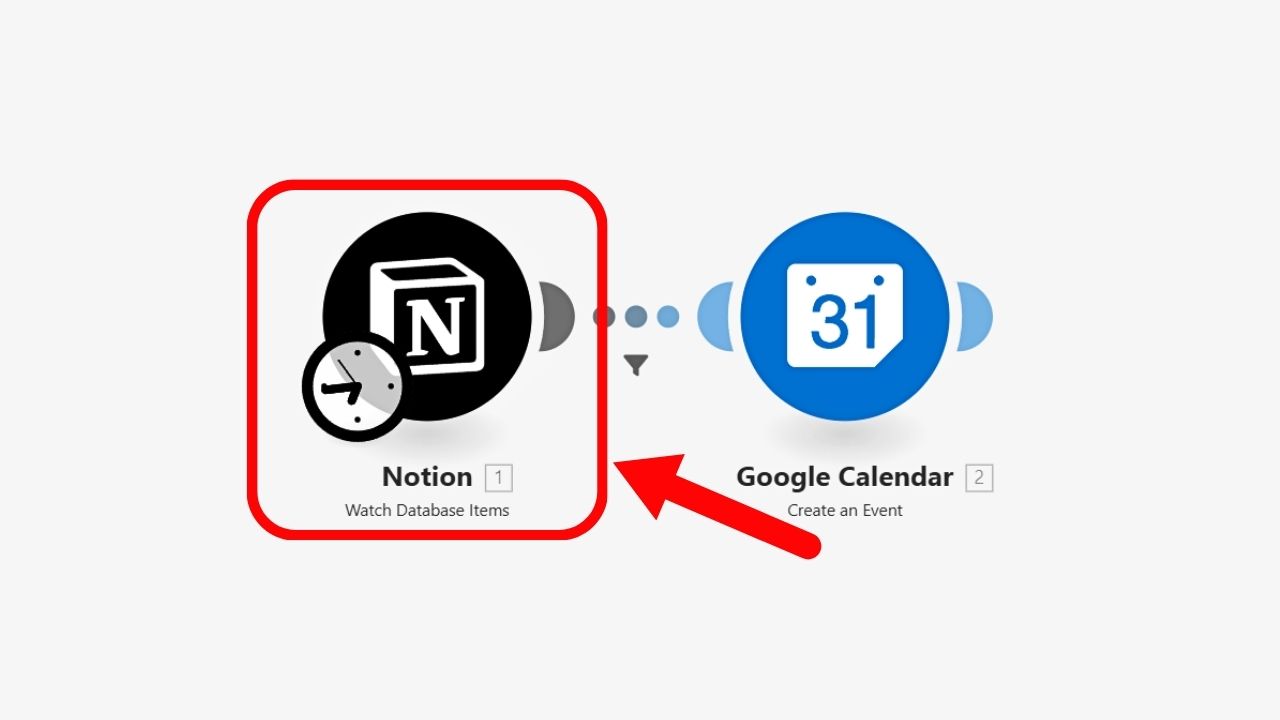
The “Notion” icon is Notion’s very logo. Once you click on it, the “Connection” window appears.
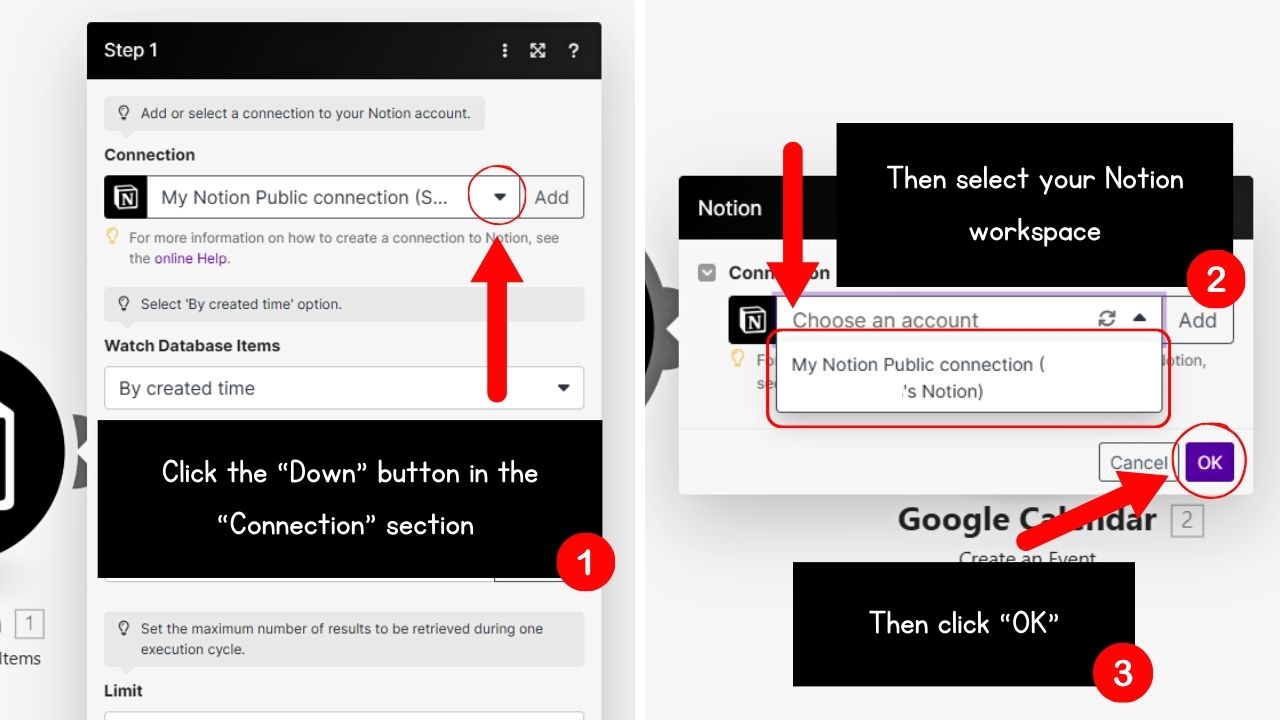
Select the “Down” toggle and select your Notion account. Then click the purple “OK” button.
5. Select “By Created Time” in “Watch Database Items.”
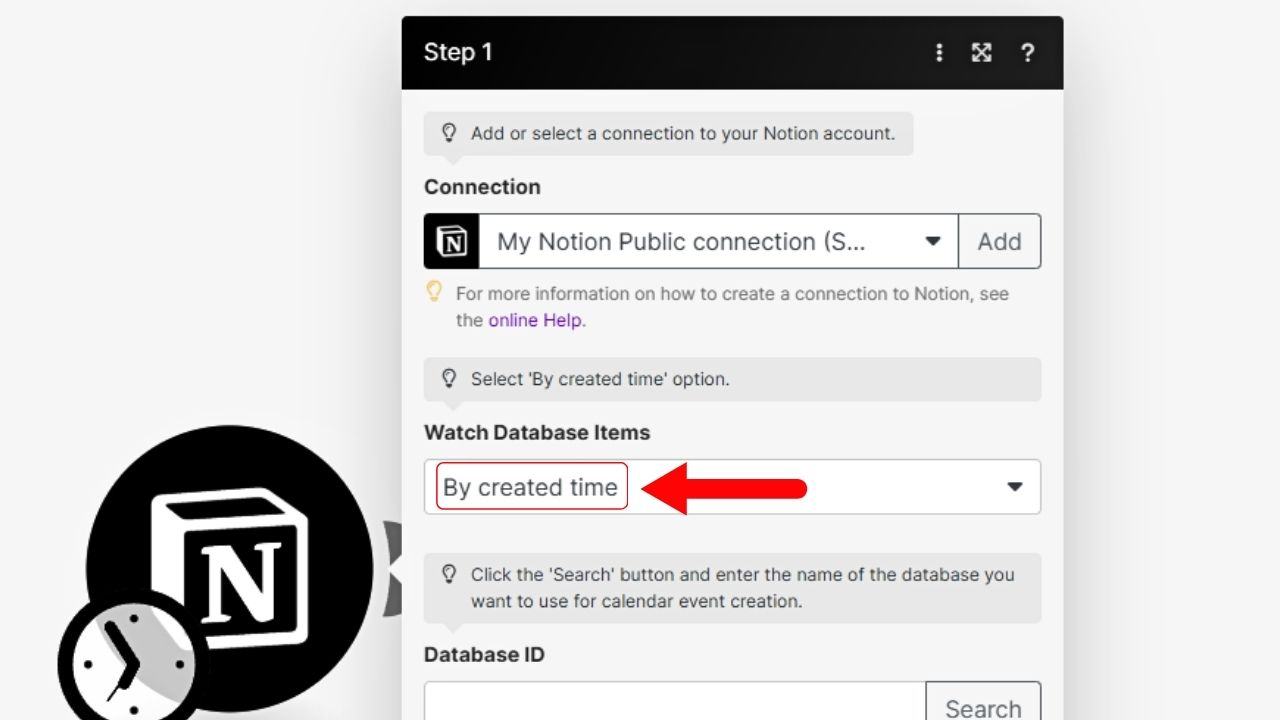
Though you can select “By update time,” “By created time” is the recommended option by Make.
6. Copy and paste the database ID you’ll sync with Google Calendar.
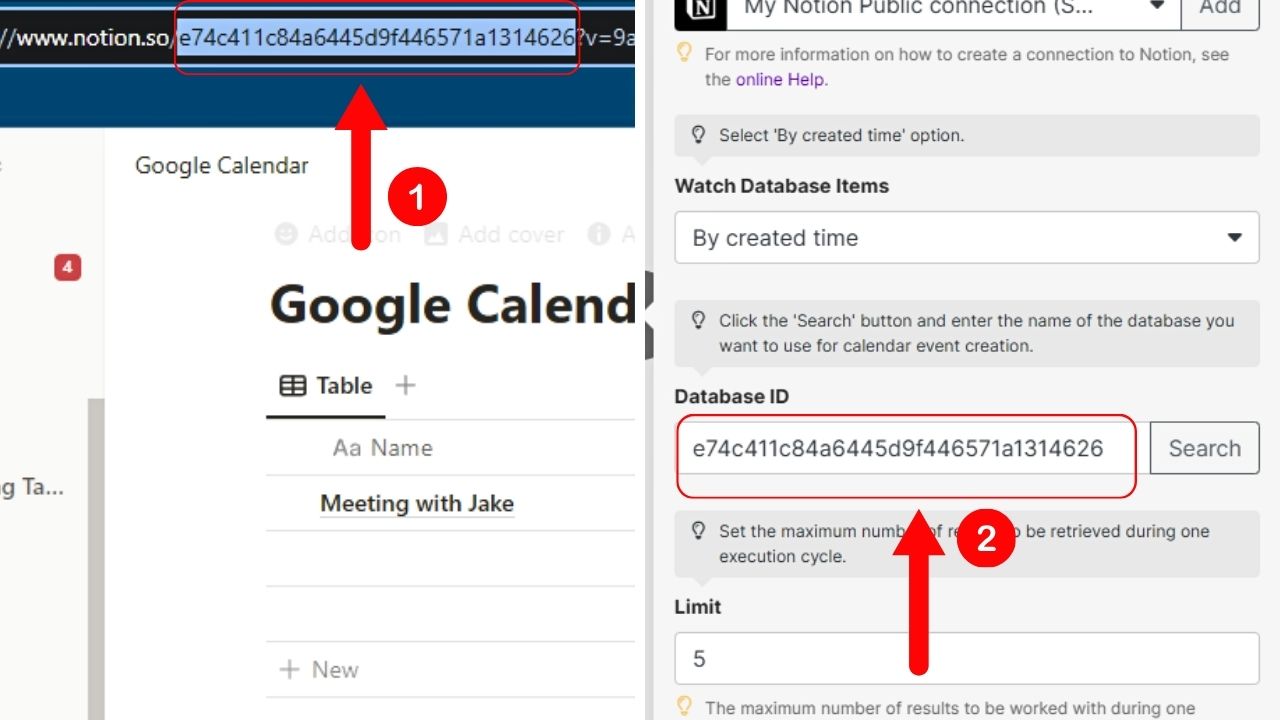
You can perform a query search, but getting the Notion database ID and pasting it to the corresponding field is the faster option.
7. Set the limit for the execution cycle.
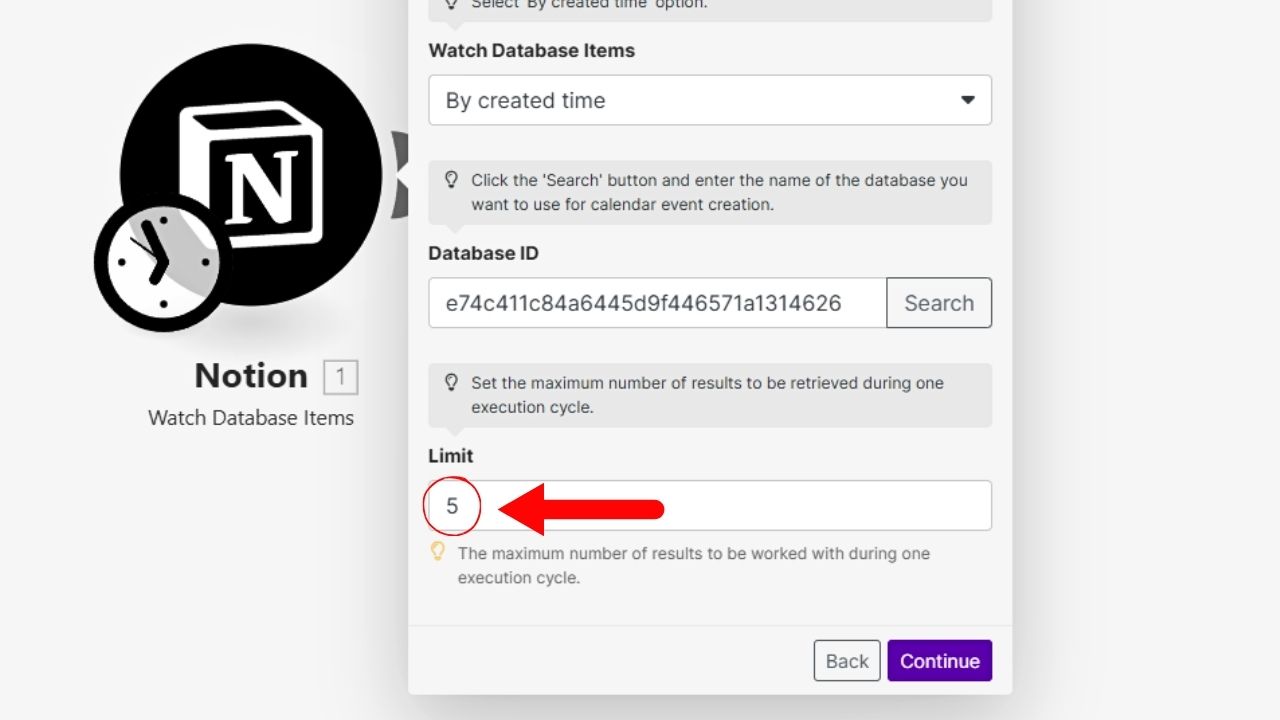
By default, Make set “5” as the maximum number of results it will work on in an execution cycle. Decrease or increase it if you want.
8. Click “Continue.”
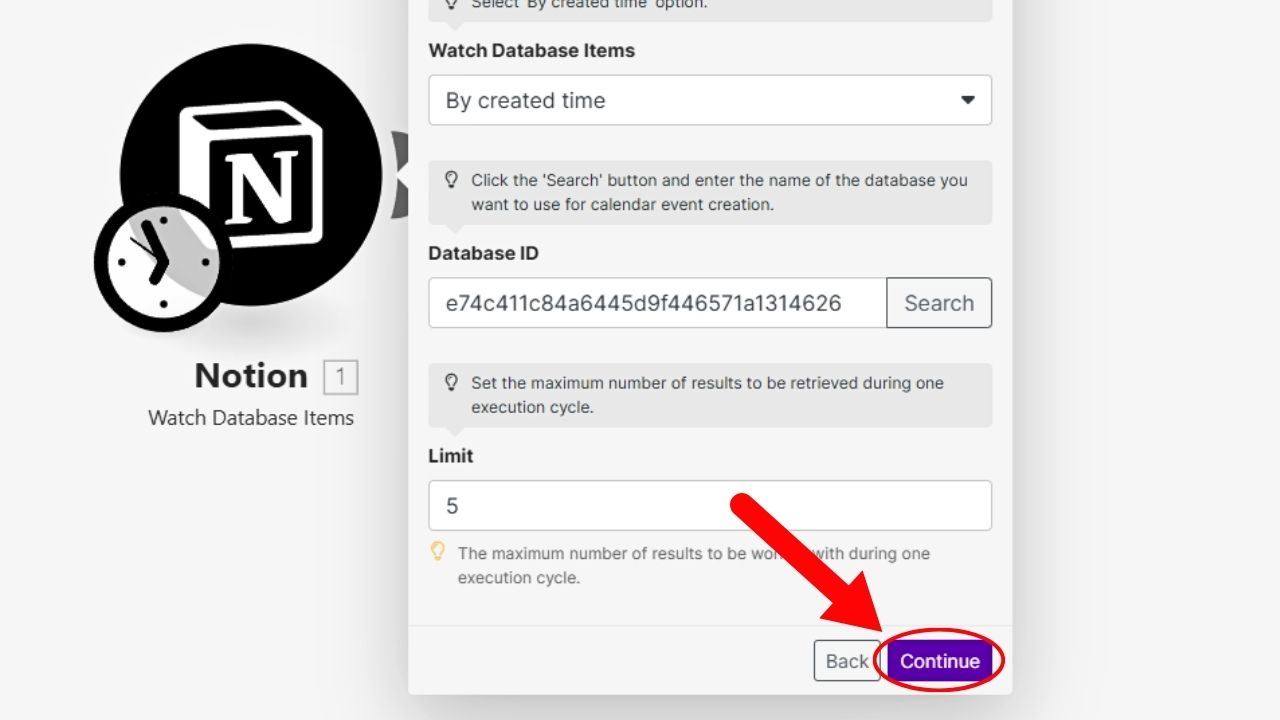
It is the purple button you’ll find on the “Step 1” window’s lower right.
9. Select the “Google Calendar” icon and click a connection.
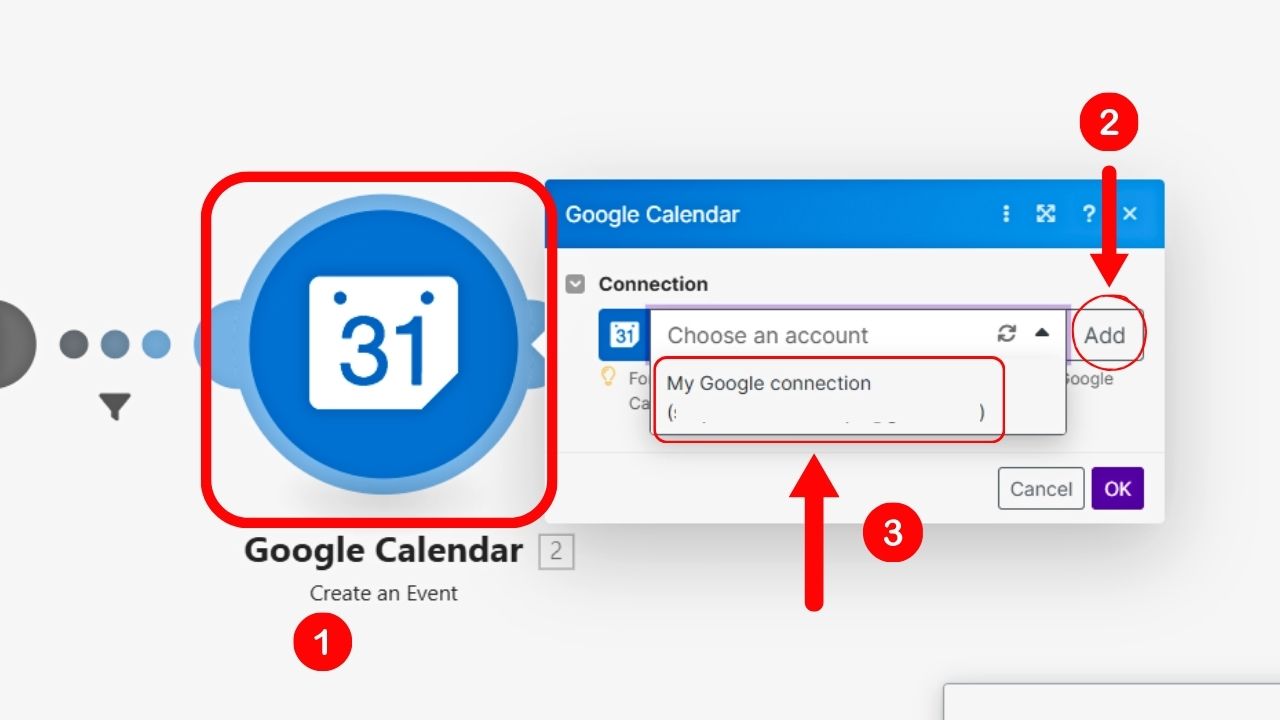
Click the “Add” button and select your Google Calendar account.
10. Set the parameters for “Create an Event.”
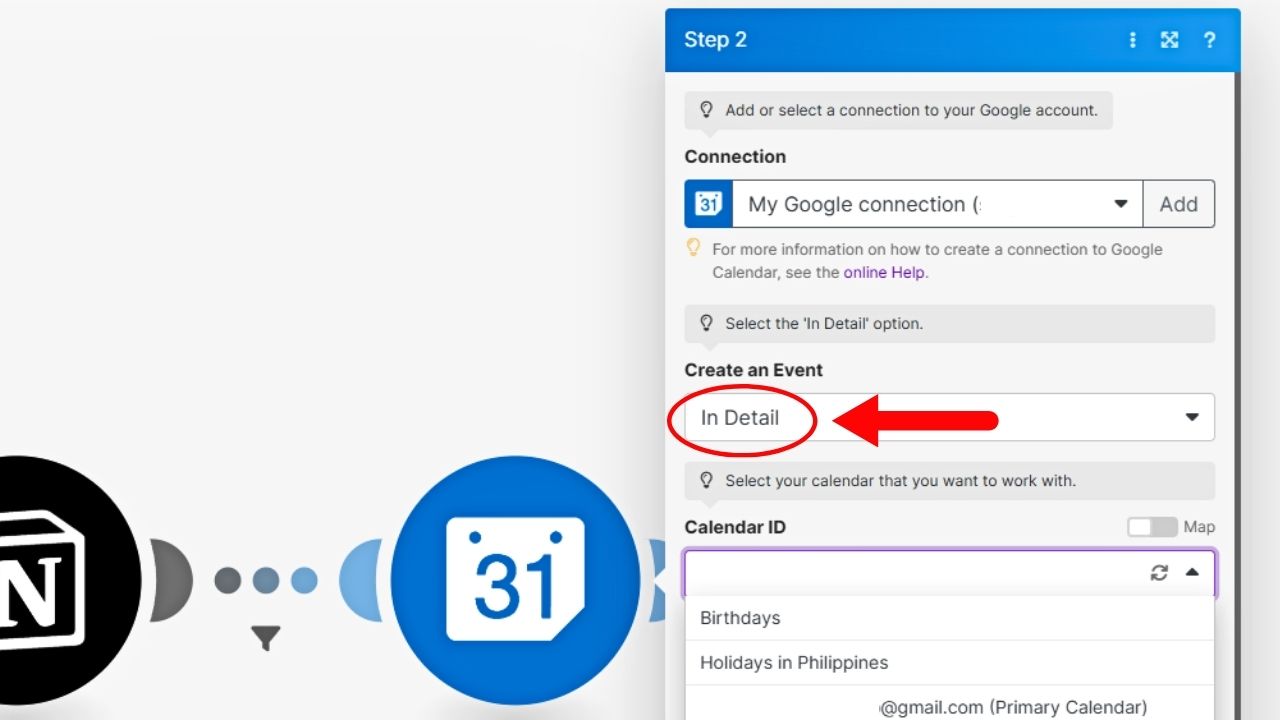
You can choose between “Create Quickly” or “In Detail.”
11. Select the Google Calendar ID.
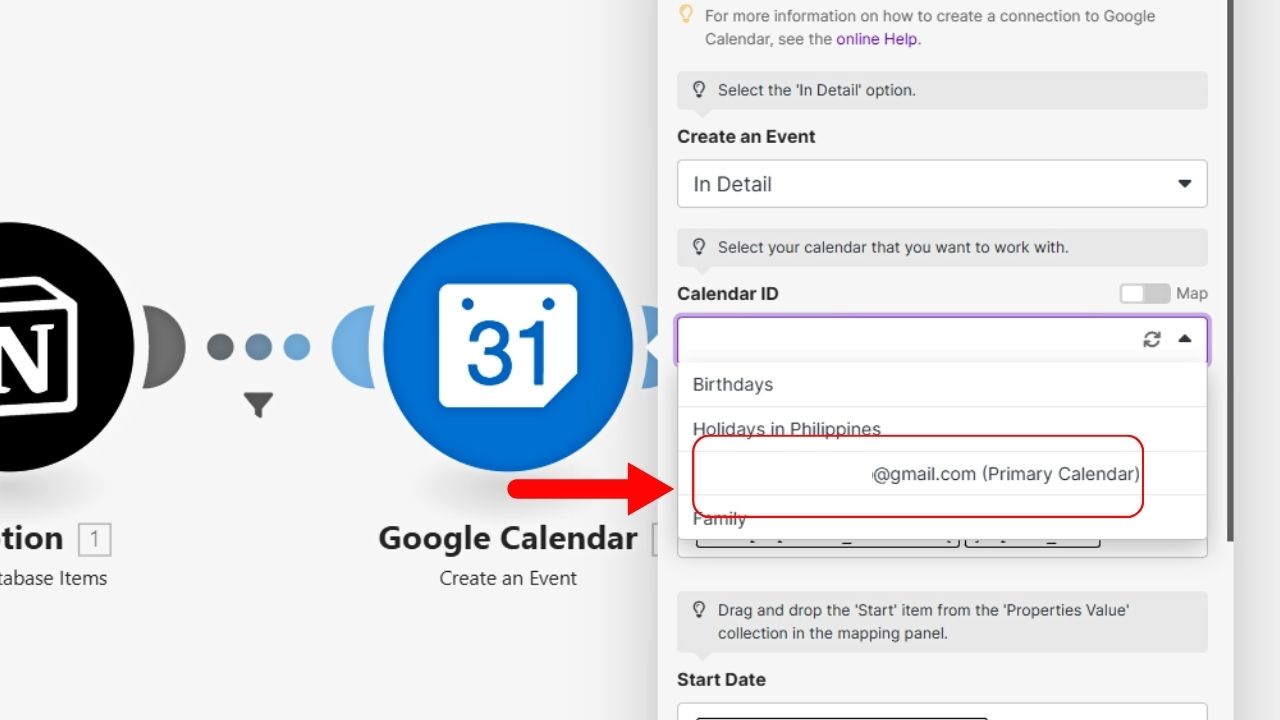
Google Calendar has different calendar “filters” according to its purpose. Now if you want to see all events and tasks, select the “Primary Calendar” option.
12. Set the “Start” and “End” date properties.
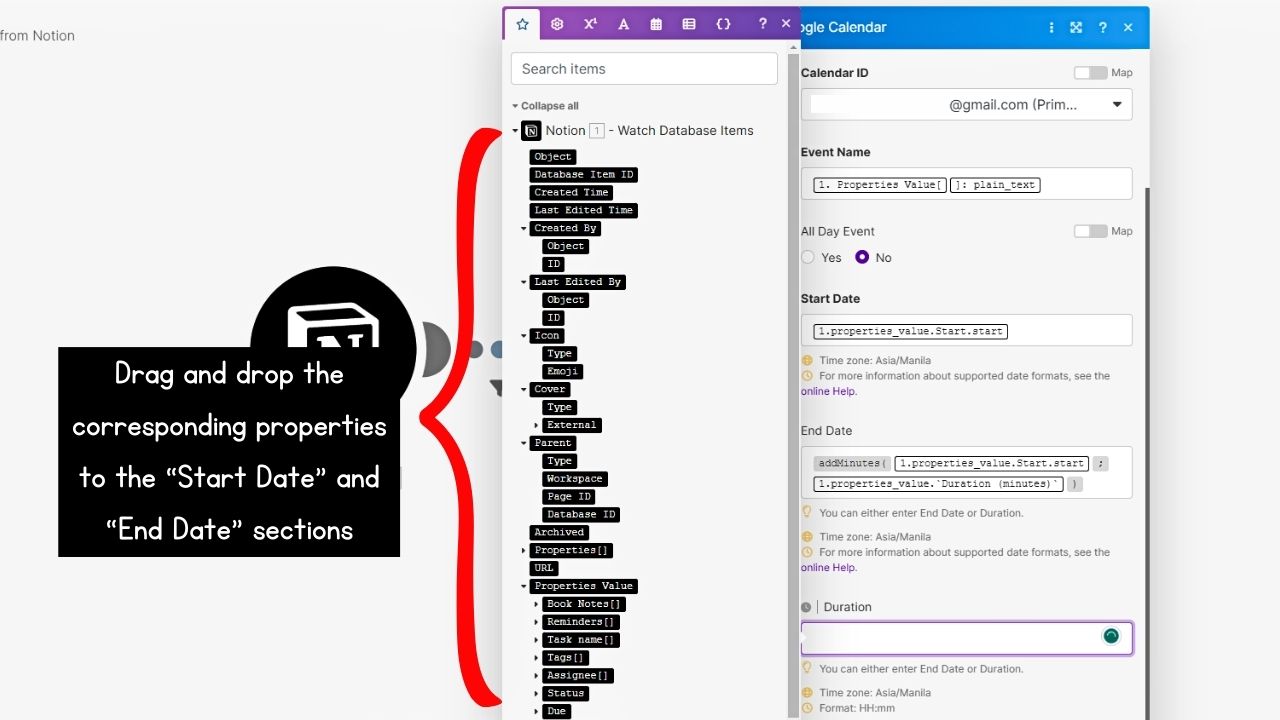
Drag and drop the “Properties Value” from the “Start” or “End Items” to their corresponding fields.
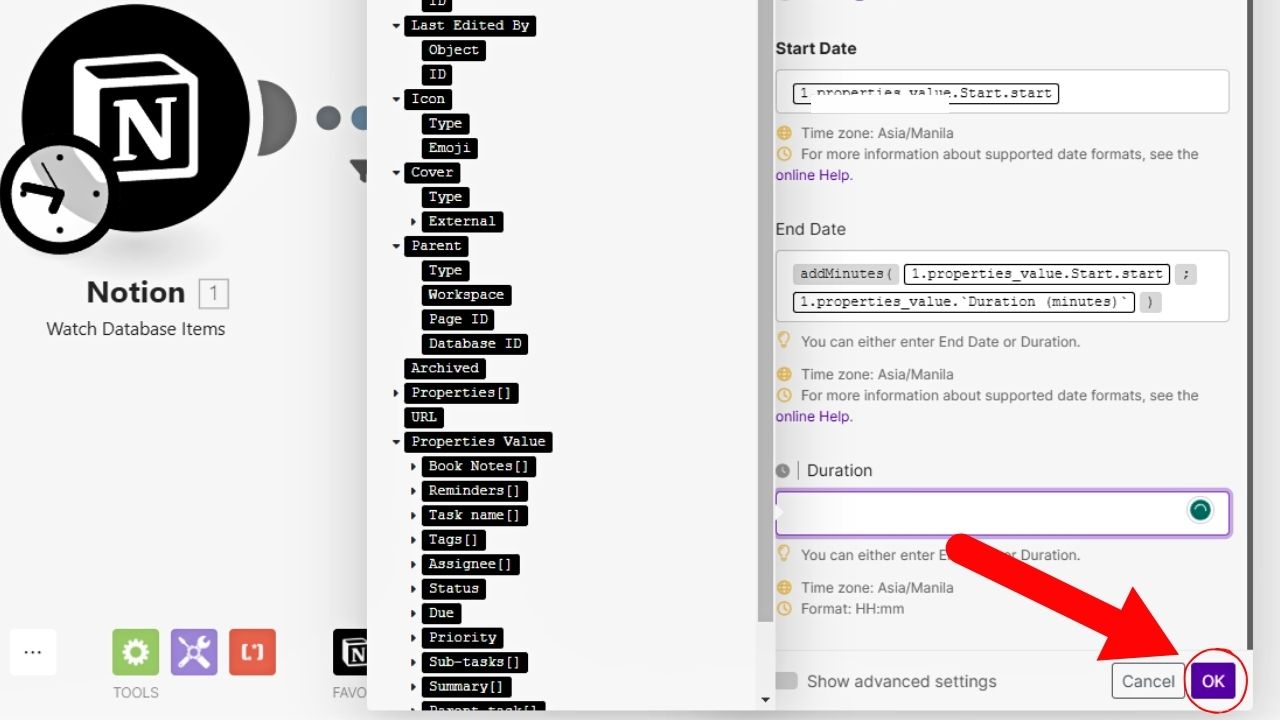
If you have no advanced settings to set, click “OK.”
13. Click the “Run once button.”

This is the “Play” icon on the lower left of the screen.
You’ll then know if the scenario is working (green checkmarks on both Notion and Google Calendar).
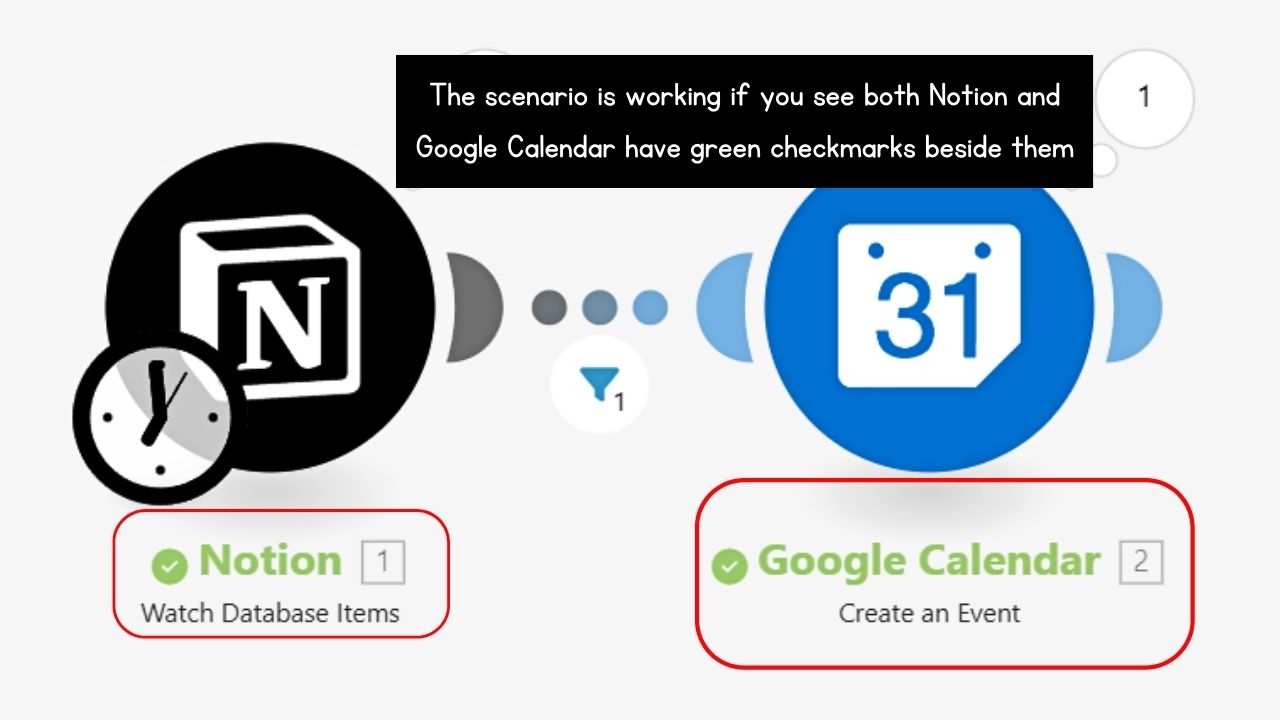
In case it’s not, click on the magnifying glass icon to fix the problem. Then select the “Run once” button again to test the scenario.
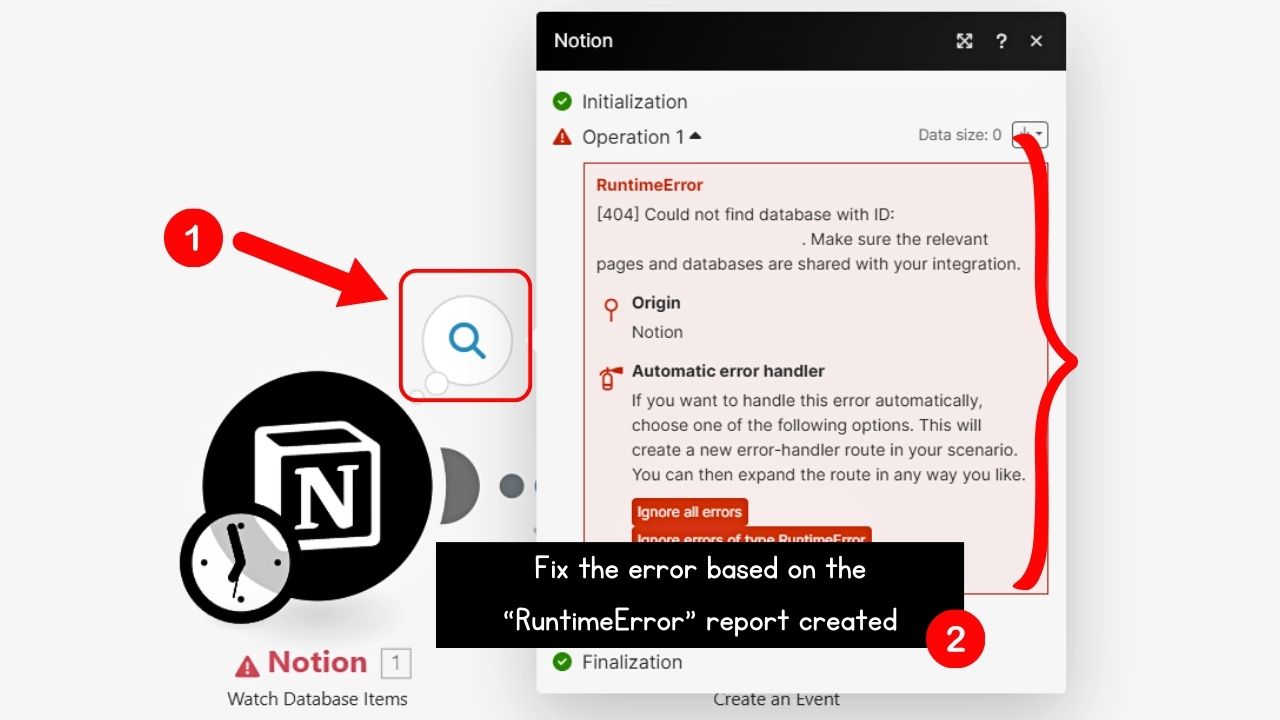
14. Activate the scenario you created.
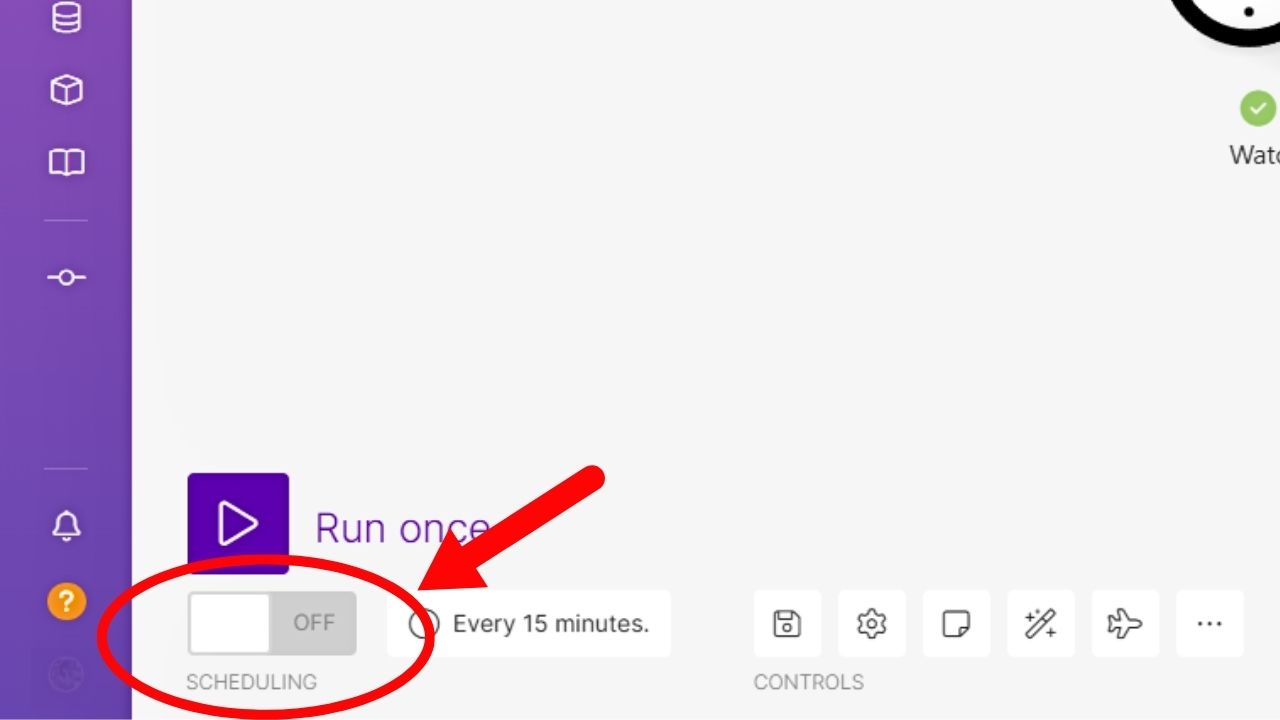
Do this by clicking the “On” toggle below “Run Once.” Then set the interval on how often Make will fetch new updates. It is set to “Every 15 minutes” by default.
Then click “OK.”
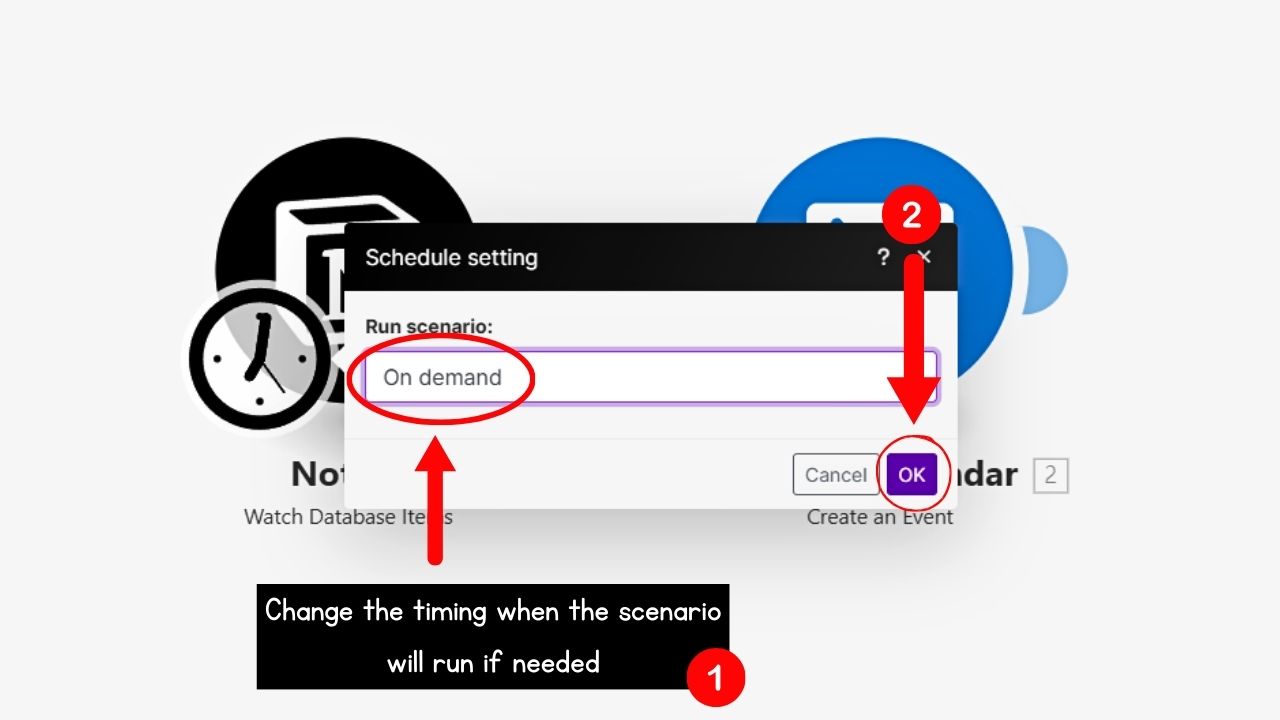
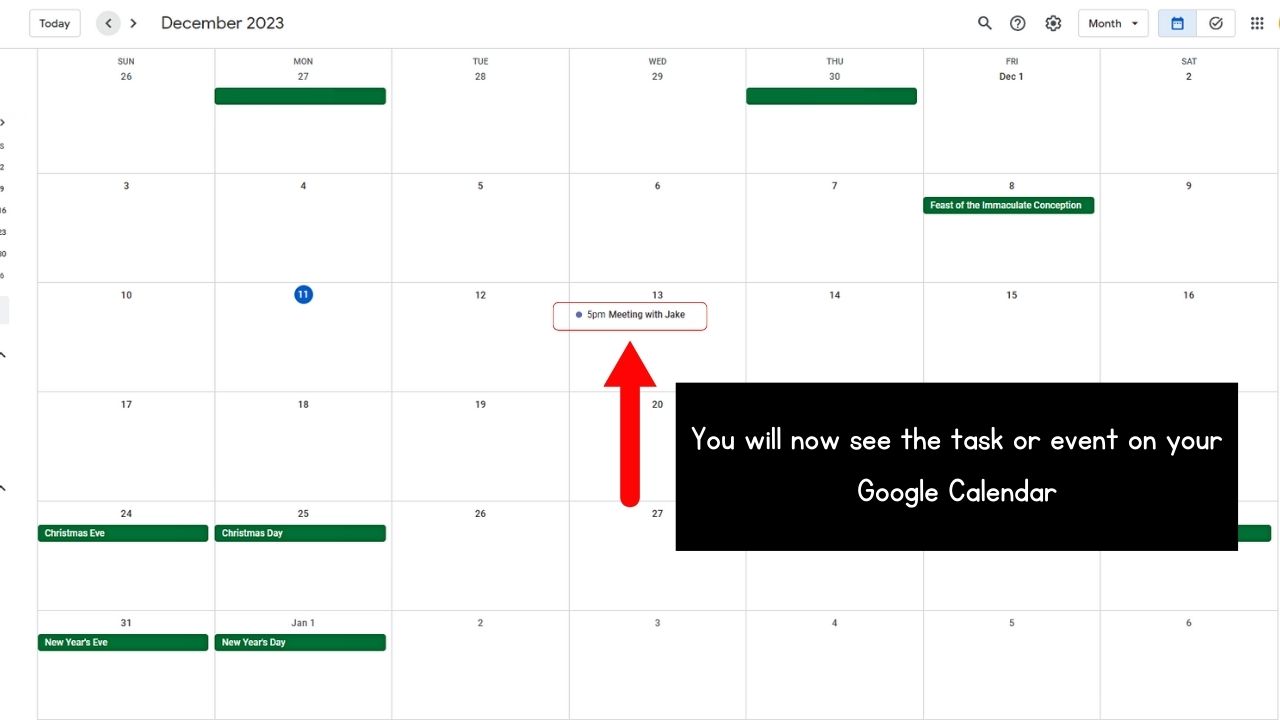
You should now see the event added to your Notion database on your Google Calendar.
If you want to add another module, simply click on the “+” icon beside the “Google Calendar” module.
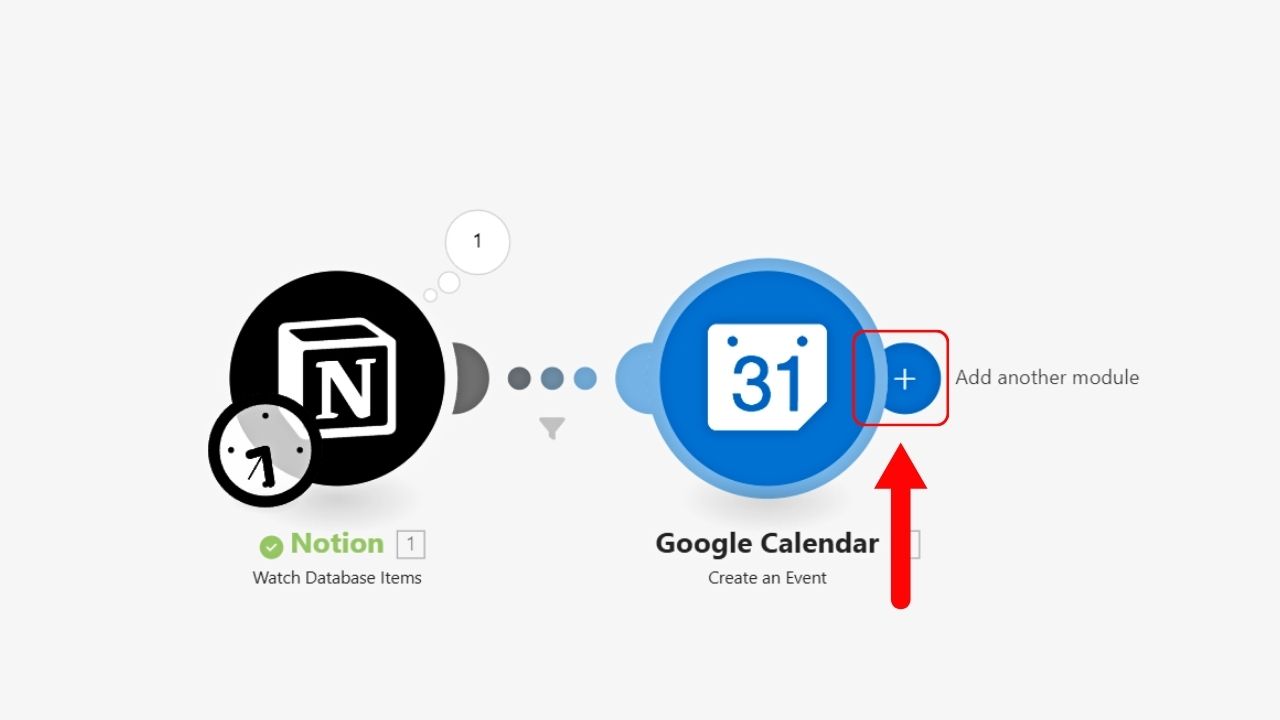
Take note though that you can only activate up to 2 scenarios with free Make accounts.
Synchronize Notion with Google Calendar Using Notion Automations
Notion Automations is the best software integration you can use for 2-way sync. But to truly enjoy this feature, you have to pay for a monthly subscription.
Just make sure that you have already added Notion Automations as a connection to your database (steps like how you create forms in Notion).
1. Create a new Automation.

There are two Automations available: “Google Calendar” and “Todoist.” Both of these Automations feature a 2-way sync with Notion.
Select the “Google Calendar” Automation option.
2. Connect your Google Calendar.
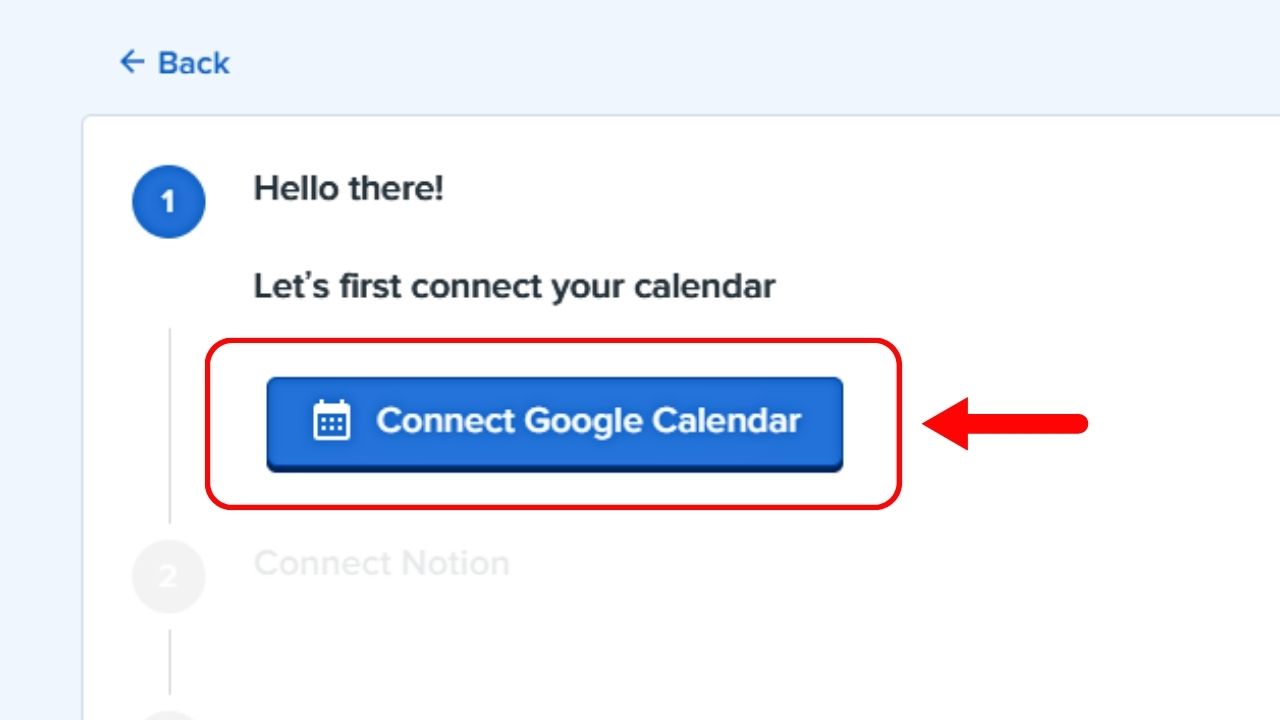
Click the “Connect Google Calendar” button for this step. You can then tick the boxes of the calendars you want to sync with Notion Automations.
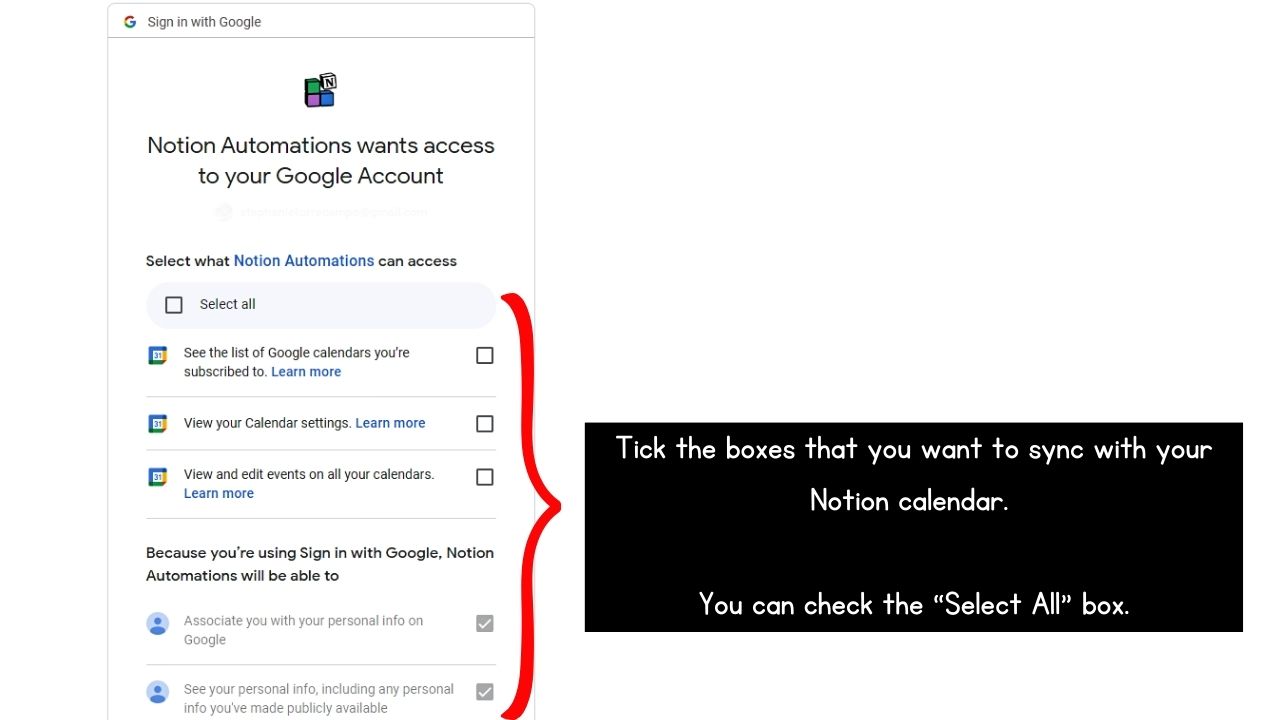
Tick “Select All” also if you want to include all Google Calendars.
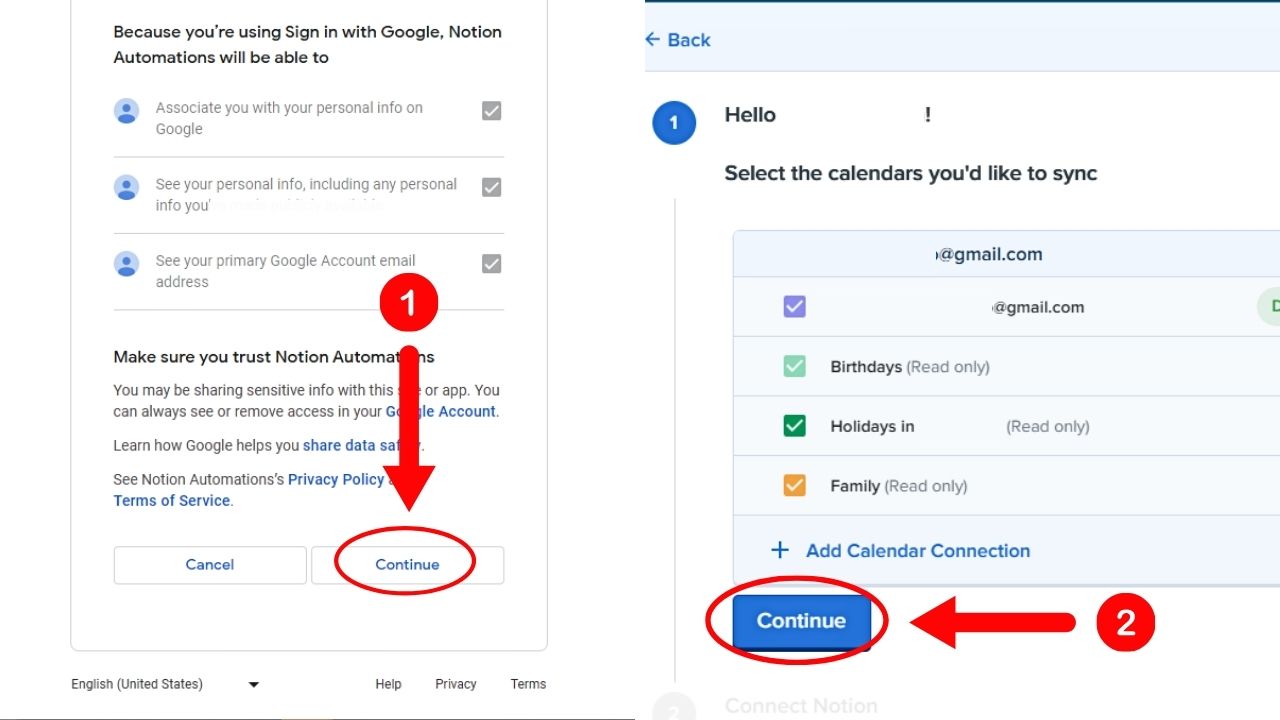
Then select “Continue” twice, one on the “Google Calendar” window and one in “Notion Automations.”
3. Connect your Notion account with Notion Automations.
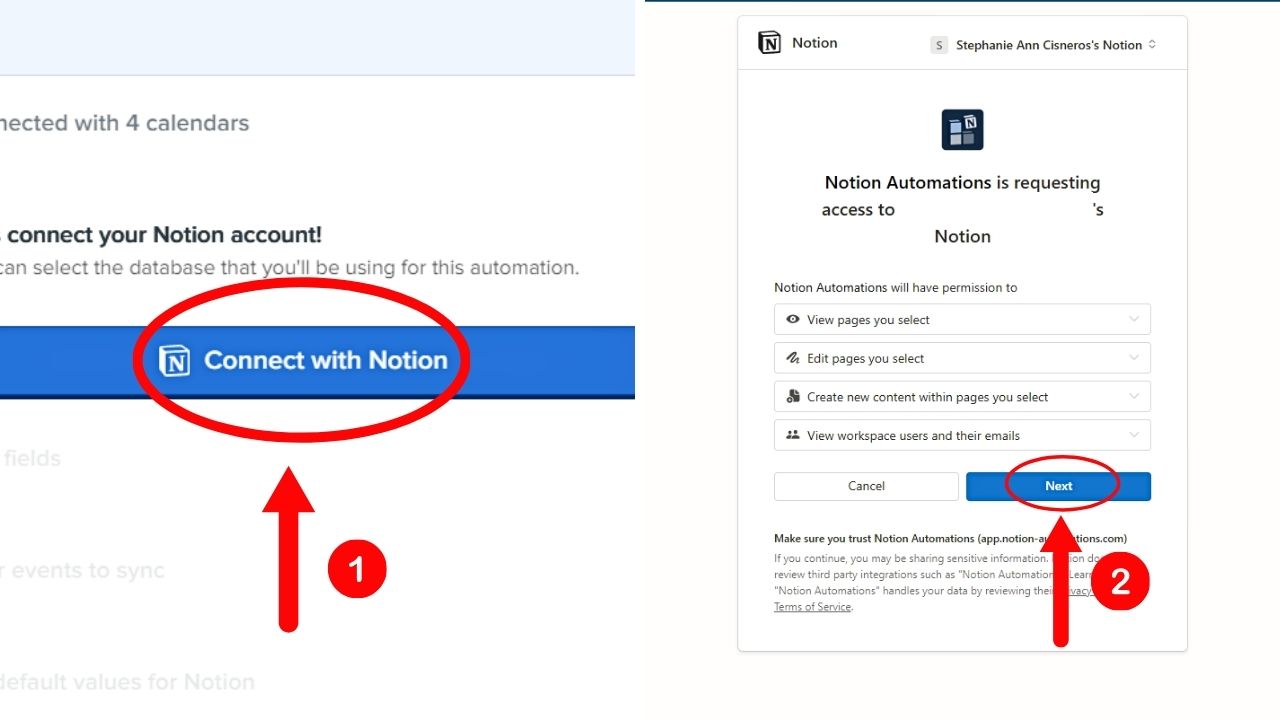
Start by clicking the “Connect with Notion” button. Then after reading the permissions that will be granted to Notion Automations, select “Next.”
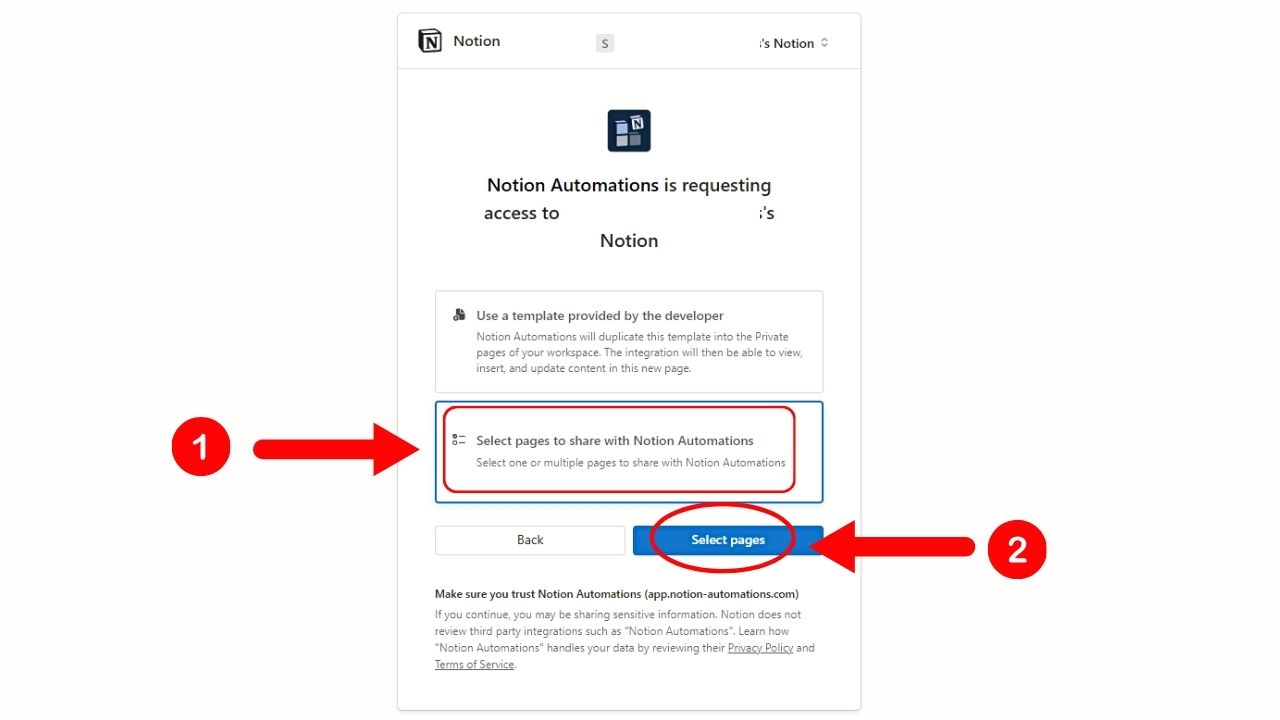
Then you can opt to use a template that will be provided by the developer or select pages from your Notion account. I selected the latter.
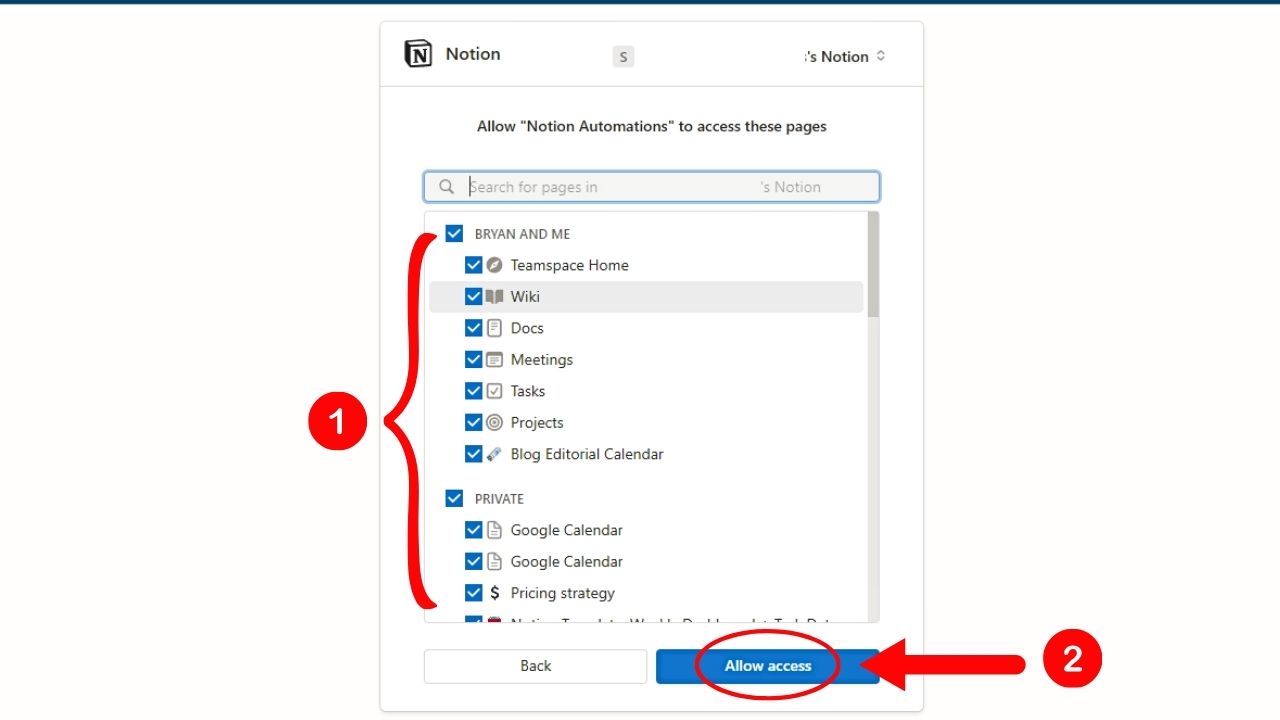
After, tick the boxes of the Notion pages you want Notion Automations to read before you select “Allow access.”
4. Connect the Notion database to Notion Automations.
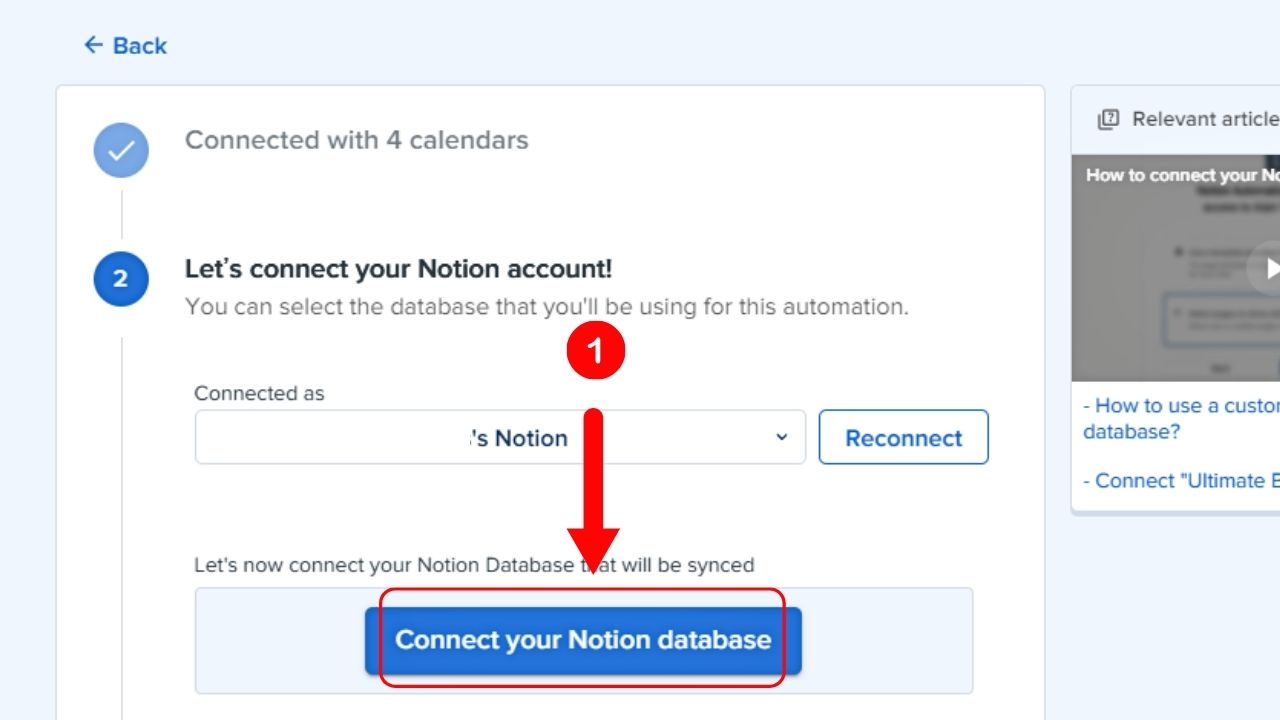
Click the “Connect your Notion database” button.
If you want to use the template made by Notion Automations, select the “Use our template made for this automation” option. Otherwise, click “Use a custom Notion database.
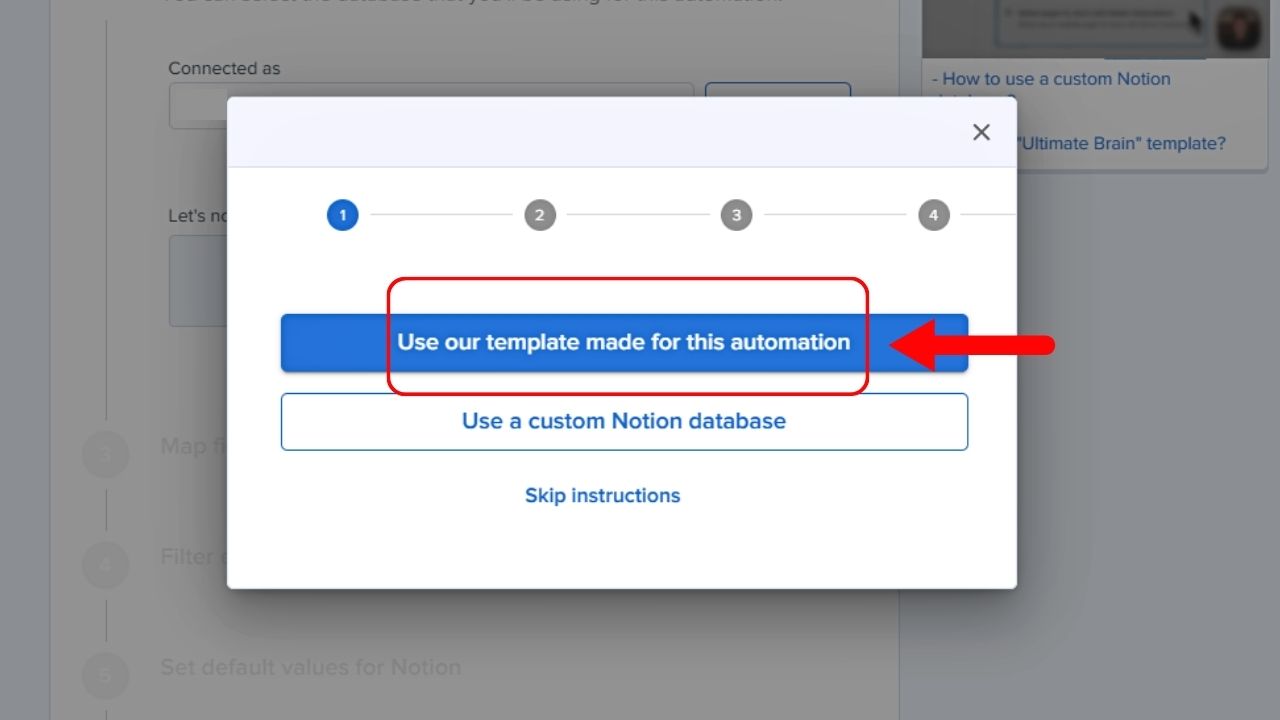
Make sure you have already connected the database with Notion Automations. Otherwise, go through the steps to connect them by clicking ‘Continue.”
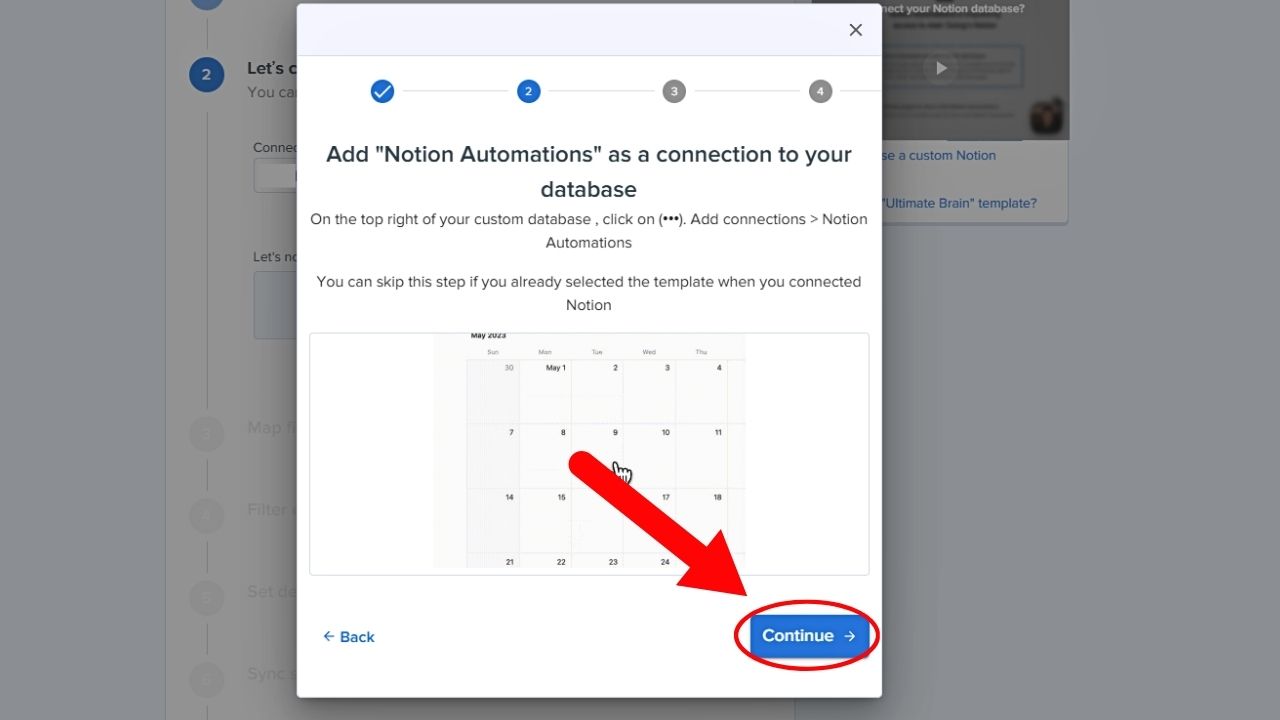
5. Copy the Notion database link.
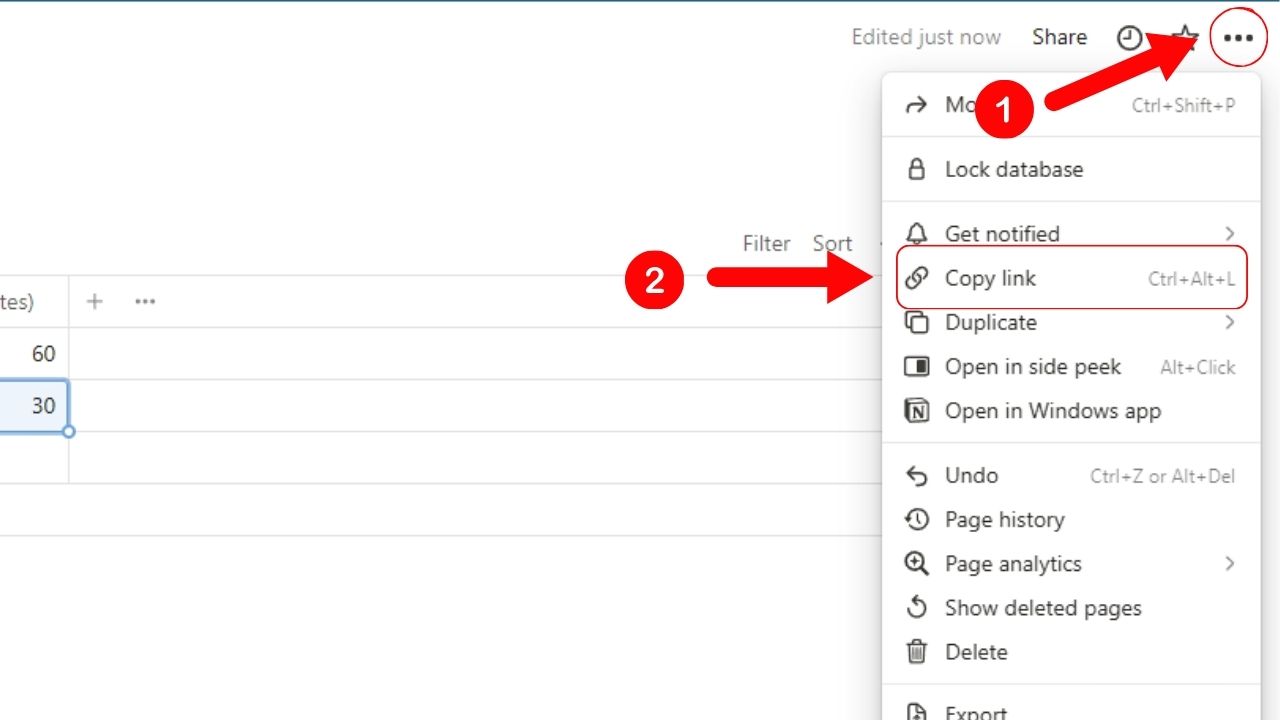
Do this by clicking on the 3-dot icon on the top-right corner of the Notion database page. Then select “Copy Link” on the dropdown menu.
Paste the said link in the “Notion database link” field before clicking “Add database.”
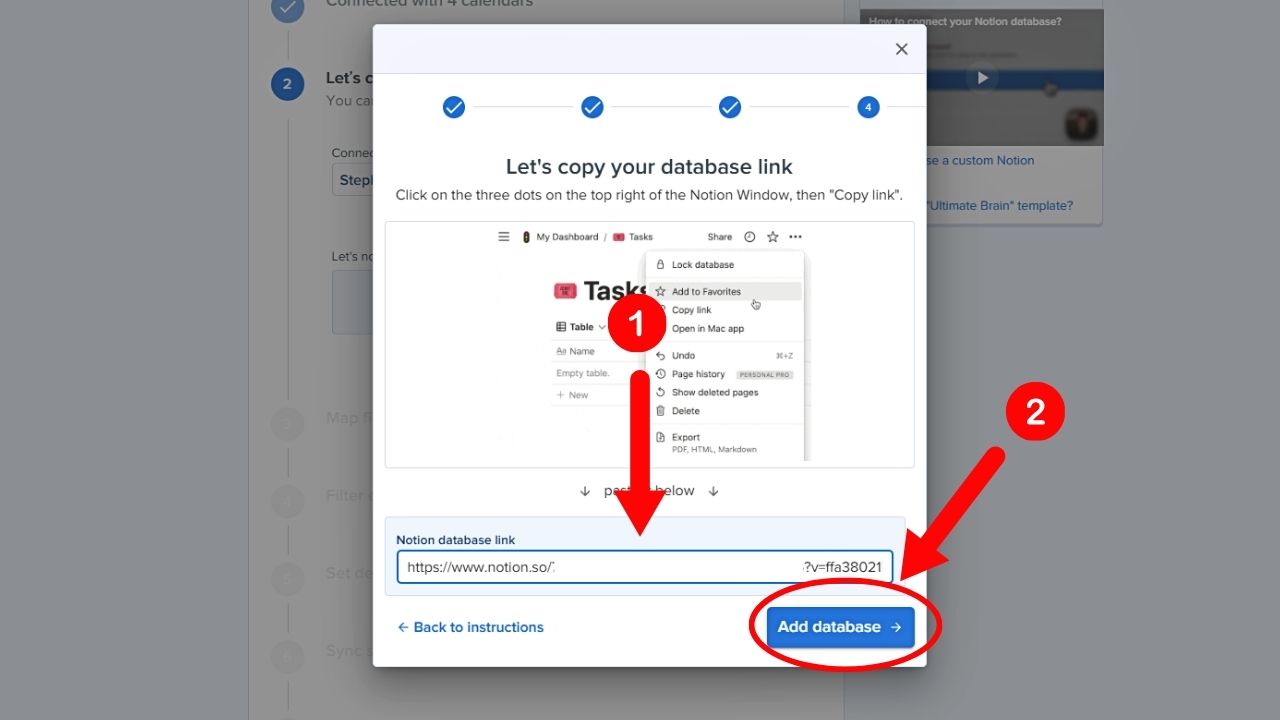
Then select “Continue.”
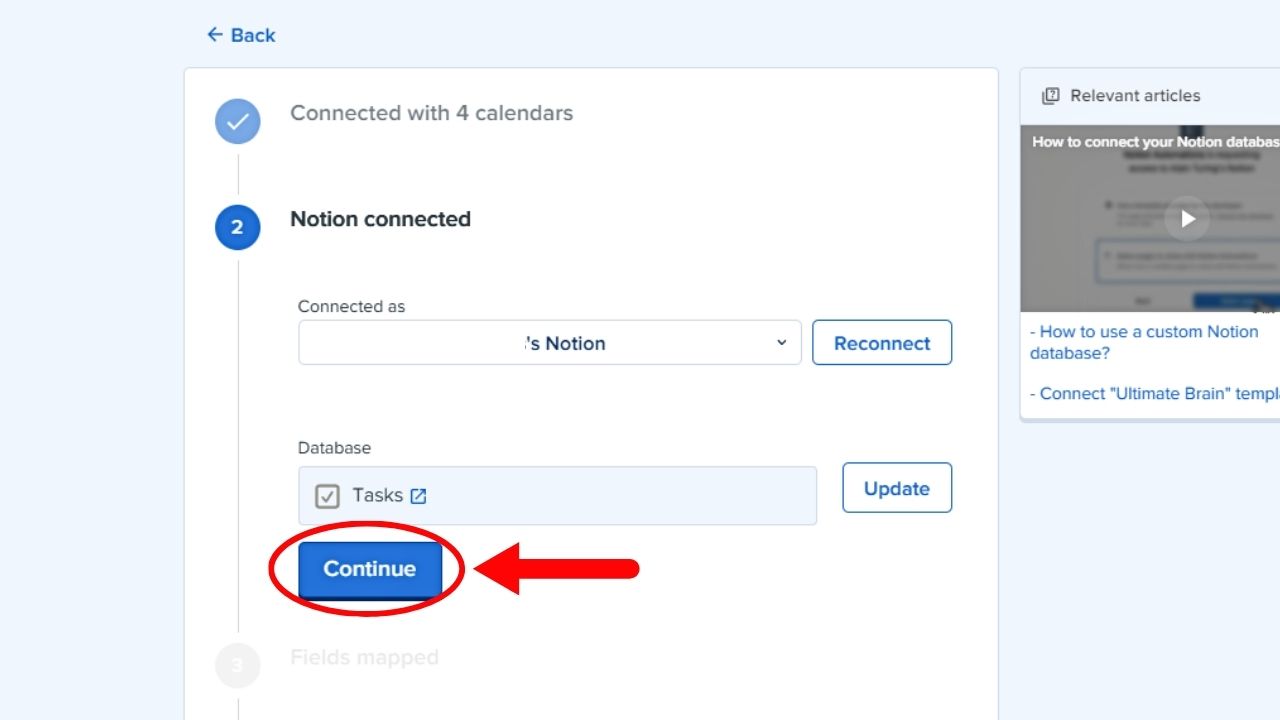
6. Connect Notion properties with your Google Calendar attributes.
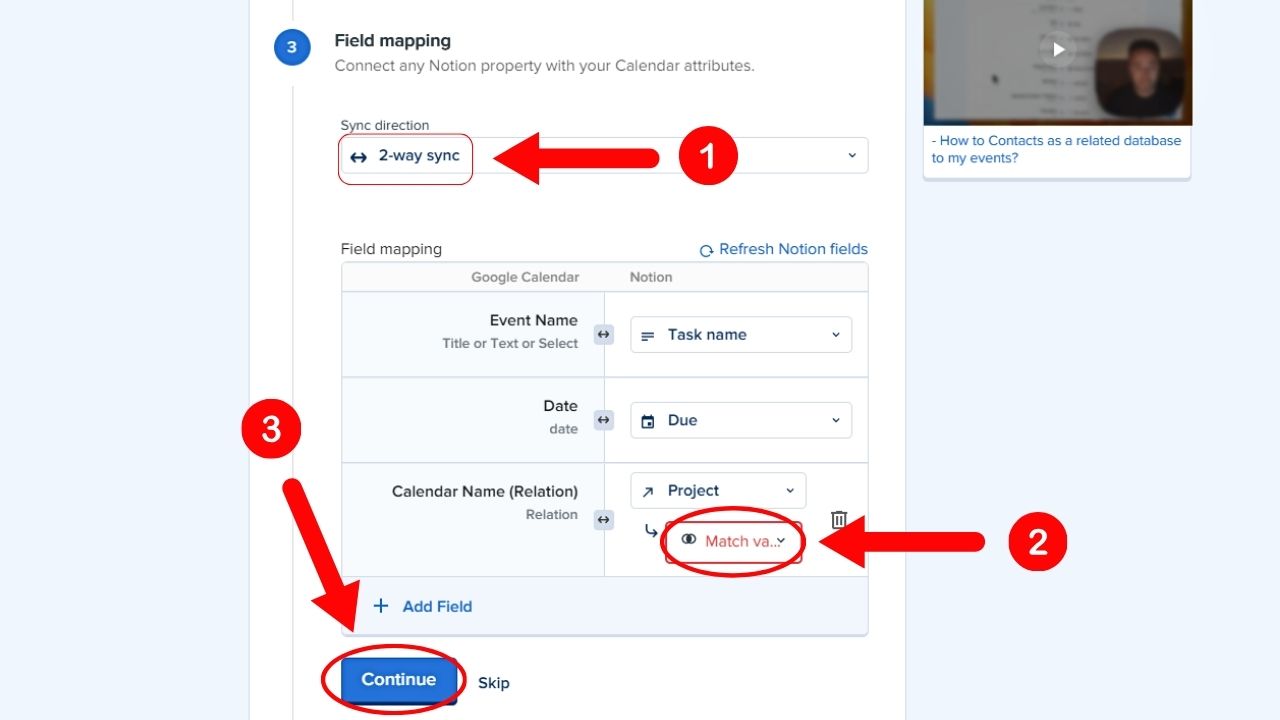
This step is technically called “Field Mapping.” Here you select whether the properties will be synced 1-way or 2-way.
You can also set the Notion fields to make the syncing process work. After selecting the property, click “Continue.”
7. Add filters for the synced Notion pages.
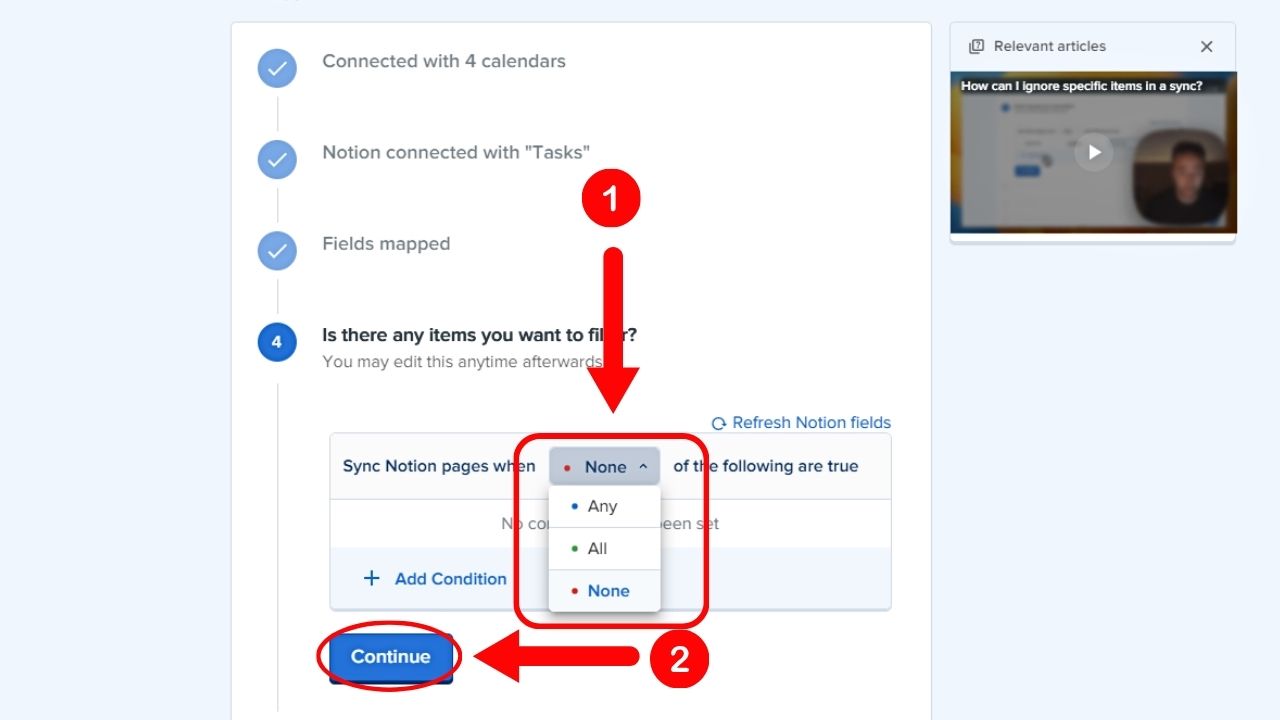
You can set it using 3 choices: “None,” “Any,” and “All.” You can change these filter settings later if you like.
Then click “Continue.”
8. Add a default value for Notion.
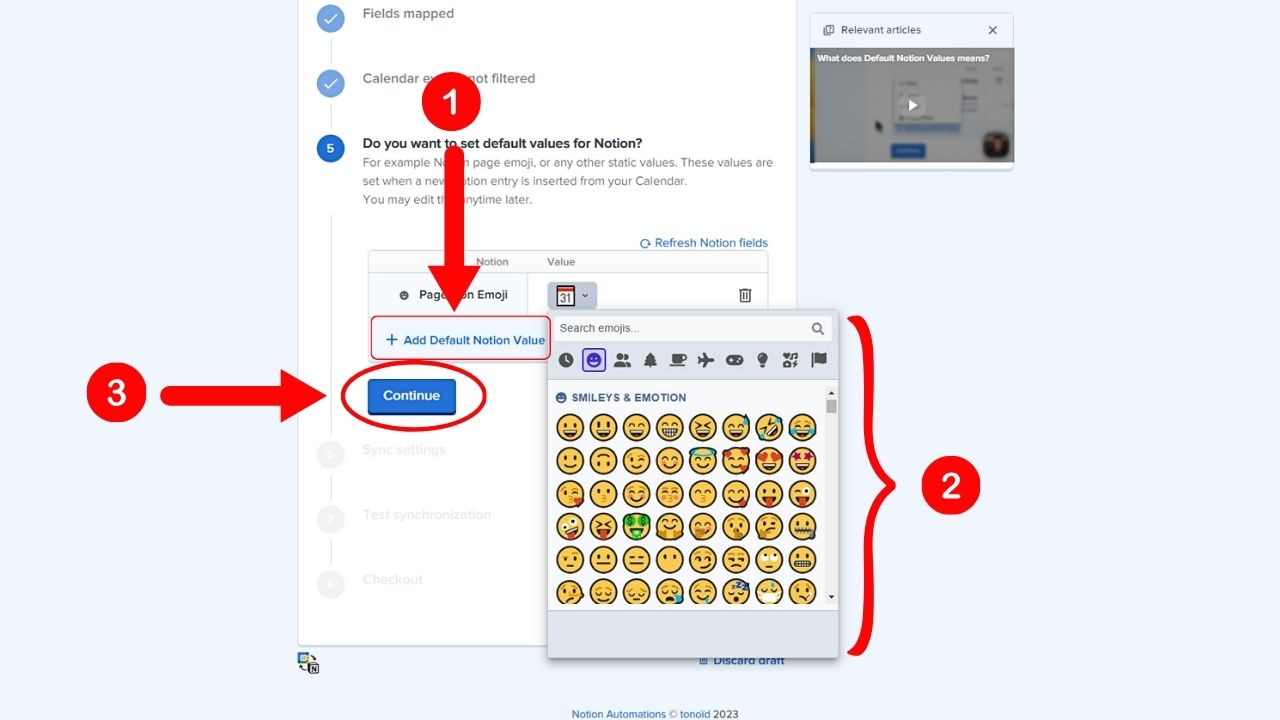
These default values are static values you can set whenever you insert a Notion entry into your Google Calendar. These can be anywhere from Notion page emojis or other static values you want to use.
And like the filters, you can change them later. Select “Continue.”
9. Turn on advanced settings for your Notion automation.
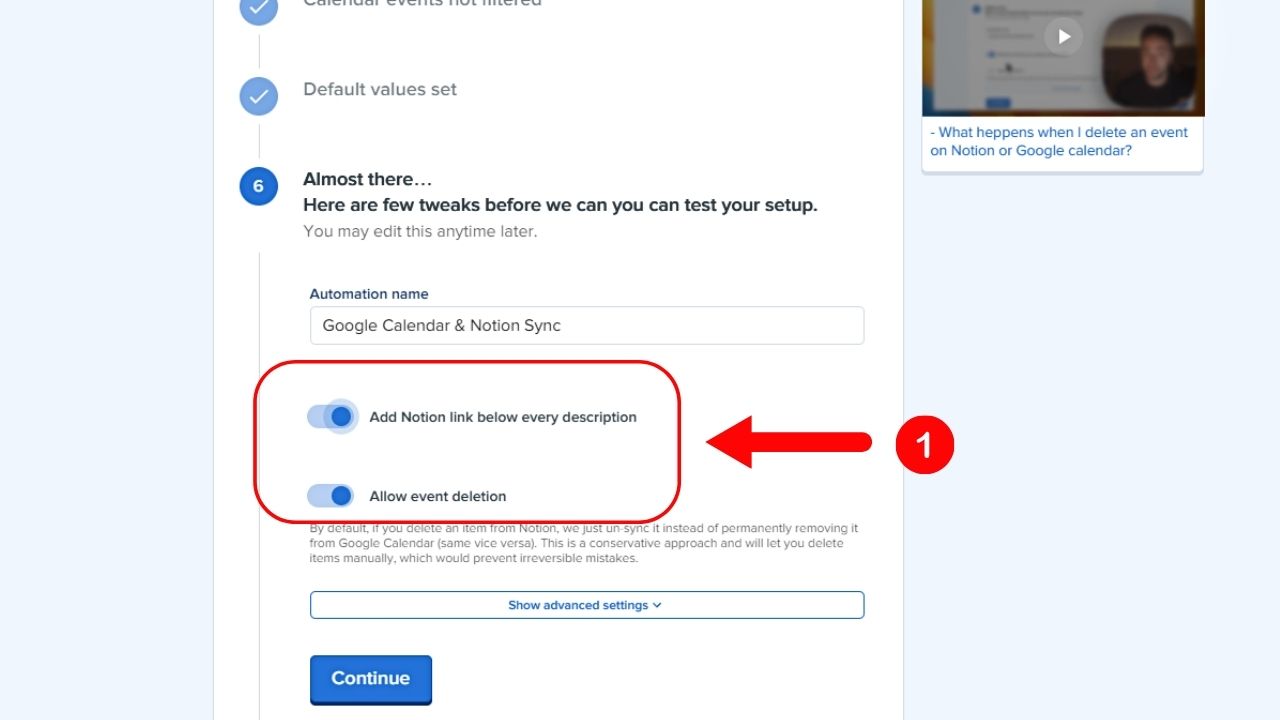
Here you can change the Automation name by editing the said field.
You can also click the toggles for “Add Notion link below every description” and “Allow event deletion.”
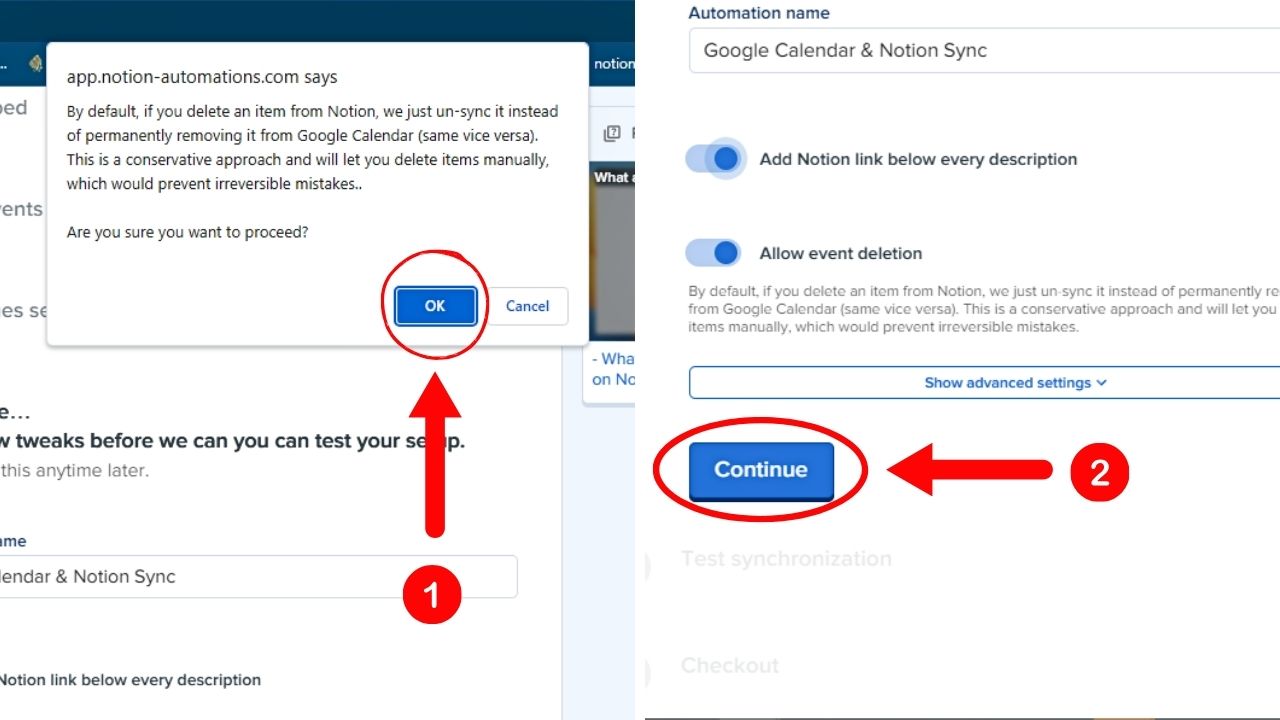
But Notion Automations will explain the risks and benefits of activating these toggles.
If you’re good with those risks, then select “OK.;” if not, click “Cancel” and “Continue” instead.
10. Test the new synchronization made.
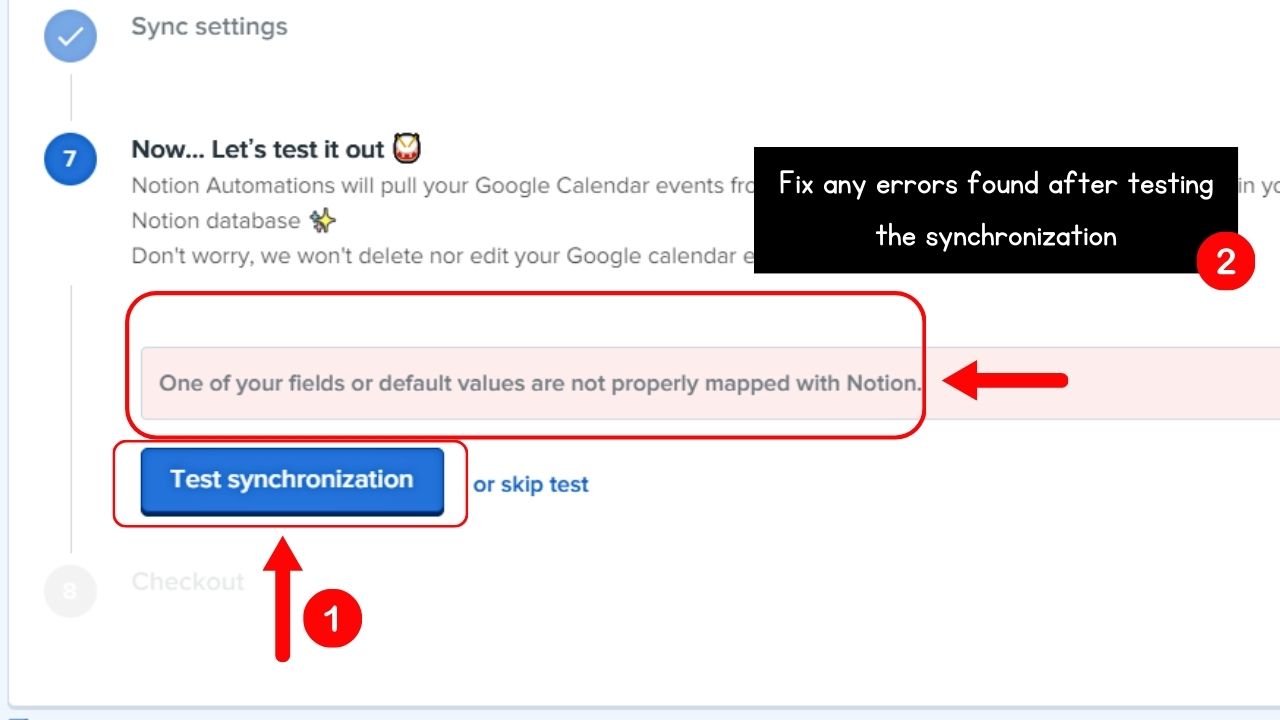
This is an optional step to take. But it’s a crucial one as it will let you see whether your new Notion automation is working or not.
If you want to do the test, click the “Test synchronization” button. Otherwise, select “Skip test.”
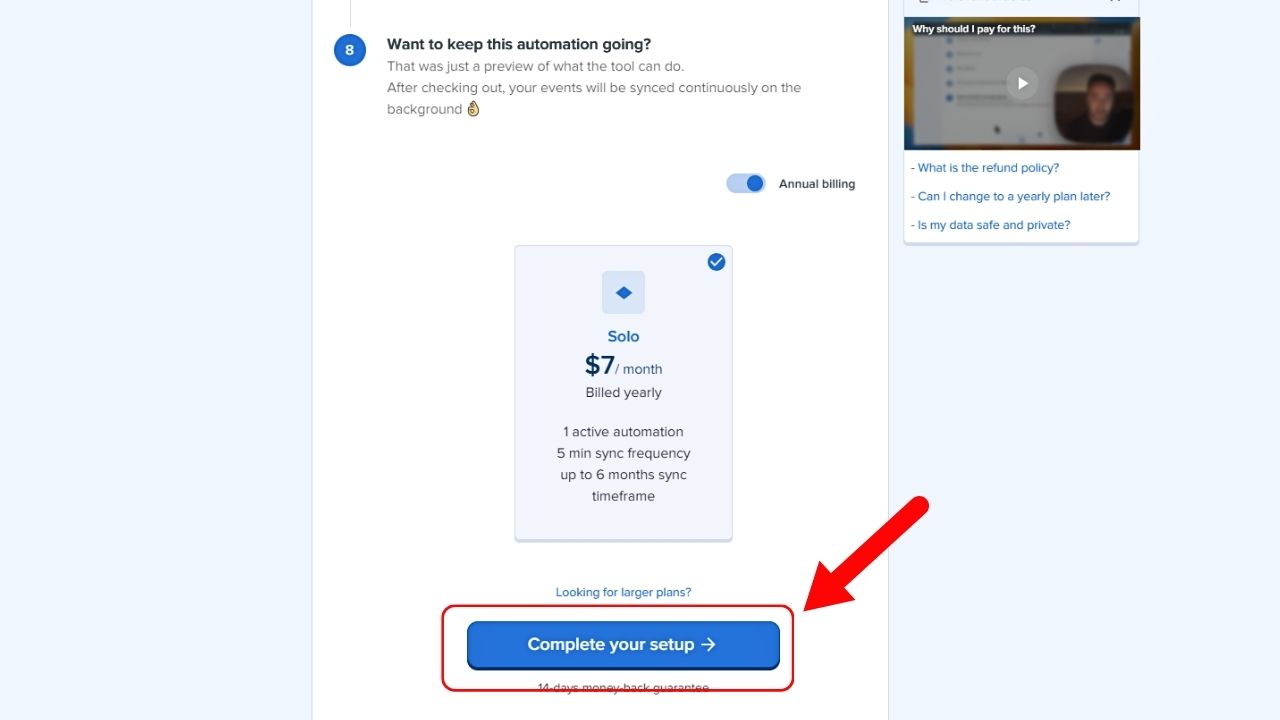
If you haven’t paid for the plan, you’re asked to confirm whether you’ll proceed with the automation you created.
Simply click “Complete your setup” to fully sync your Notion database with Google Calendar.
Conclusion
Synchronizing your Notion workspace with Google Calendar is a wise step to take if you want a seamless organization. With unified dates and deadlines, you stay updated and can easily schedule events or tasks with ease without leaving Notion.
No more slipped tasks or missed deadlines. Doing this feat ultimately makes you a productive powerhouse in no time.
