If you want to stay informed about the weather within your Notion workspace, then add a weather widget! Integrating real-time weather updates has never been easier — if you know how.
Easily keep track of forecasts by adding weather widgets in Notion with these steps.
Table of Contents
How to Add Weather in Notion
Adding weather in Notion works in the same way you add other widgets in Notion. If it is your first time to add a widget, we’ll work you through the process.
Two sites are popular among Notion users when adding weather widgets: Indify and Meteoblue.
Adding Weather in Notion Through Indify
To add any widget from Indify, you first have to sign up for an account. After signing up, log into your new Indify account. Then do these steps.
1. Click the “Weather” widget option.
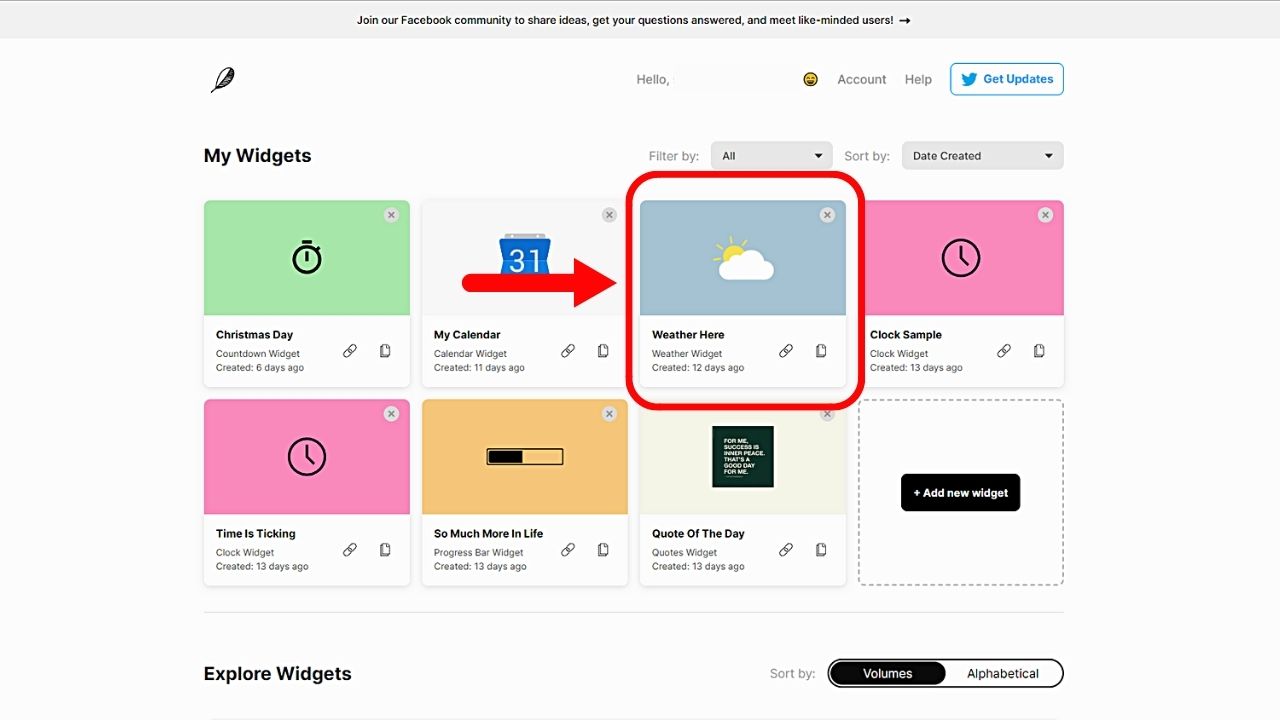
After clicking this widget option, you’ll be redirected to the customization page.
2. Customize the weather widget.
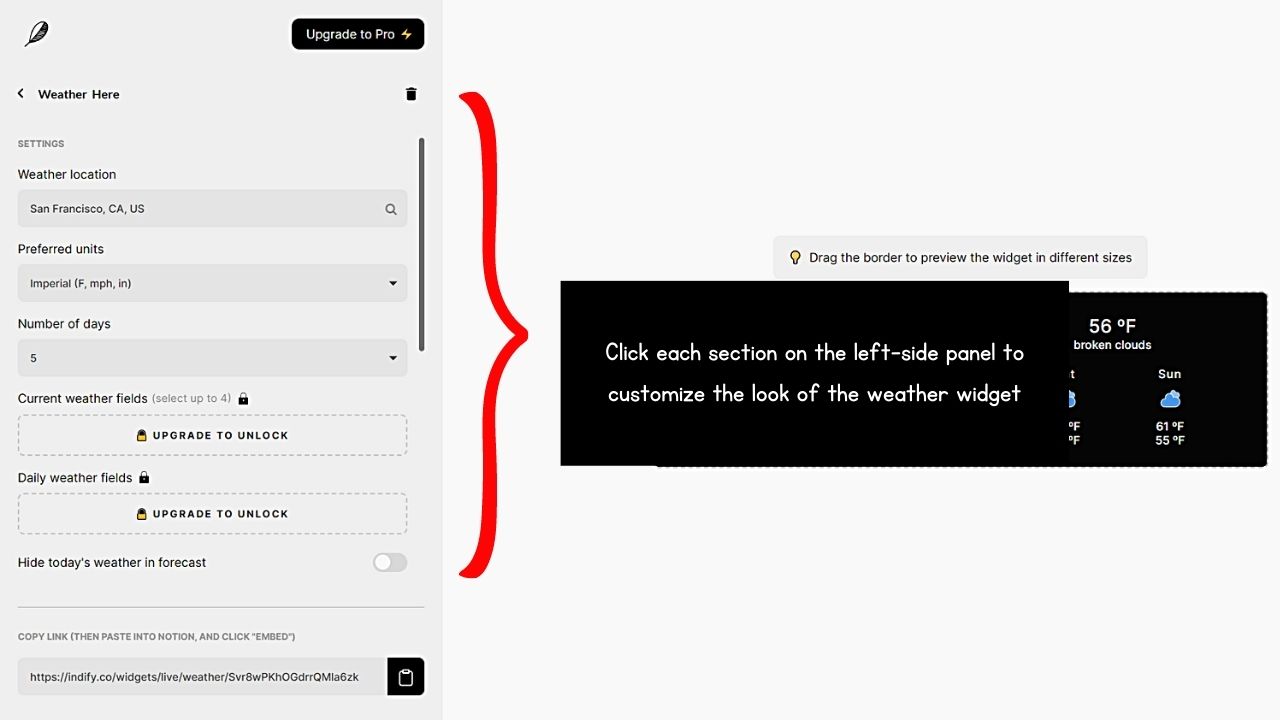
Choose the weather location, your preferred units for the readings, and the number of days that will appear on the forecast.
If you’re on the paid account, you can change the current weather and daily weather fields. You will then see the effects of the customization made in the “Preview” window.
3. Copy the embed link.
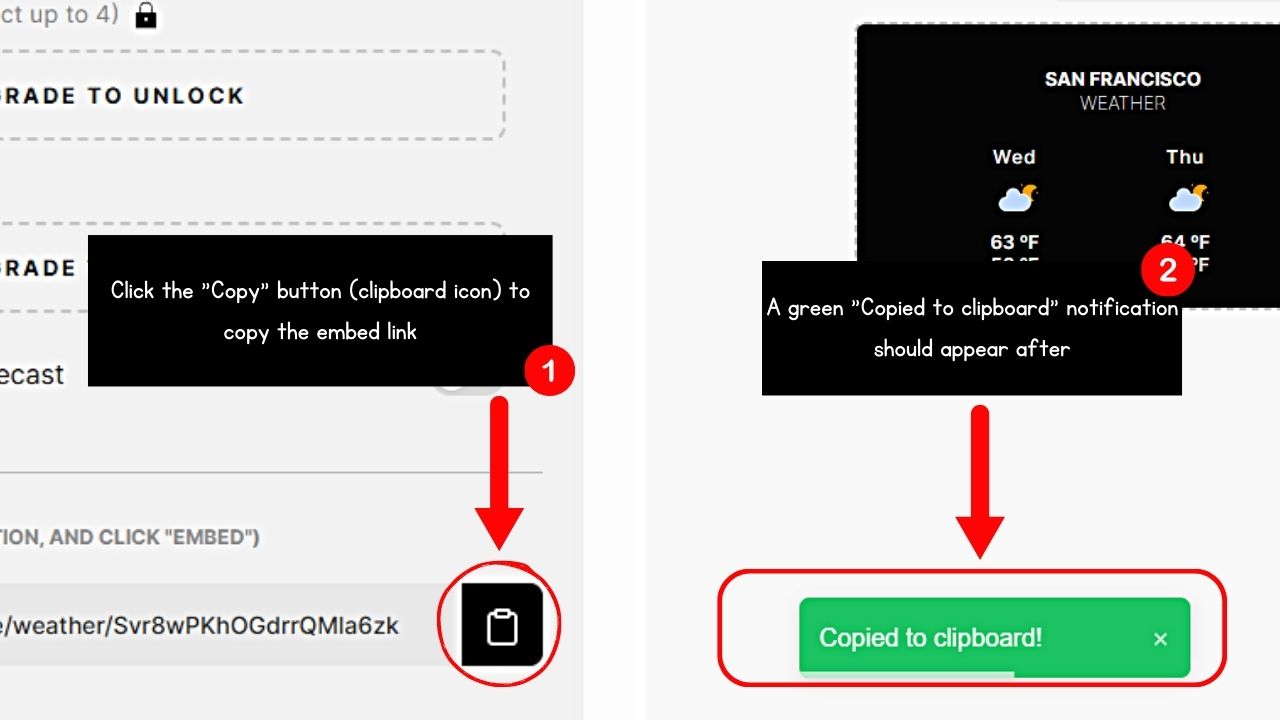
Click the “Copy” button (which takes the shape of a clipboard) until you see a green “Copied to clipboard!” notification.
But make sure you have added all the customization you want. Indify will give you a different embed code each time you change the look of your weather widget.
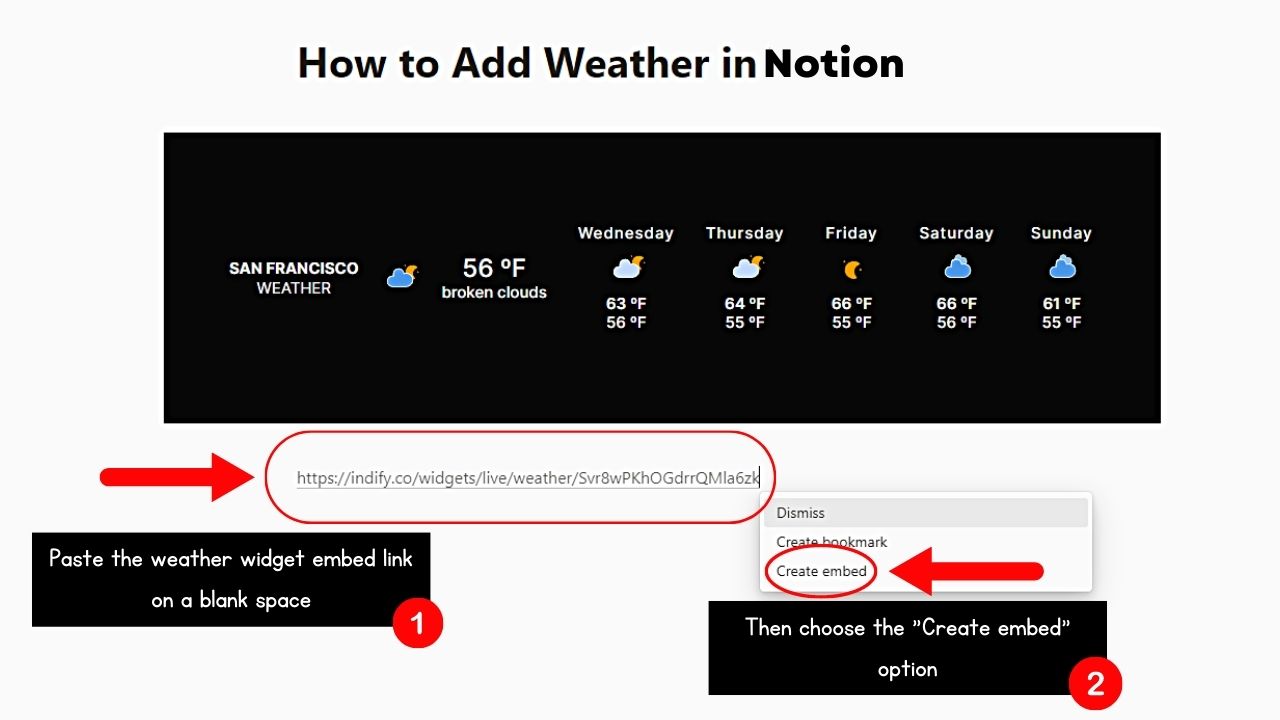
4. Open a Notion page or workspace and paste the widget embed link.
There are two ways to paste the weather widget embed link to your Notion page. The simplest way is to directly paste the link and select the “Create embed” option.
Another way is to type the “/embed” command and click “Embed” from the menu. Then paste the link inside the blank field before selecting the “Embed link” button.
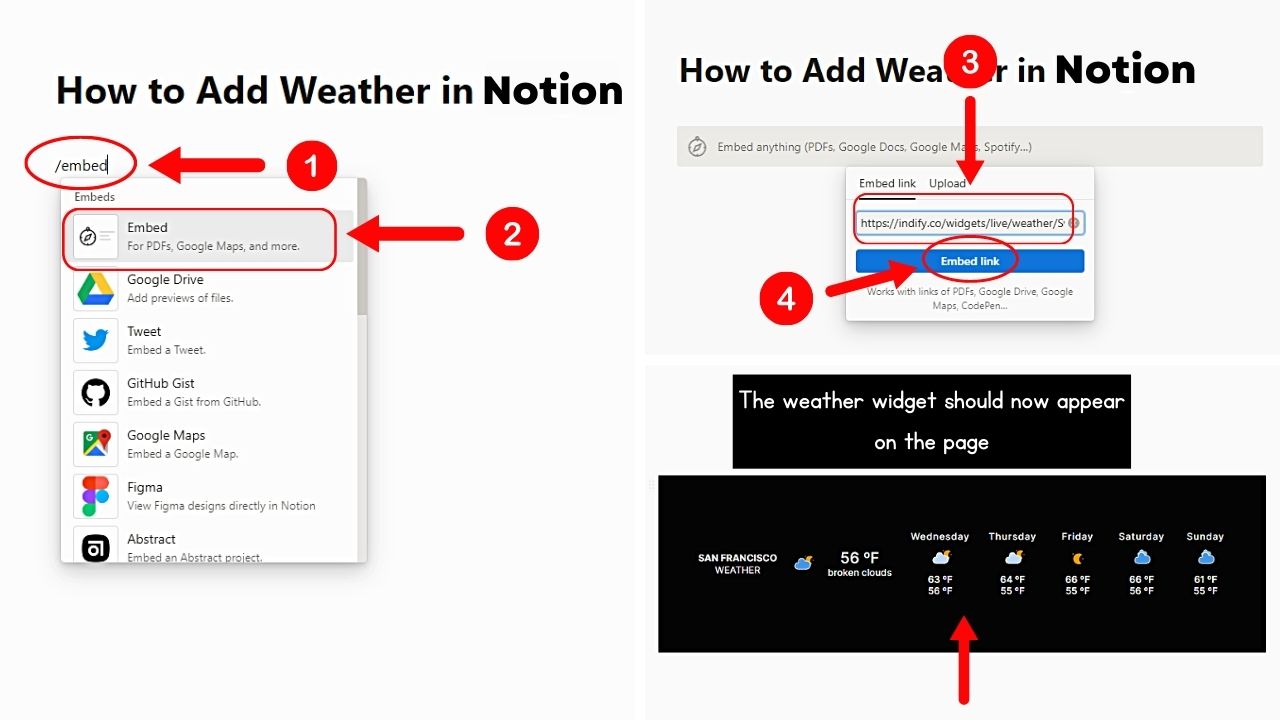
Then, wait for the weather widget to appear. You can then reposition it and resize it by dragging the handles on its corners
Adding Weather in Notion Through Meteoblue
Adding a weather widget to Notion from Meteoblue works almost the same way as Indify. But unlike on Indify, you don’t need to set up an account to customize your weather widget.
Once you’re on the Meteoblue website, follow these steps:
1. Click “Widget.”
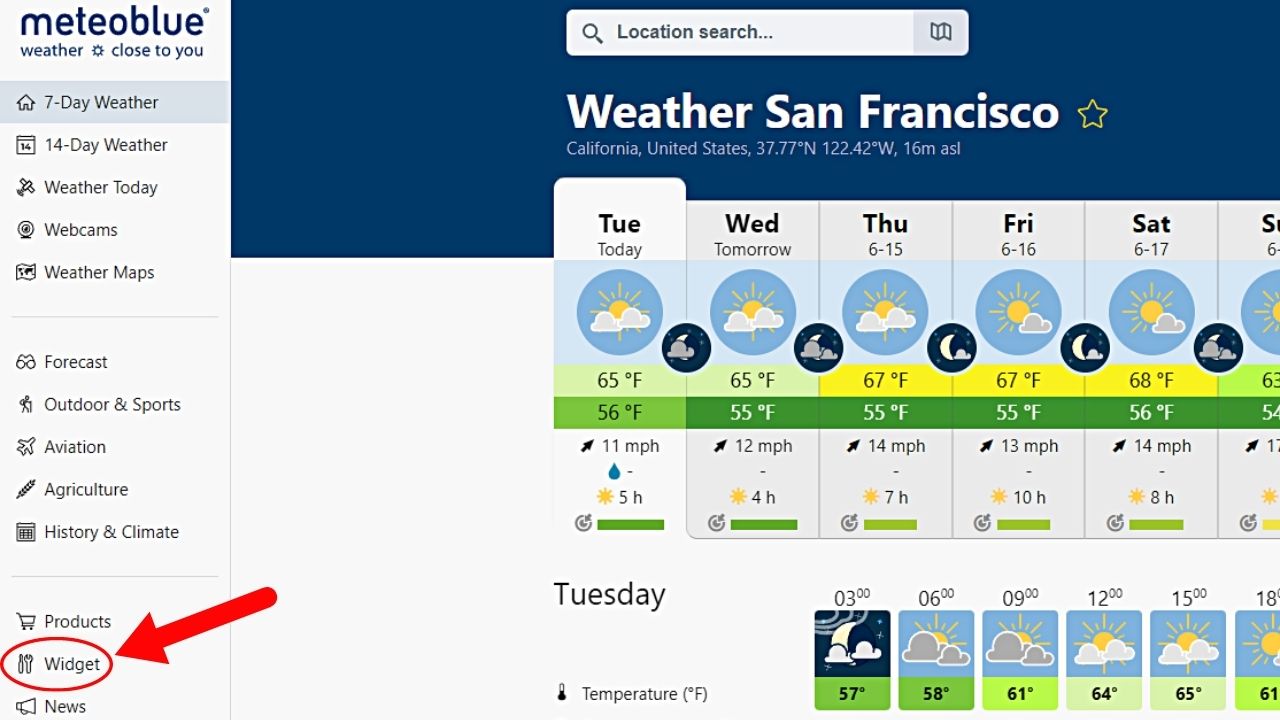
This option appears on the left-side panel between “Products” and “News.”
2. Choose the “Widget 3h” option.
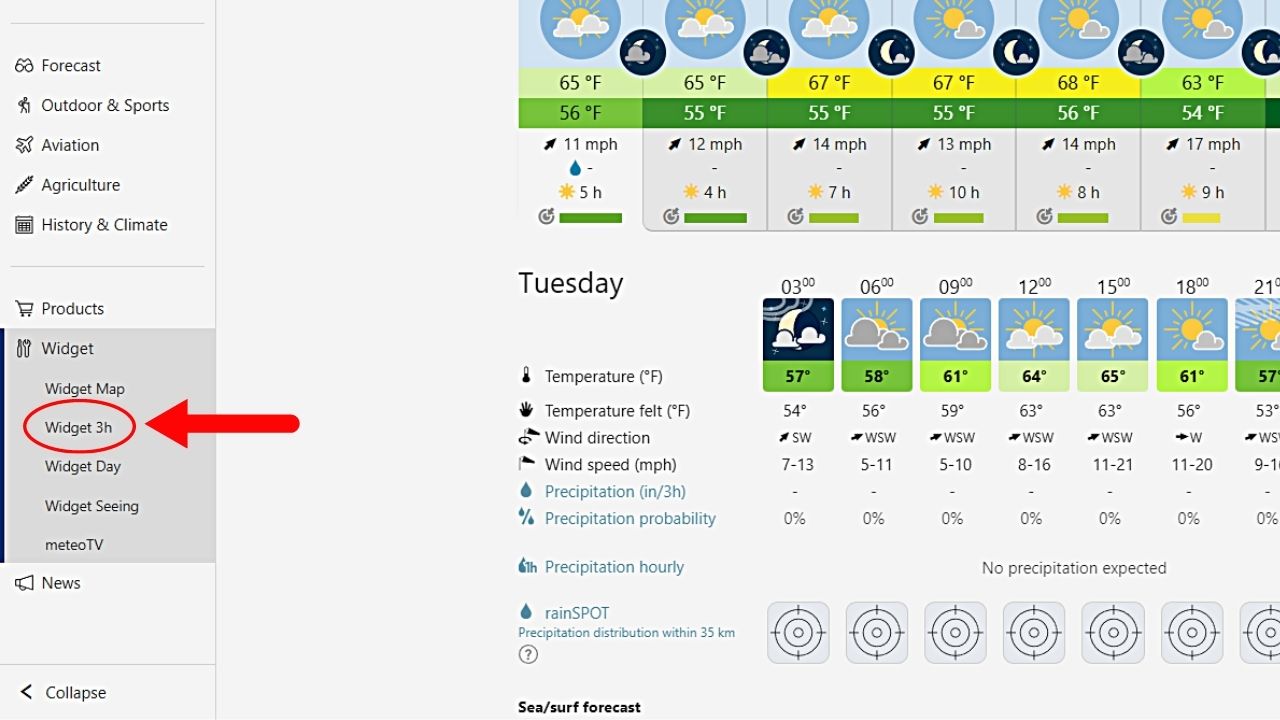
There are five options under “Widget.” But since you want to add a weather widget, the “Widget 3h” option is the perfect fit.
You’re then redirected to the “Configure your widget” page.
3. Configure the weather widget.
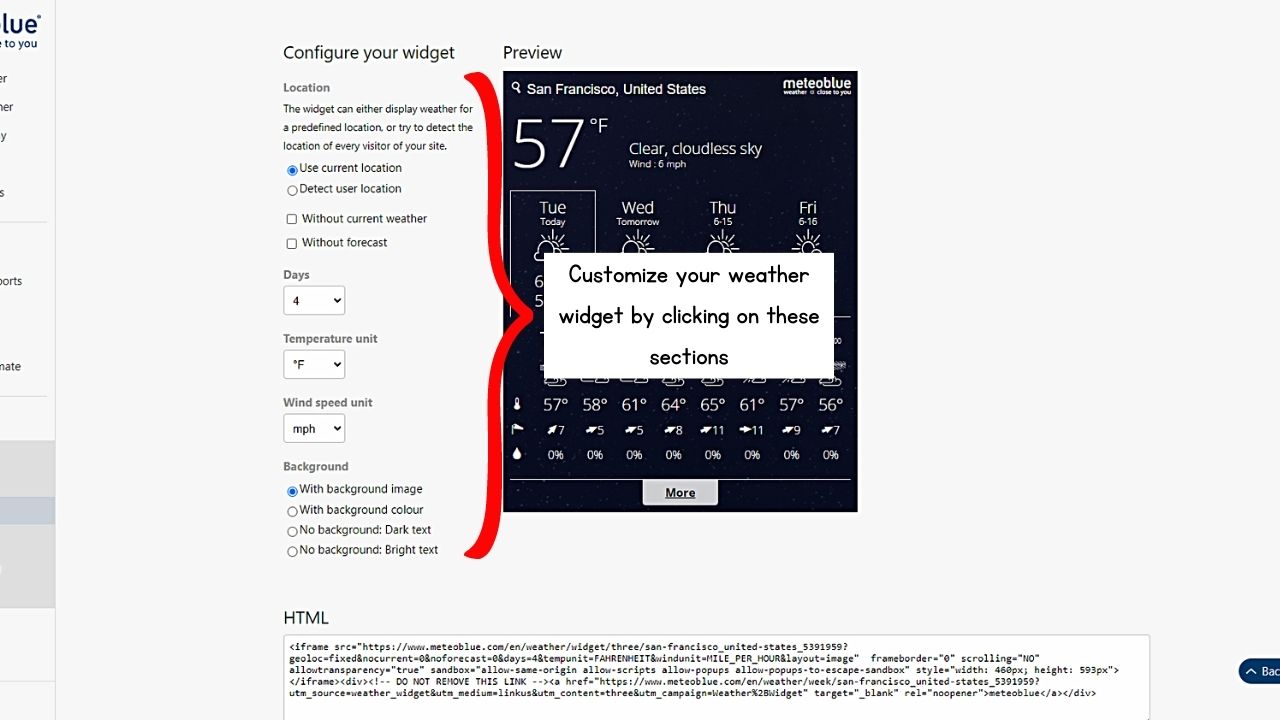
Then choose what location to use, the number of featured days, whether there will be a forecast or not, and what temperature and wind speed units will be used.
If you want, you can choose whether the weather widget will have a background and dark text or not. Just make sure to finalize the customizations.
4. Copy the embed link.

Unlike on Indify where you can click a “Copy” button, you’ll have to highlight the entire embed code in the “HTML” section. This is called the iframe.
Then press the “Ctrl/Cmd + C” keys after highlighting the code.
5. Open a Notion page or workspace and paste the widget embed link.
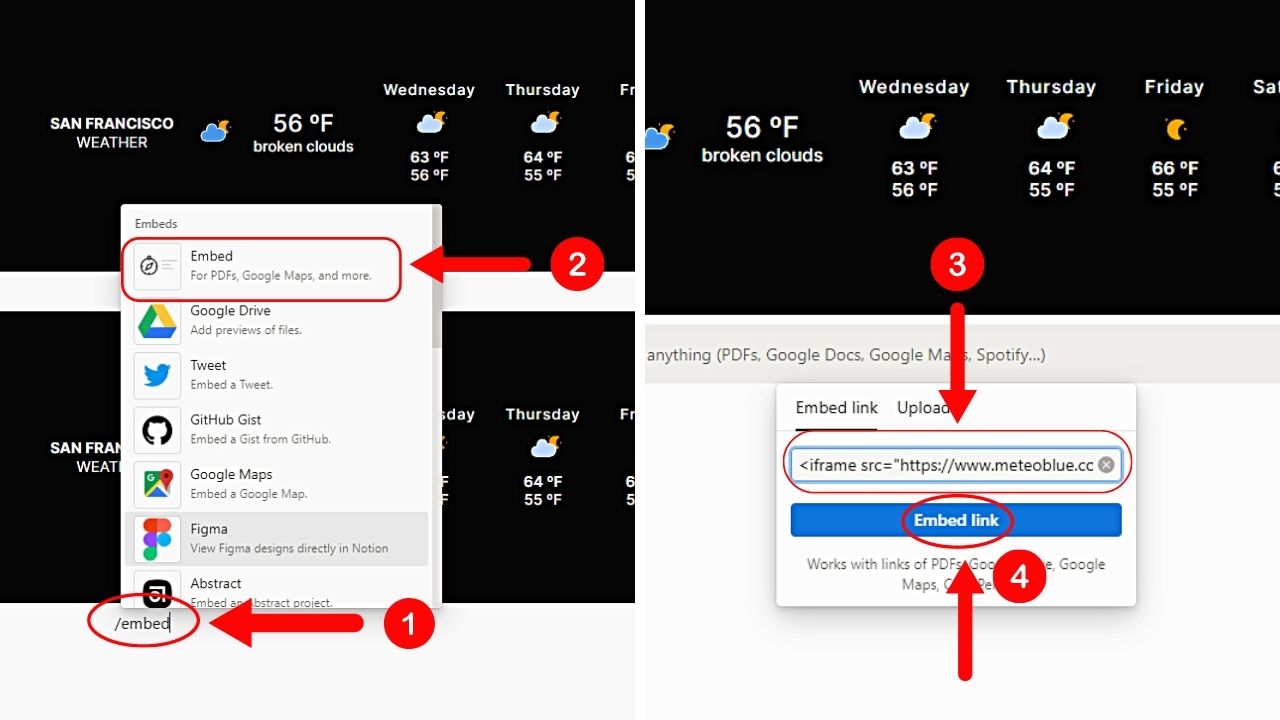
Type the “/embed” command, select “Embed,” and paste the embed link before clicking “Embed link.” Then wait for the weather widget to appear.
If you want to add more widgets to your Notion workspace, embed a calendar using the same method.
Conclusion
Integrating weather forecasts in Notion is one way to enhance your productivity and stay informed. By leveraging widget websites, you can seamlessly incorporate real-time weather updates into your workspace.
Hence, add your personalized weather widget in Notion and be updated on the forecast!
