Do you need to design a tasks page for your client in Notion? You can easily do so by adding columns without even inserting a table!
With recent updates, you can even divide a column into subcolumns if you want to. You will know all about these if you keep reading.
Table of Contents
How to Add Columns in Notion
Columns are neat ways of organizing ideas or data into a table-like structure. The process to achieving this look is pretty simple — provided you do it on a computer.
This is because the “Columns” feature of Notion doesn’t work on the mobile app (both Android and iOS). Though you can still view those columns, they’ll appear as a single column instead.
Regardless, here is the process of how you add columns in Notion.
1. List all the column titles on the page.

Type in a way that they look like a simple list. If you need a guide, you can add “Column 1, Column 2…” labels.
2. Click on the 6-dot button of a text and drag it.
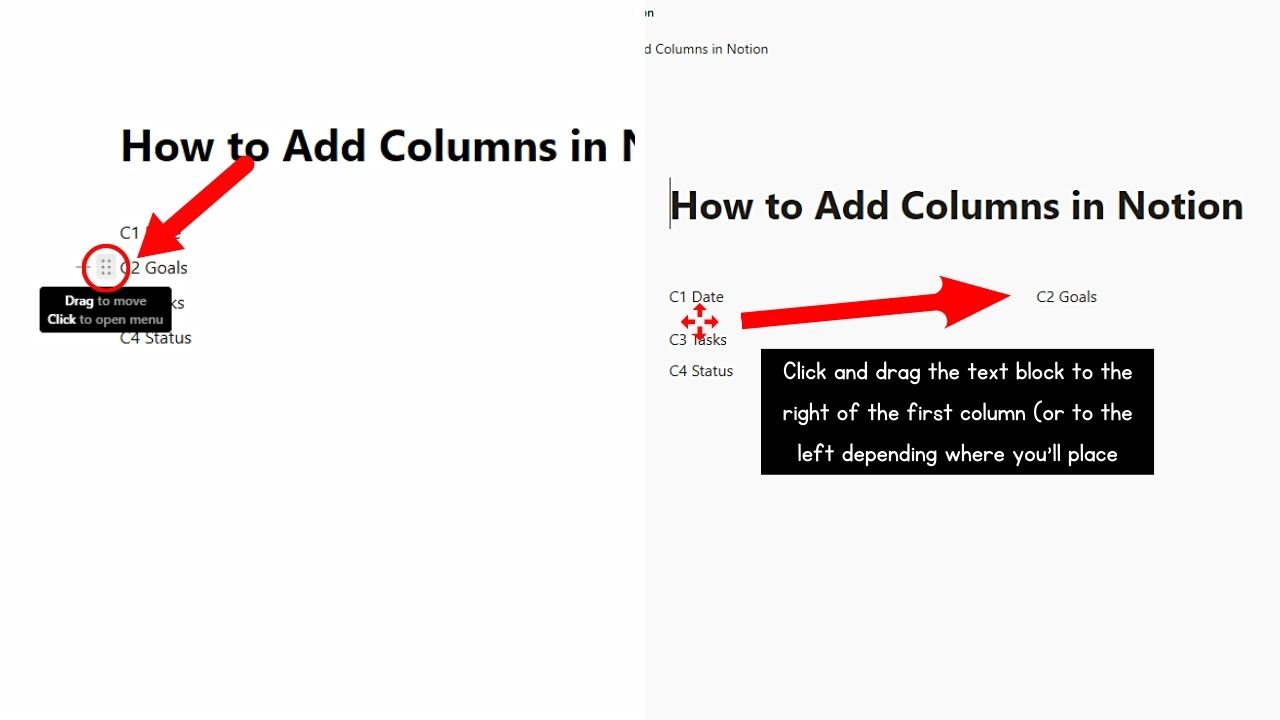
This drag-and-drop handle is found on the left side of the text, beside the “+” button.
Make sure you see the blue guides before releasing your hold on the text. You’ve now created a new column.
Repeat until you have all the columns in place.
3. Format the column headers.
You can make them bold or use the “Heading” text formatting option. But if you want them to look aesthetic, turn them into “CallOut” blocks instead.
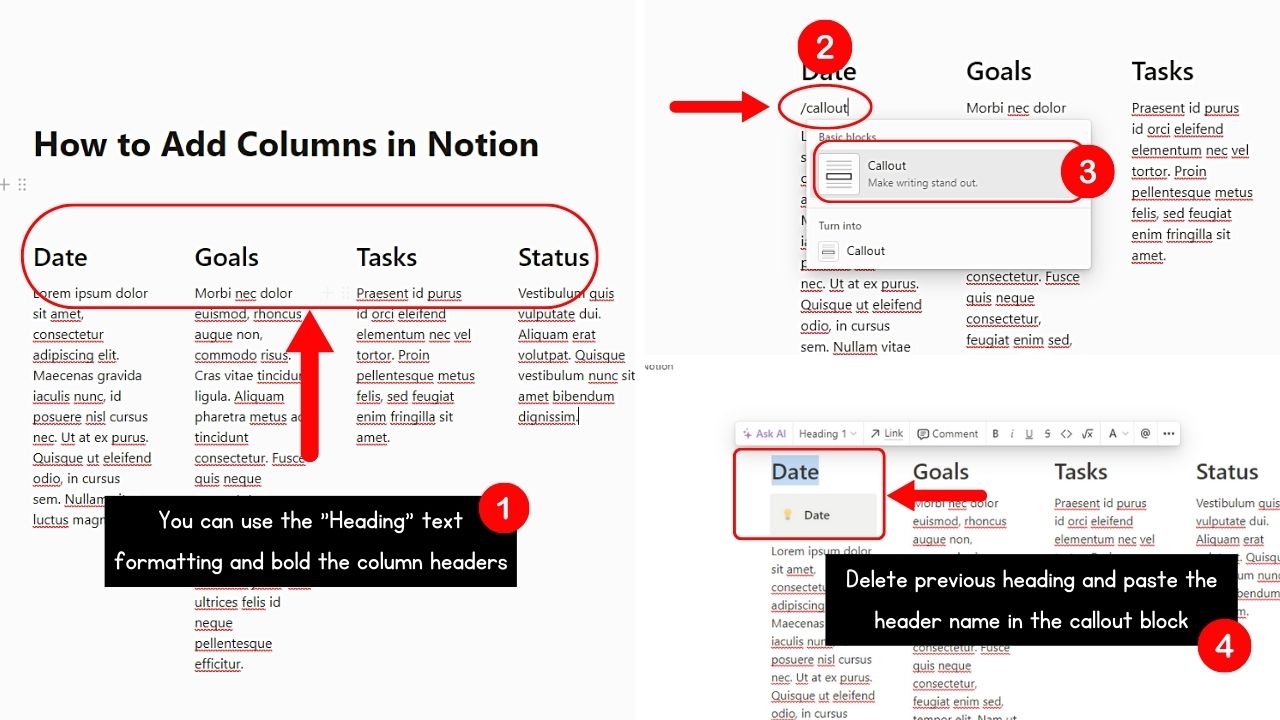
There are 2 ways to add them. One, you can press “Enter” and type “/callout.” Choose the “Callout” option. Once the callout block appears, copy and paste the column header into it. Delete the previous column header you placed and format it accordingly.
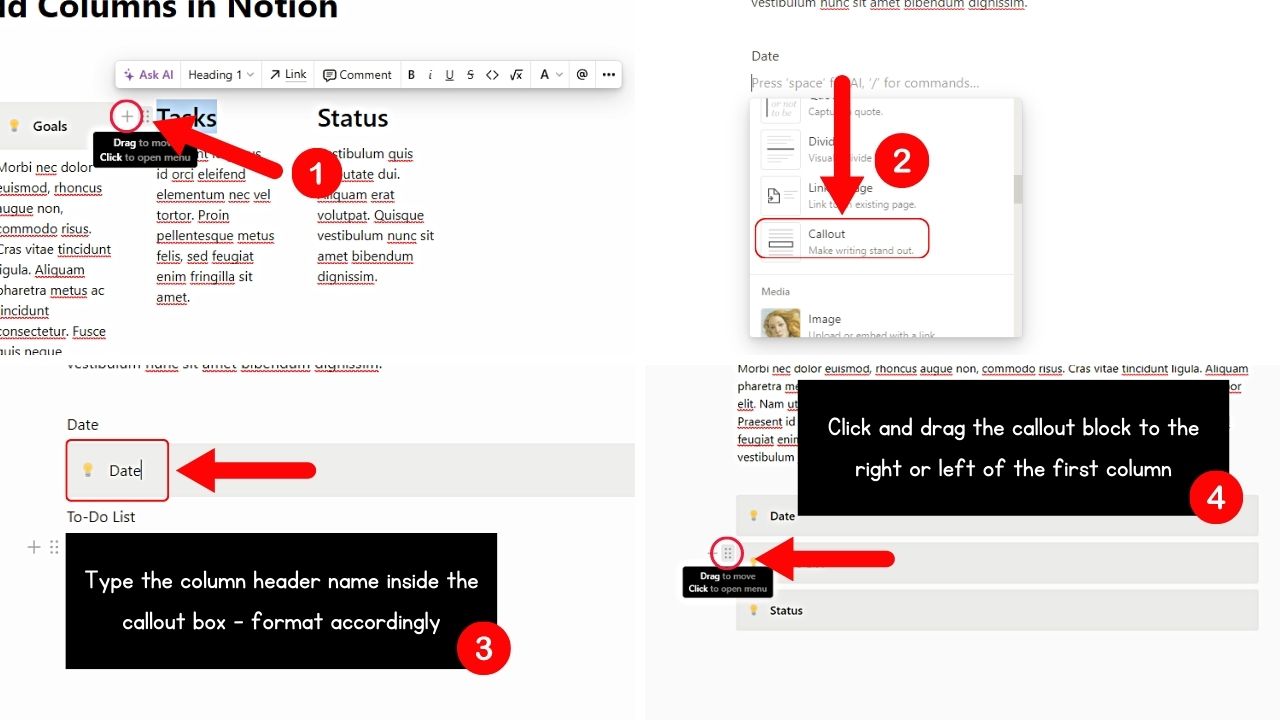
Another way is to click the “+” button, scroll down on the menu and select “Callout.” Then add and format the text in it. Then click and drag the 6-dot handle and place the callout header block where you want it.
4. Add visible column divider lines.
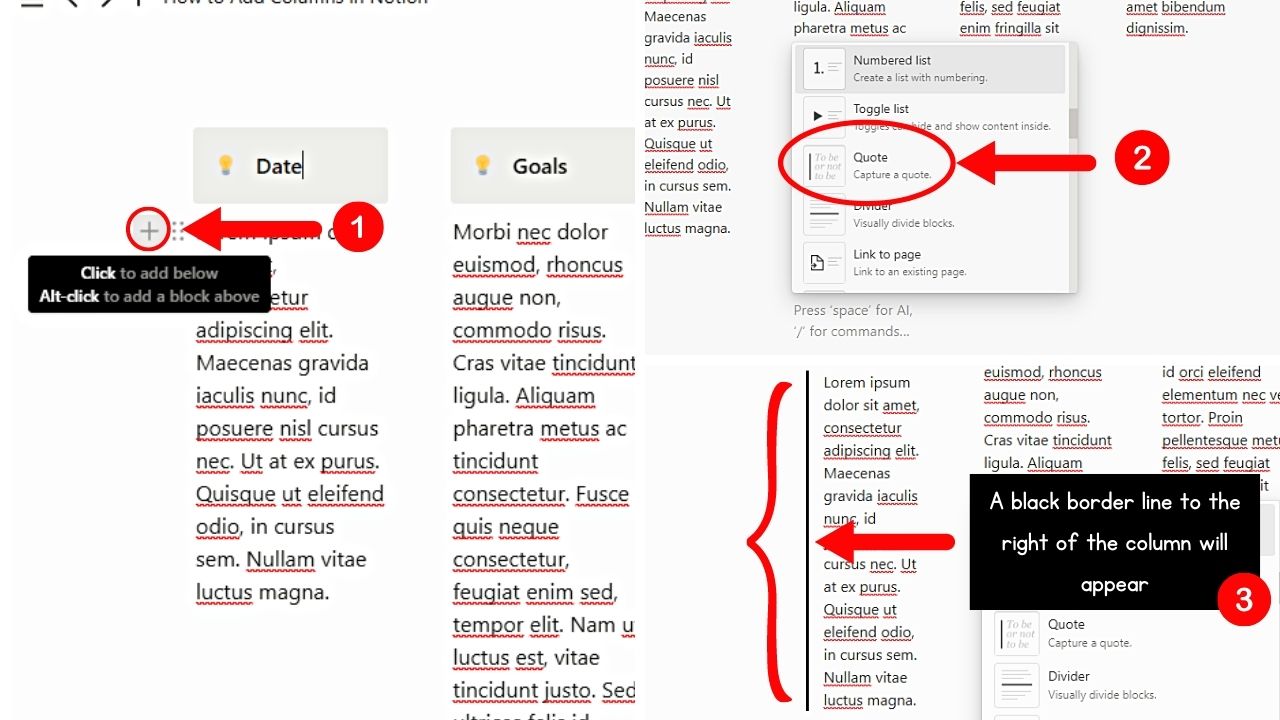
By default, the columns you’ve made have “invisible divider lines between them. There is no feature to make those divider lines visible, but you can use a “Quote” block instead.
Click the “+” button, scroll down, and click “Quote.” A block with a black line to the left will be seen. If you have added text before the “Quote” block, just copy and paste the text in it.
5. Adjust the column widths.
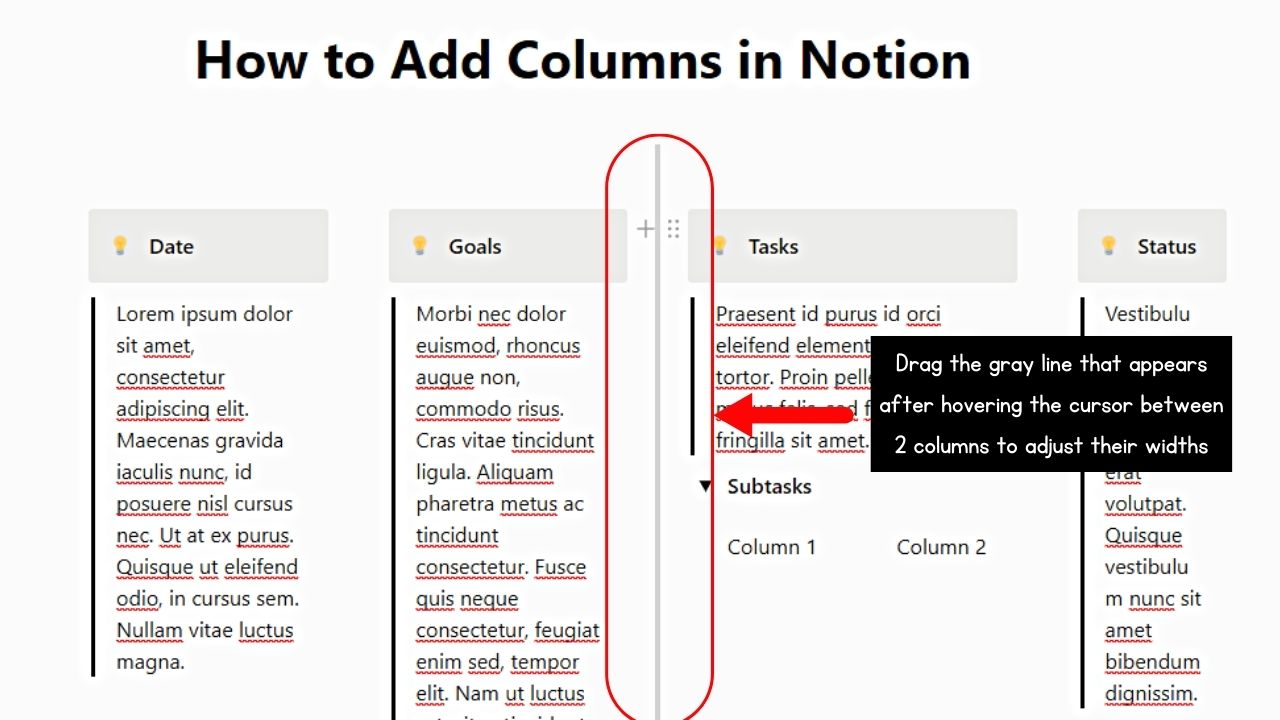
Do this by hovering your cursor in the middle of two columns until you see a gray line between them. Click and drag the gray line until you get the right column width.
6. Add subcolumns in a column if needed.
To do this, add an entry under the first entry of the main column, type “/toggle,” and select “Toggle List.” Click the “right arrowhead” button to add another entry below it.
Then type “/” and scroll down to click the column number options available (2 columns to 5 columns). This initially was under the “Advanced Blocks” section but is now seen in the “Turn Into” section.
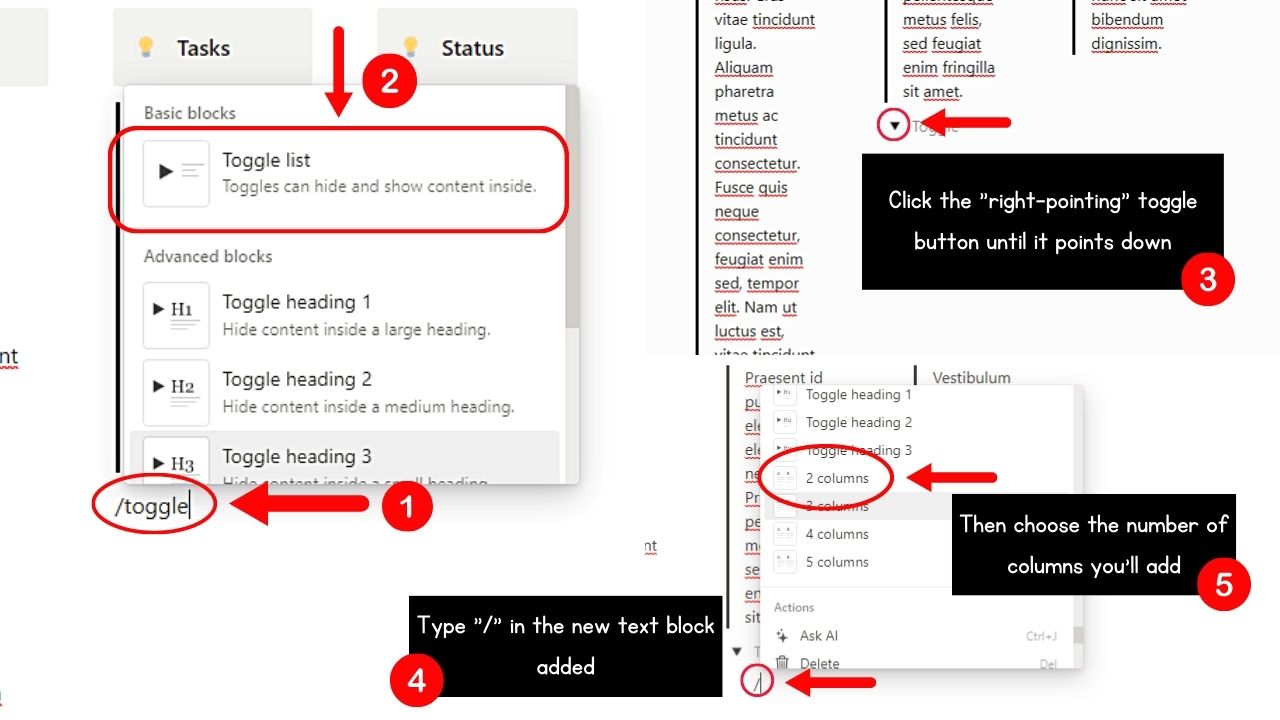
Type the names of the subcolumns before you click and drag the 6-dot handle of the second subcolumn to the side of the first. Repeat until all subcolumns have been added.

Conclusion
Adding columns in Notion is one of the many ways to organize your ideas and make them clear to everyone who sees it. With the steps above, you can neatly classify data and present them concisely.
So, what is stopping you? Add columns to your Notion workspace now!
