If you want to view your Notion databases on Excel or Google Sheets, you can easily do so if you know how to export them. This streamlines your process of analyzing data in any spreadsheet tool you prefer.
Continue reading below on how to export Notion table to Excel or Google Sheets.
Table of Contents
How to Export Notion Table to Excel or Google Sheets
It’s easy to embed or import Google Sheets to your Notion workspace once you know the steps. It’s like how you embed a Pinterest board to the Notion page.
However, reversing the process (exporting the Notion table to Excel or Google Sheets) is also easy. Though you can connect your Notion database with third-party tools, you won’t need to if you know how.
Granting that you have already opened the Notion page with the table in it, do the following:
Note: Notion table here refers to databases.
1. Select the 3-dot icon.
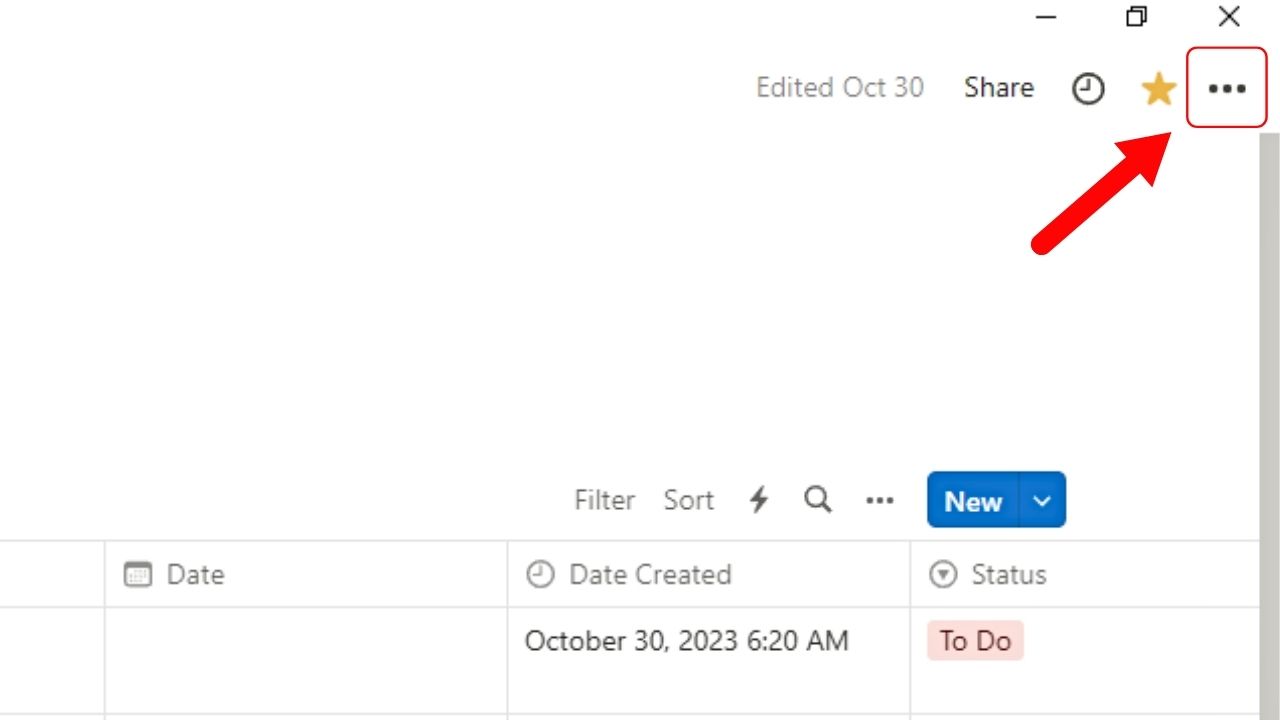
You’ll find this in the upper right corner of the Notion page with the database. A dropdown menu then appears.
2. Click “Export.”
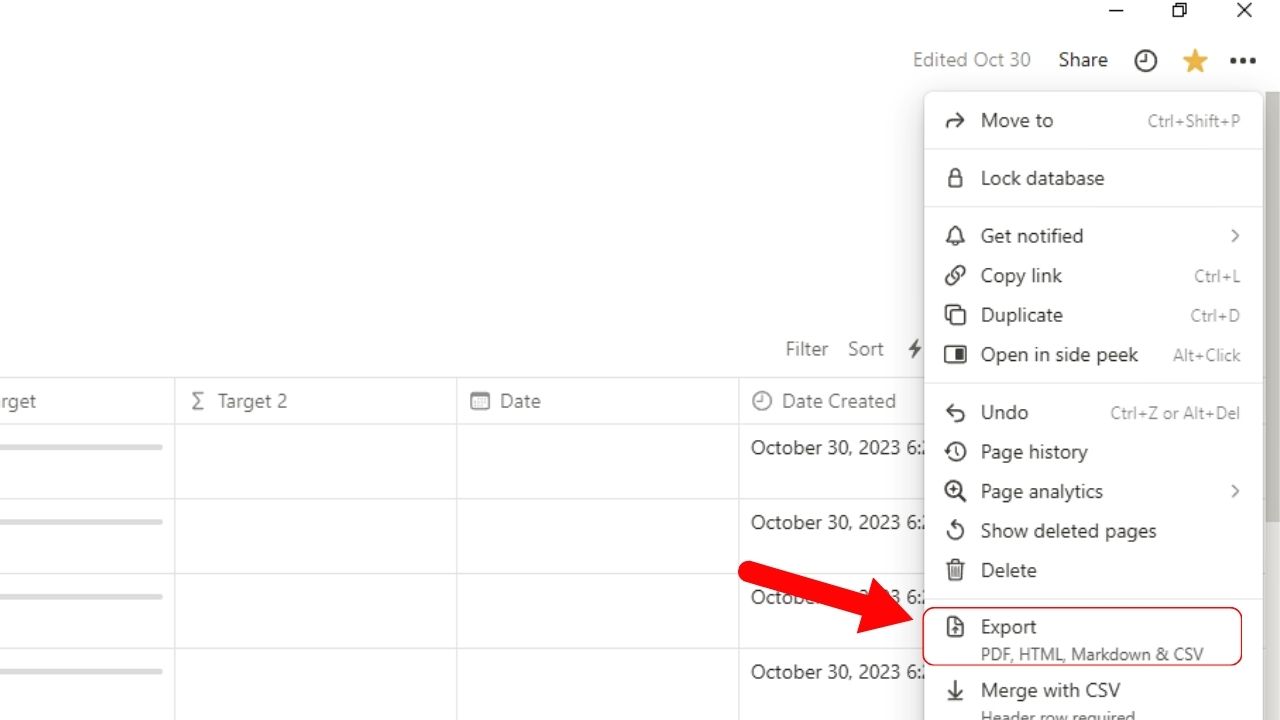
This option is between “Delete” and “Merge with CSV,” the option you’ll click if you want to merge databases in Notion.
A pop-out window then appears in the middle of the Notion page.
3. Select the “Export Format” option.
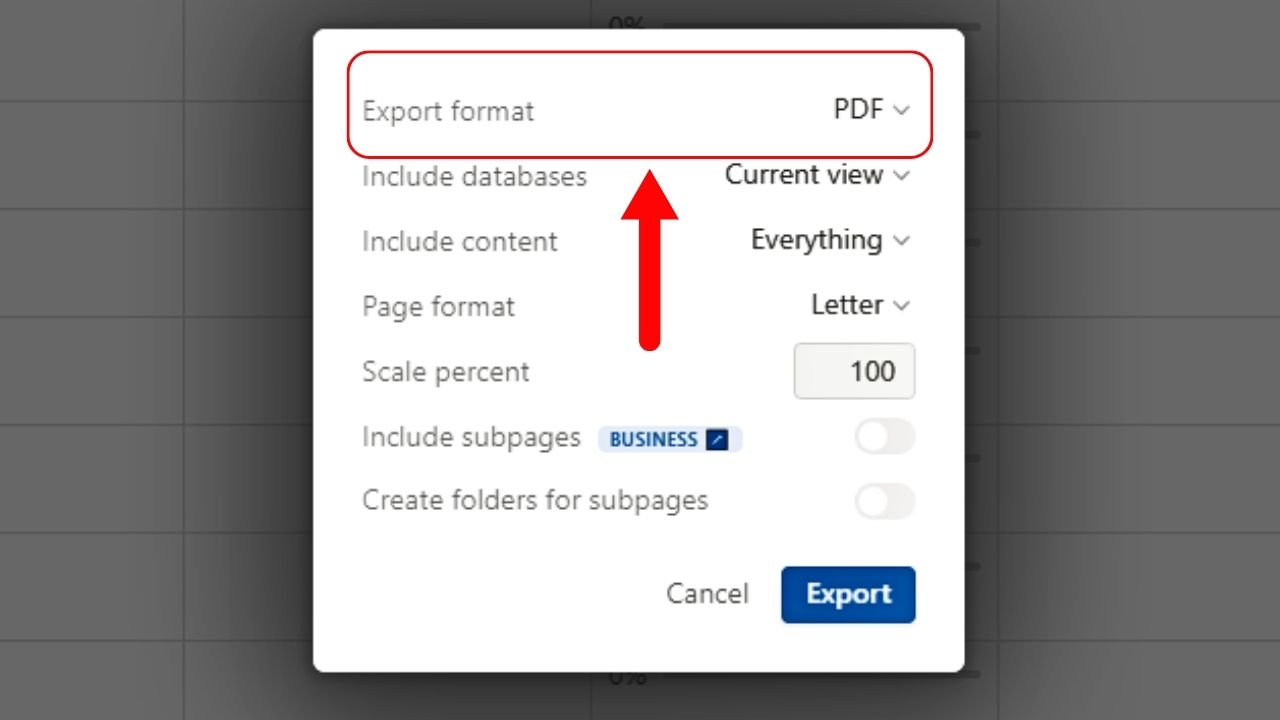
This is the first option you’ll see on the pop-out window.
4. Click the “Markdown & CSV” option.
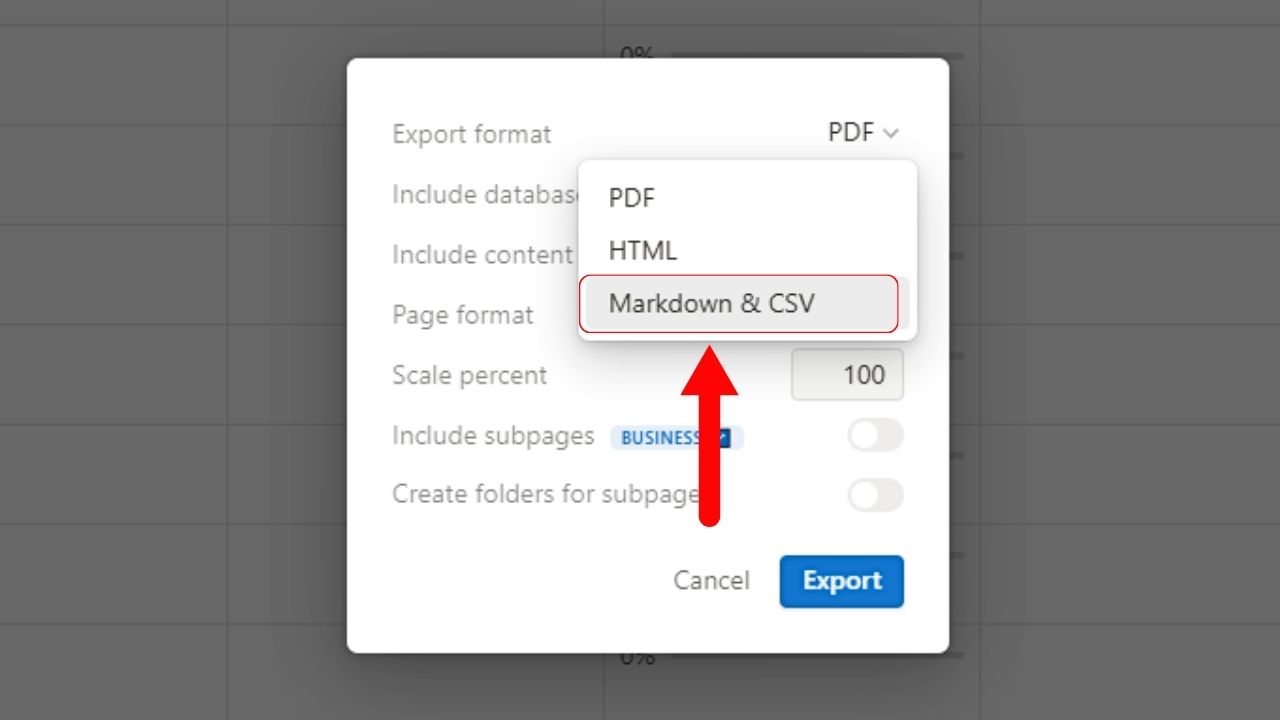
This is the last of the 3 format options, including the PDF format, on the dropdown menu. You’re redirected to the main pop-out window after selecting a format.
5. Click the “Export” button.
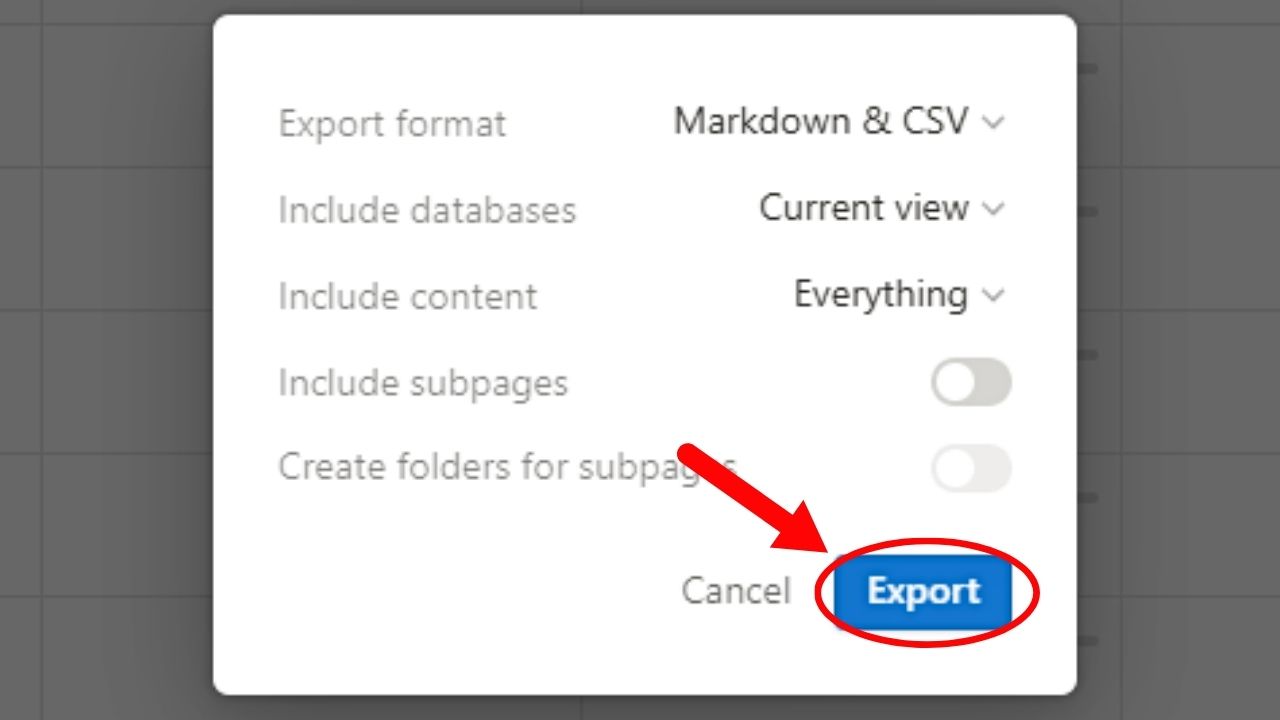
This is the blue button on the pop-out window. An “Exporting” notification then appears on the screen.
6. Select a folder and click “Save.”
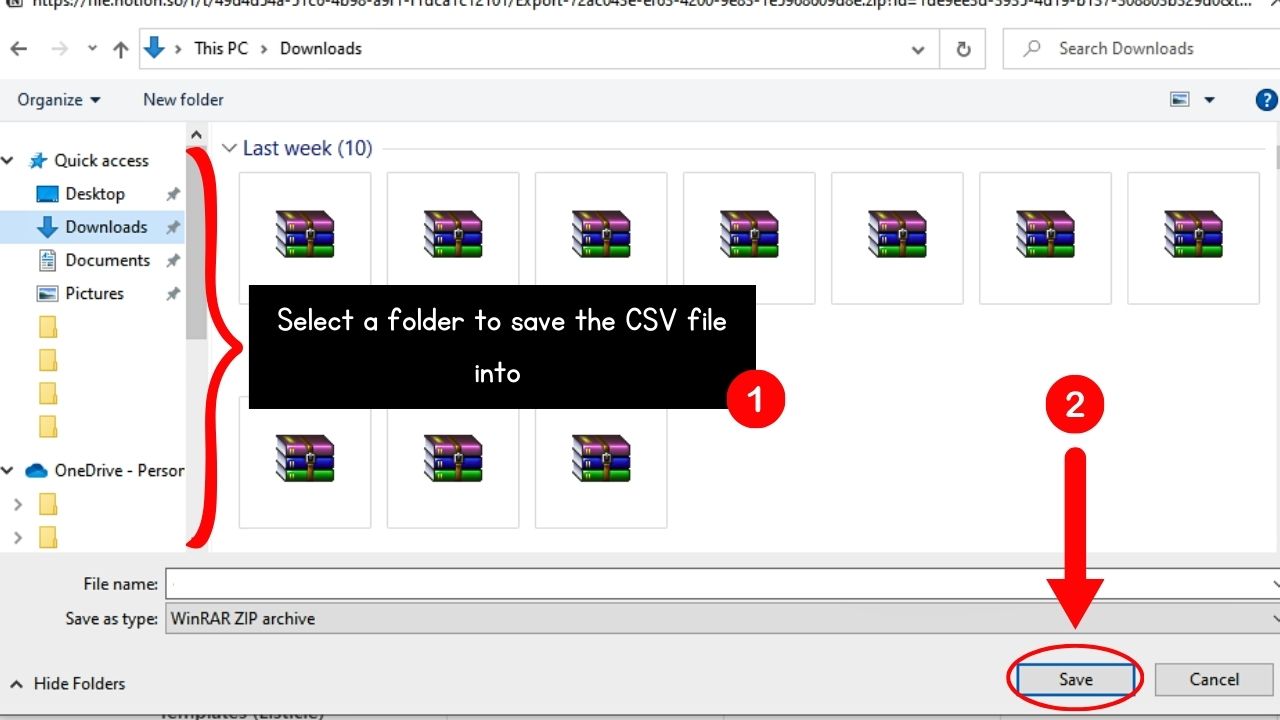
Select any folder you want for the ZIP file of the Notion database will be saved. Then click the “Save” button on the window.
7. Extract the CSV files from the ZIP file before saving them to a folder.
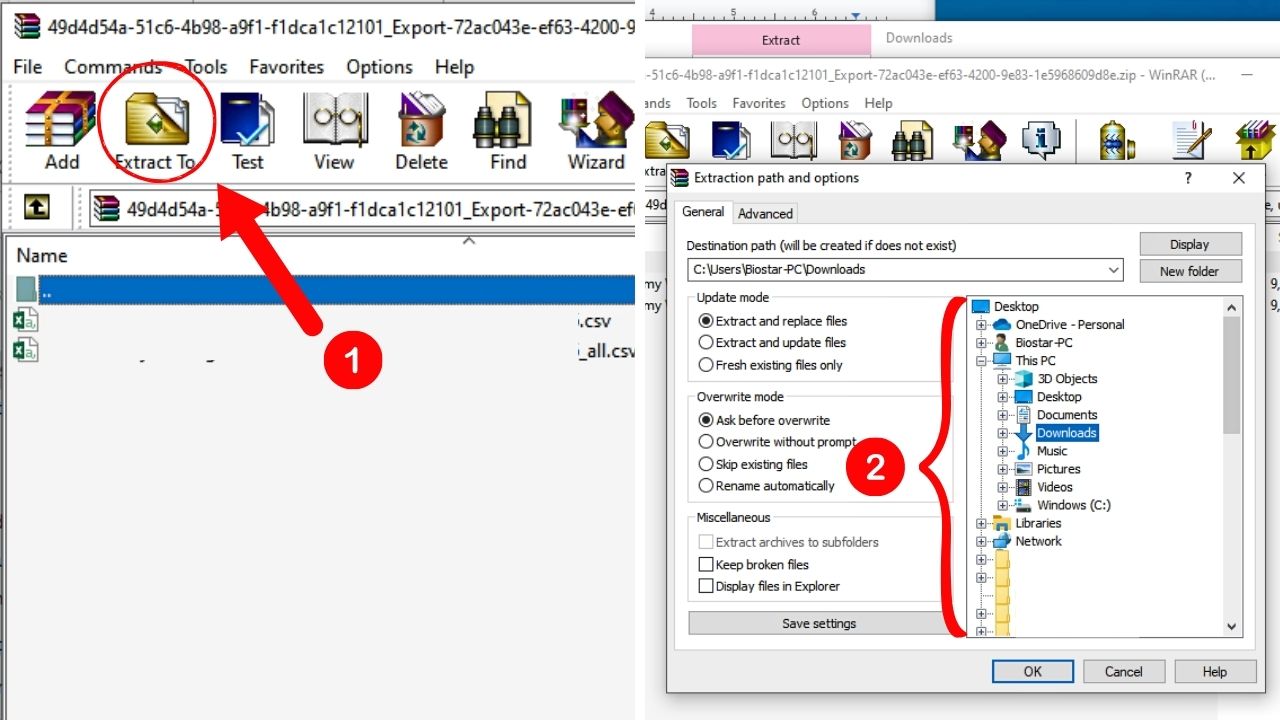
Click the “Extract to” button on the WinRAR window and select where to save the CSV files.
8. Open in Excel the CSV file.
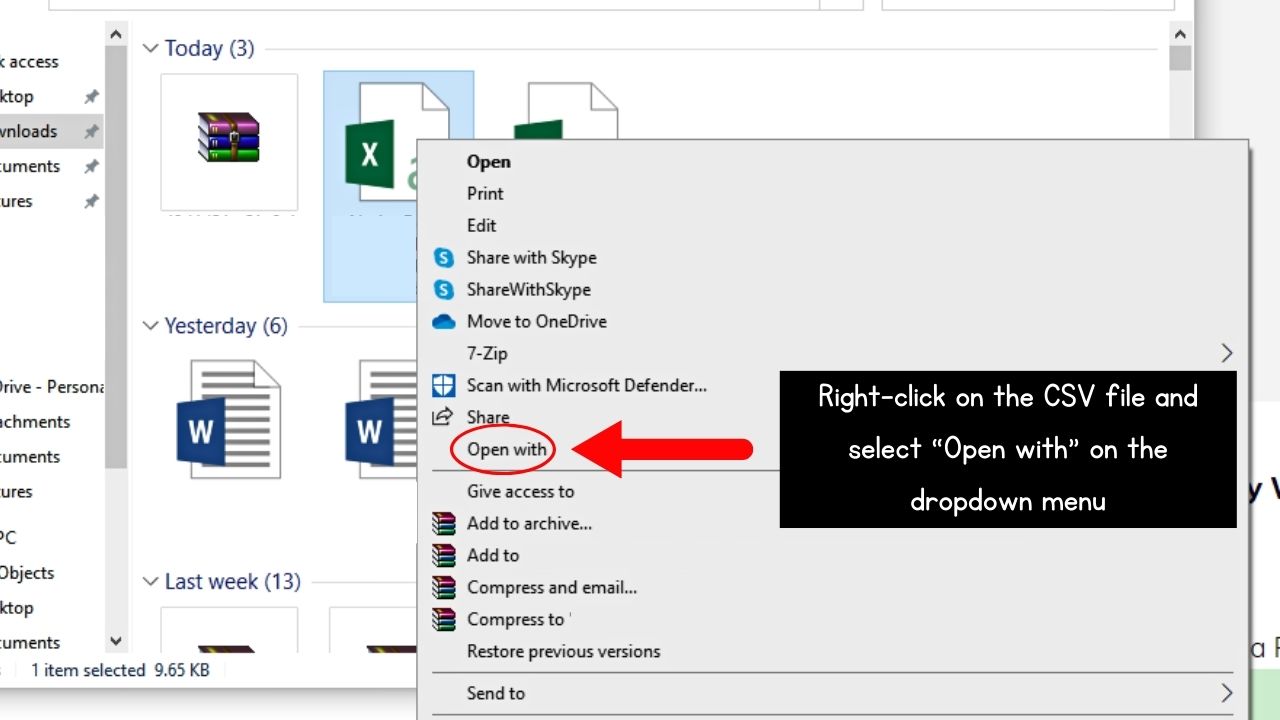
If you prefer to open the downloaded CSV file on Excel, right-click on the file. Then select “Open with.”
On the submenu, select “Excel.” You should now see the Notion table appear in a new Excel sheet.
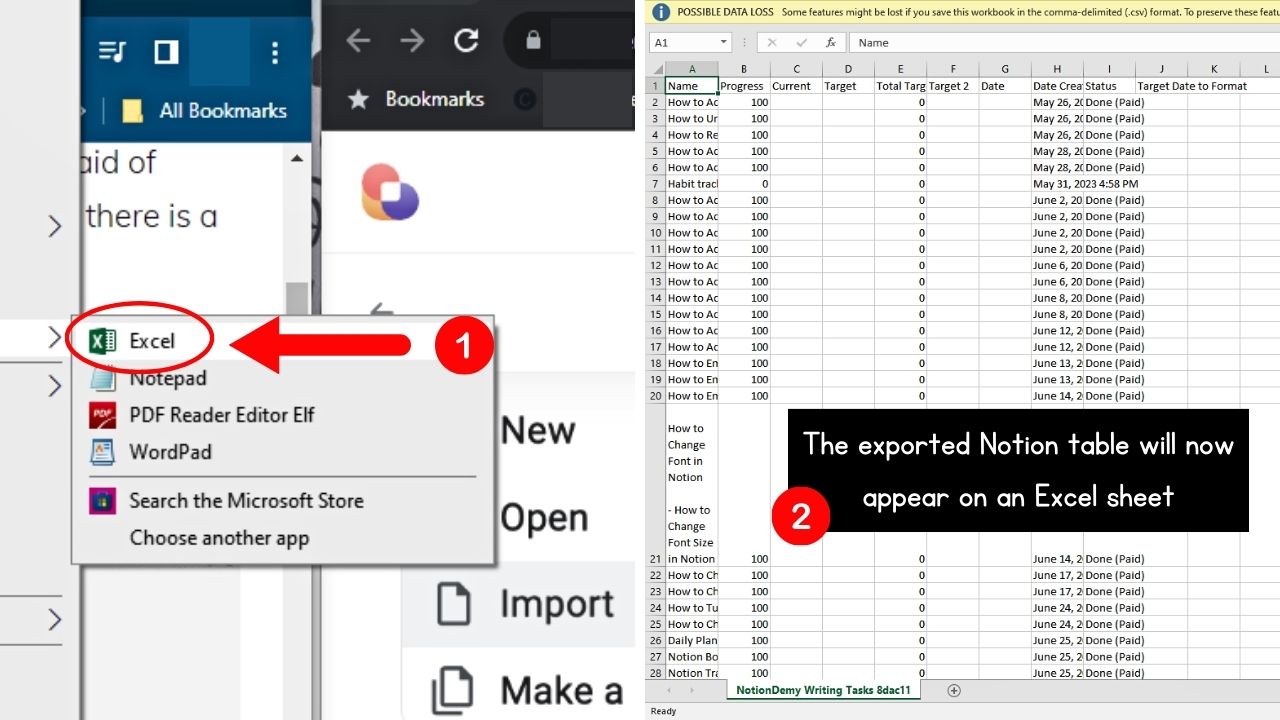
Skip this step if you prefer to open the Notion table in Google Sheets.
9. Open a new Google Sheets tab and select “File.”
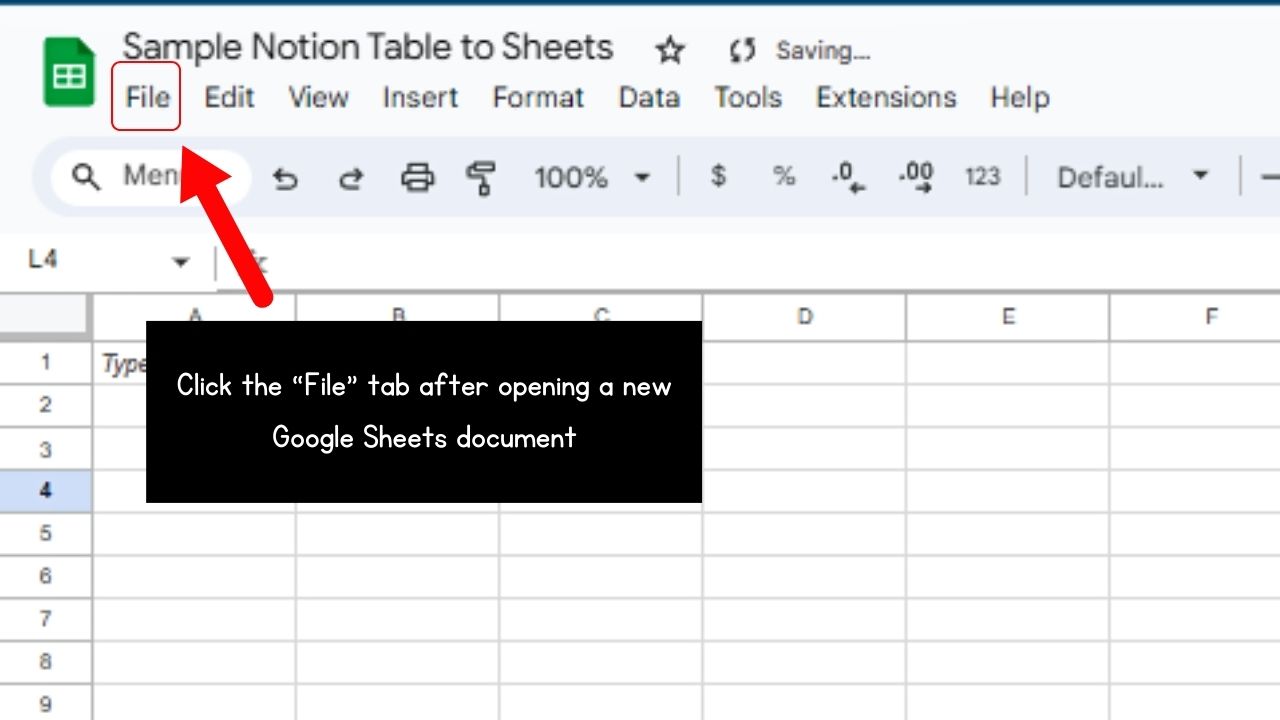
Type “sheets.new” on the address bar and select the “File” tab on the Excel ribbon.
10. Select “Import.”
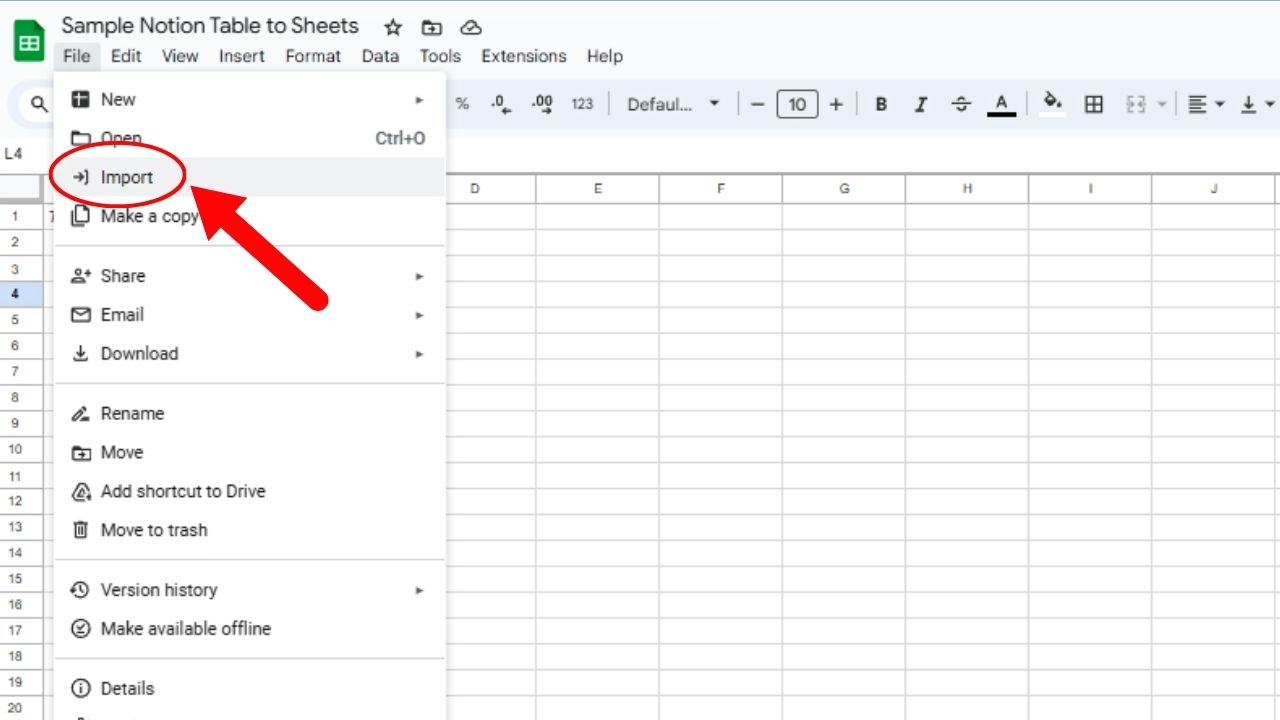
This is the third option found on the “File” dropdown menu.
11. Click the “Upload” tab and select “Browse.”
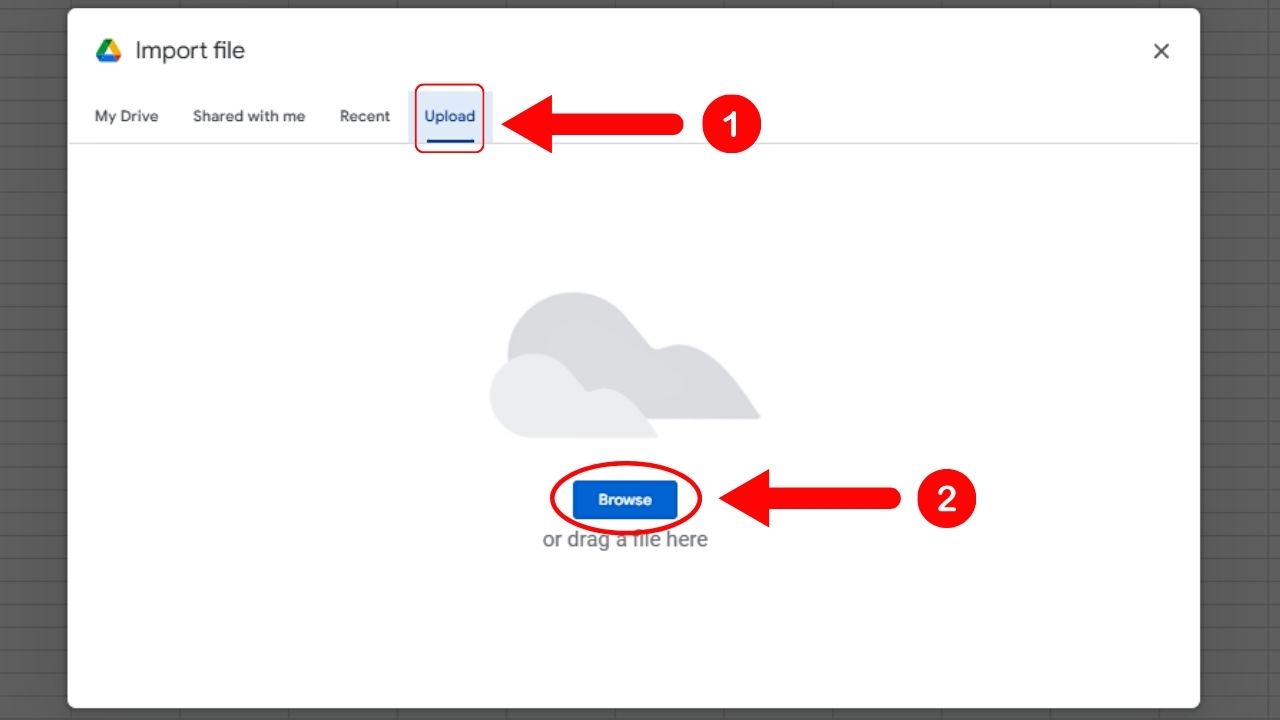
“Upload” is the fourth tab on “Import file.” You’ll then see the “Browse” button in the middle of the said window.
12. Open the CSV file.
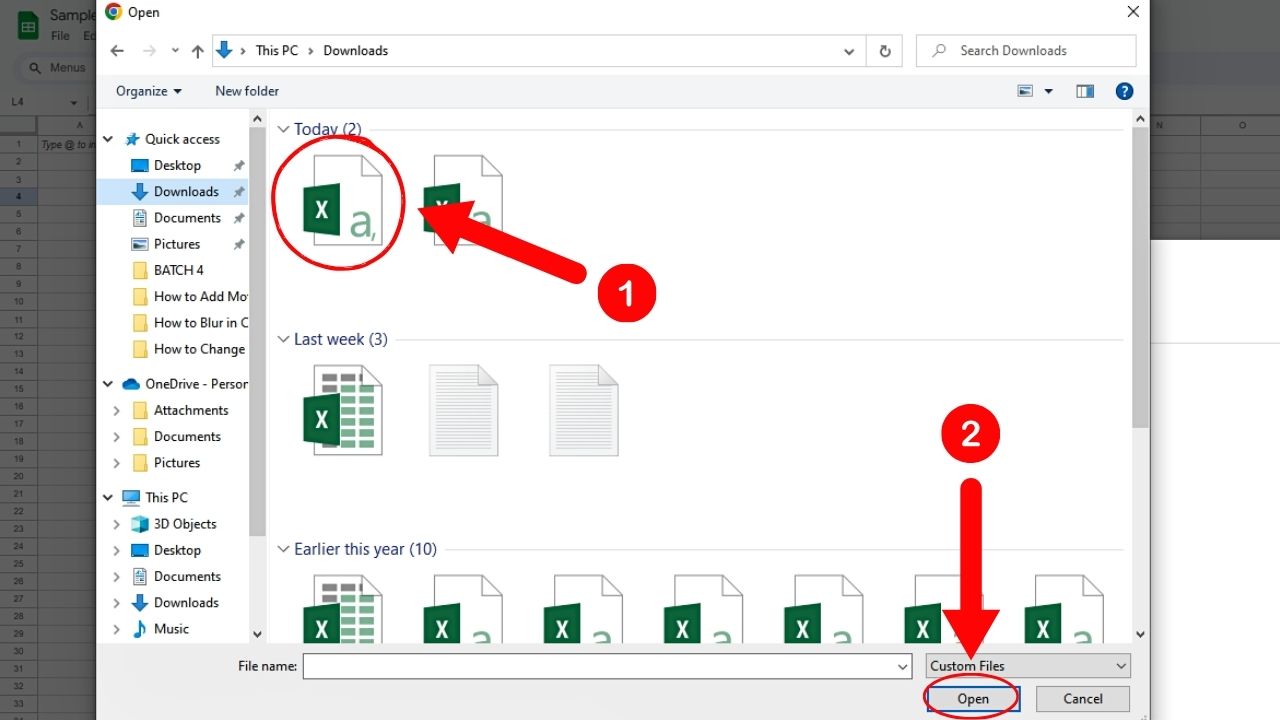
Then select “Open” after clicking the CSV file.
13. Click “Import location” and select the “Replace spreadsheet” button.
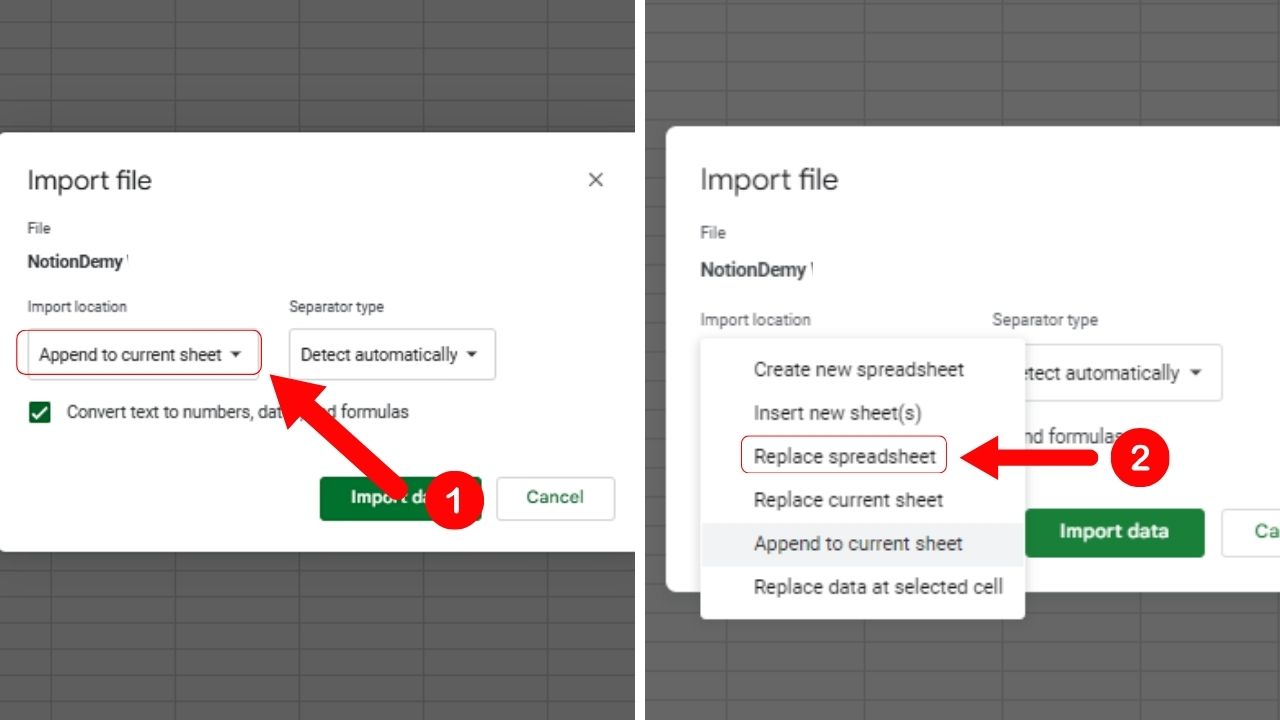
“Replace spreadsheet” is the fifth option on the dropdown menu.
14. Select “Import data.”
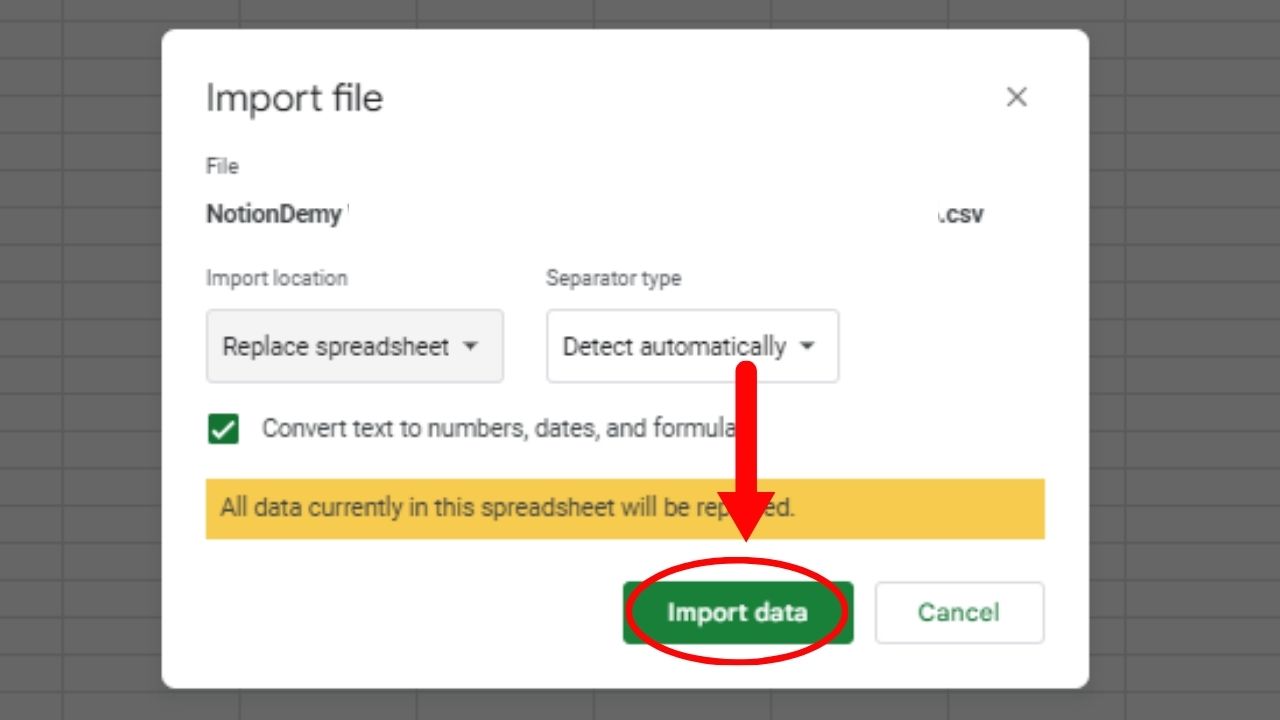
This is the green button on the “Import file” window.
You should now see the Notion table appear in Google Sheets.
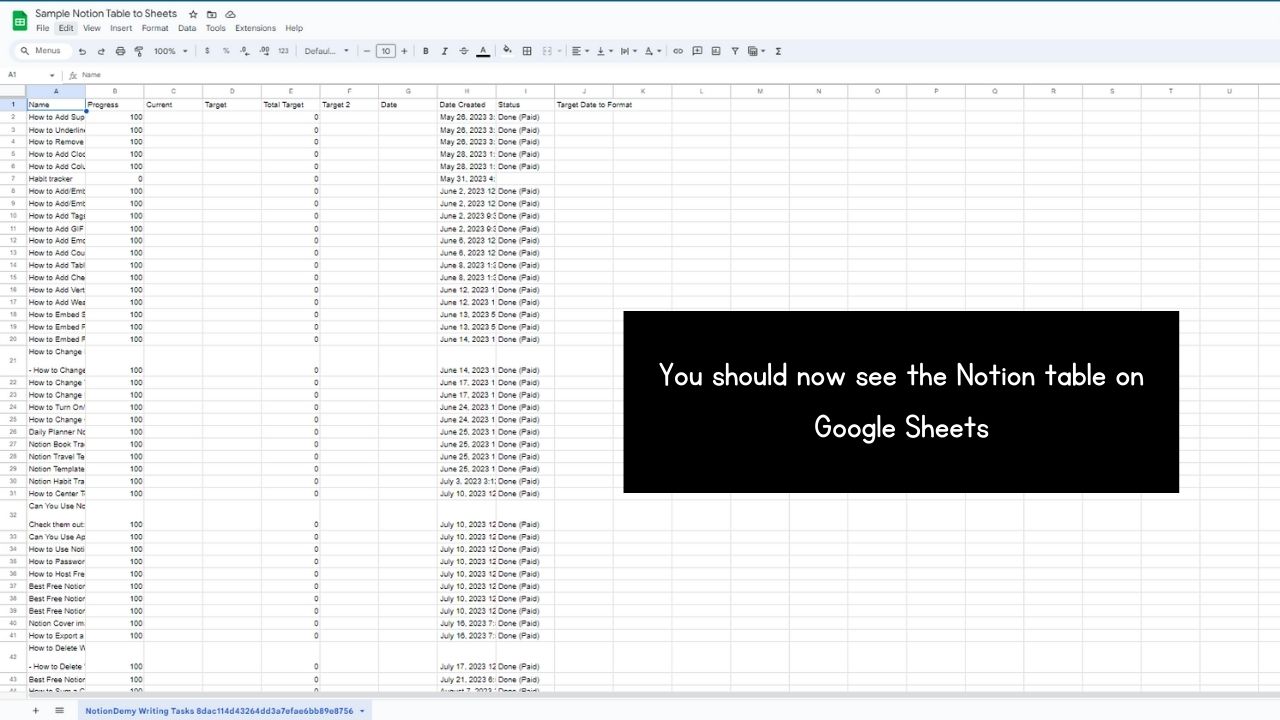
Presto! You have now exported your Notion table in Google Sheets or Excel.
Master these steps to easily open your Notion table in any spreadsheet tool you use.
Conclusion
It’s good to learn the basics of exporting Notion tables to Excel or Google Sheets. No need to use third-party tools to export them to spreadsheet tools as Notion itself has a way of doing this feat.
Master this incredibly simple process to become an expert at data management.
