To streamline your task management in Notion, you should take advantage of the Kanban boards. Made by a Japanese industrial engineer, Kanban boards make sure all the core tasks of your projects are visible at a glance.
So if you’re ready to learn the entire process of creating a Kanban board in Notion, read this guide.
Table of Contents
How to Create a Kanban Board in Notion
By default, Kanban boards consist of three columns: “To-Do” for tasks you haven’t begun, “Doing” for ongoing tasks, and “Done” for finished tasks. If needed, you can add more columns.
But before you add categories for your Kanban board, you must learn how to create one.
1. Select “New Page” on the side panel.
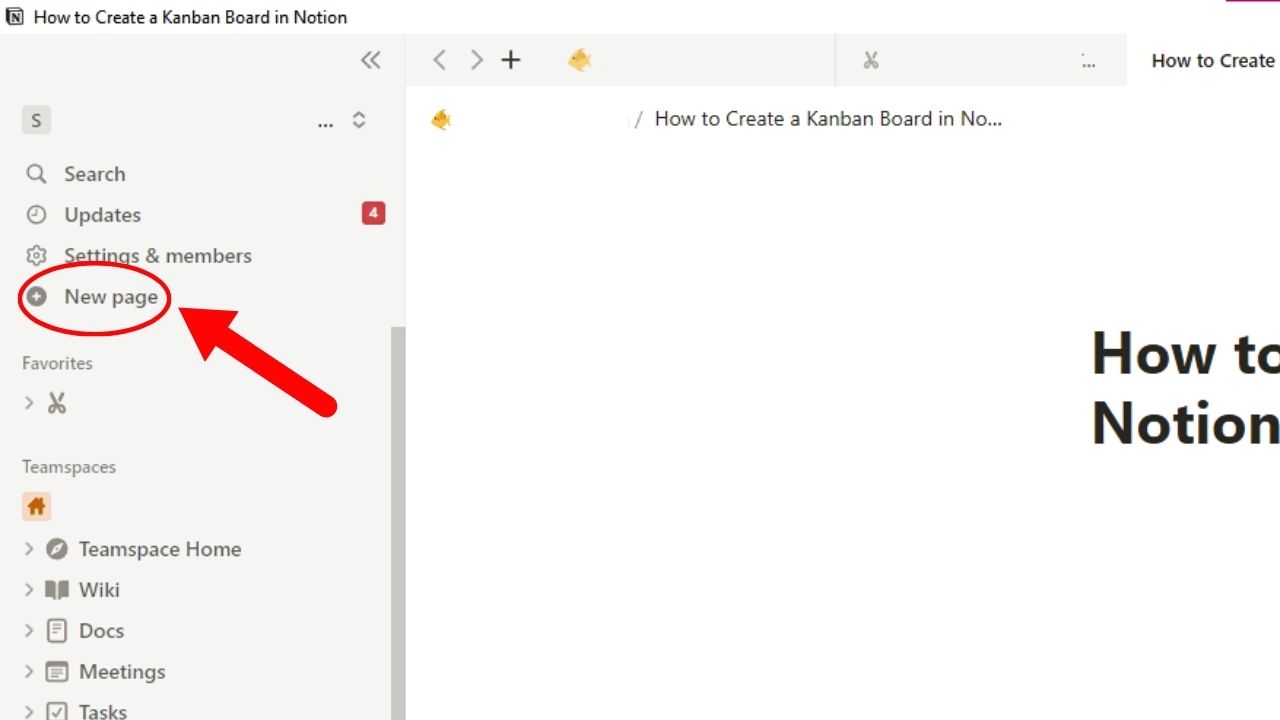
You’ll see this option after “Settings & members.” A center peek page then opens.
2. Rename the page and click “Table.”
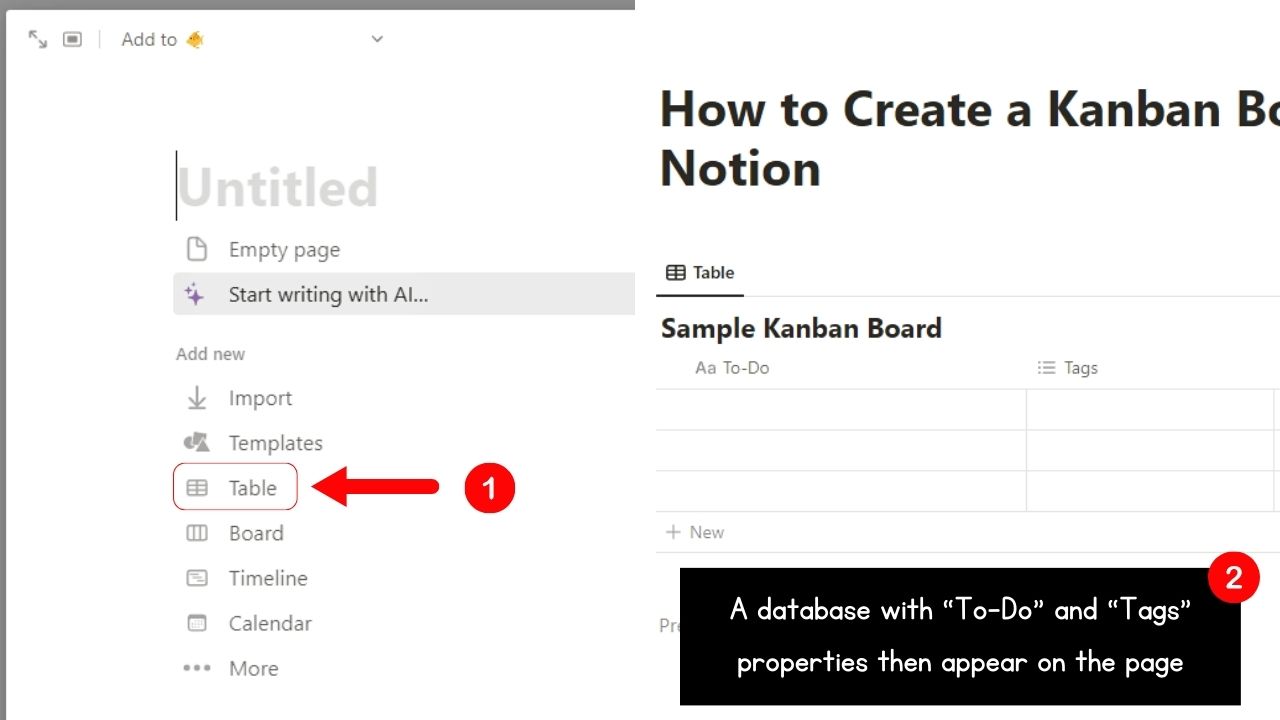
Now, you might get confused since there is a “Board” option available. But personally, it’s easier to create a database and add the needed columns first and add a “Board” view later.
An inline database then appears with its default “Text” and “Tags” properties.
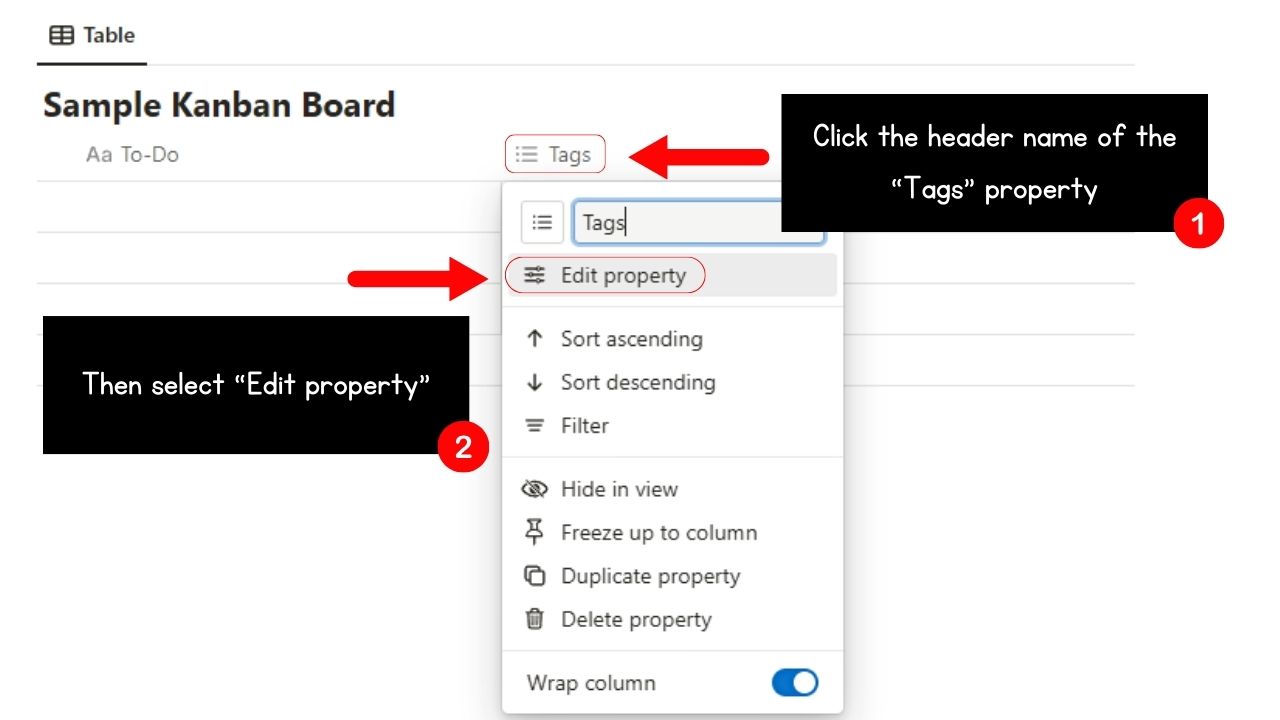
3. Change the “Tags” property type to “Status.”
By default, the “Tags” property type is “Multi-select.” Since you want to be able to move task entries like sticky notes, you need to change the property type to “Status.”
The process is like how you edit the property when you change an existing property type to “Currency.” Just click the header name and select “Edit Property” on the dropdown menu.
Then click the “Next” button of the “Type” option and select “Status.” The “Edit Property” pane then appears.
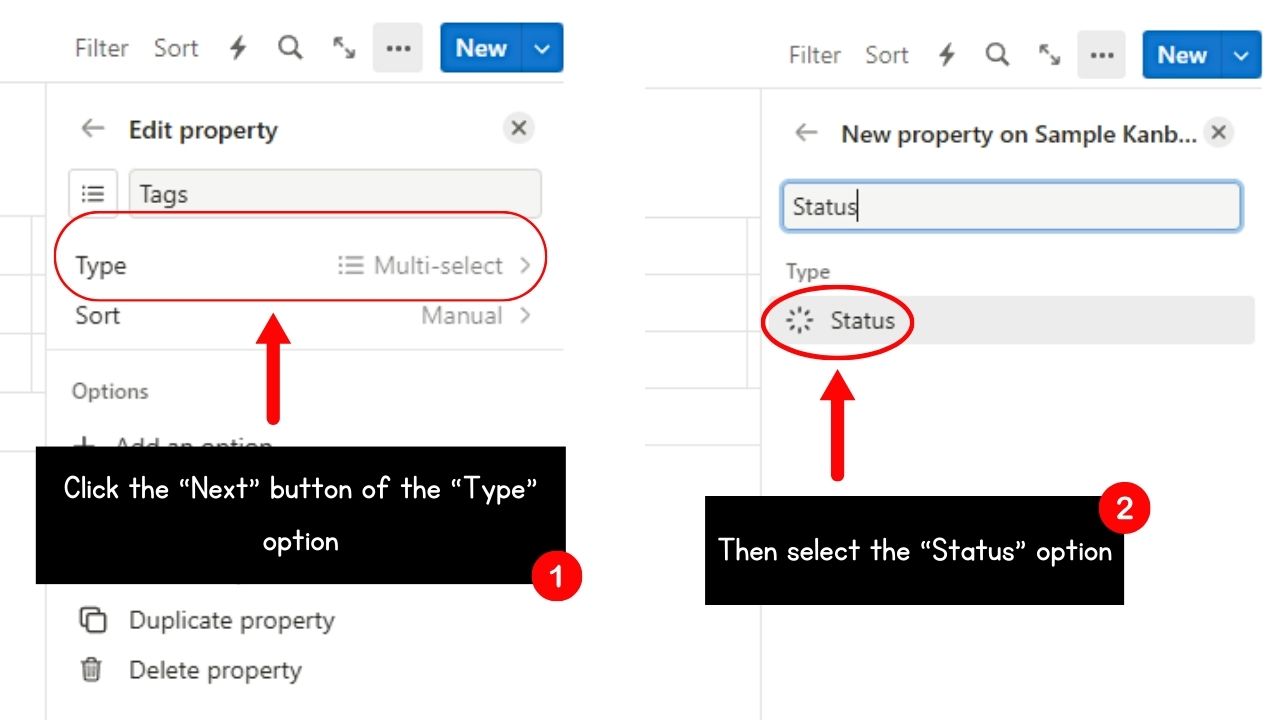
4. Edit the newly-created “Status” property.
First, you can rename the header name. But you can retain the default “Status” header name.
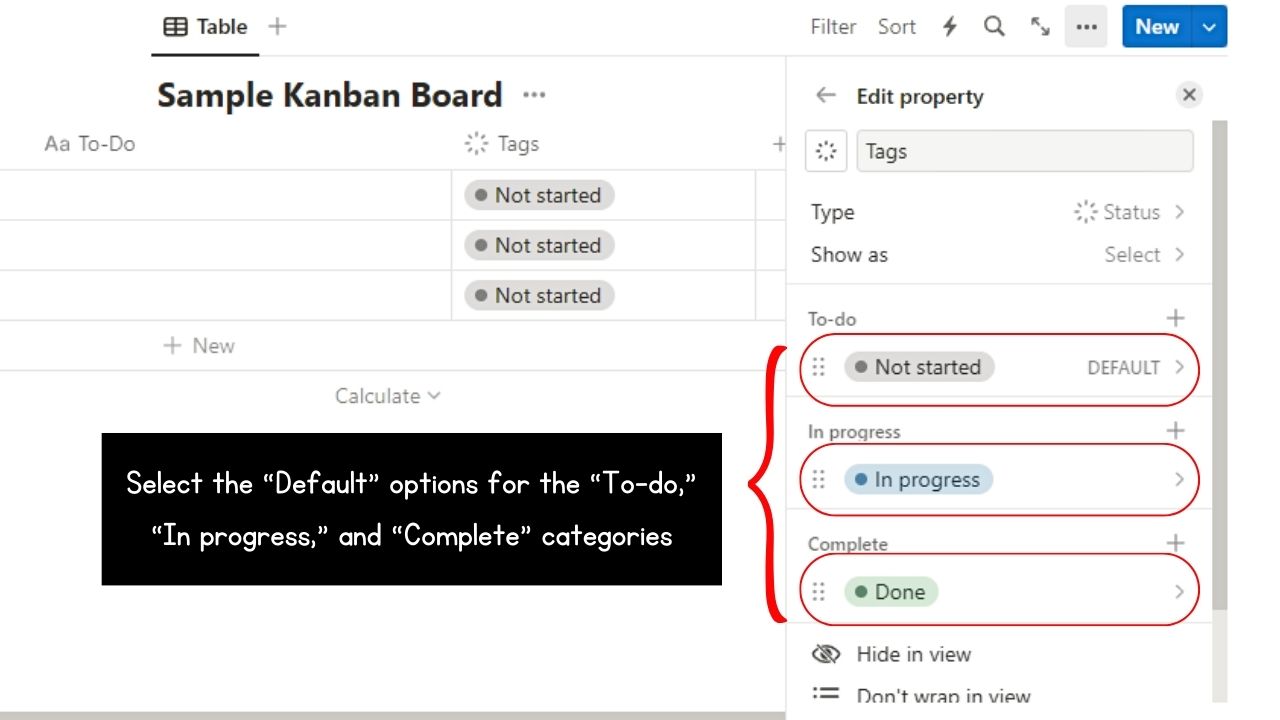
Then go to “Categories” and change the color of the “To-do,” “In progress,” and “Complete” sections by clicking “Next” of the “Default” look.
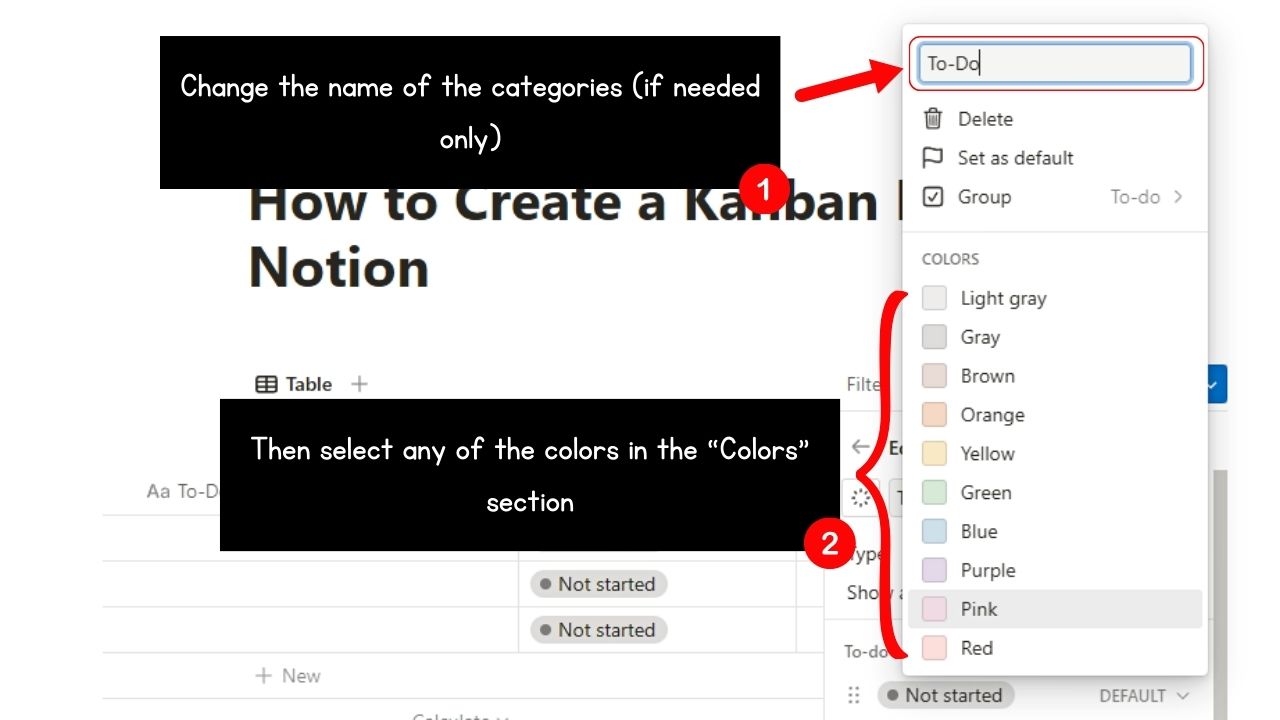
Change the name and the colors used for that task category. Once done, click anywhere outside of the dropdown menu and repeat the steps for the “In Progress” and “Complete” sections.
5. Click the “Close” button.
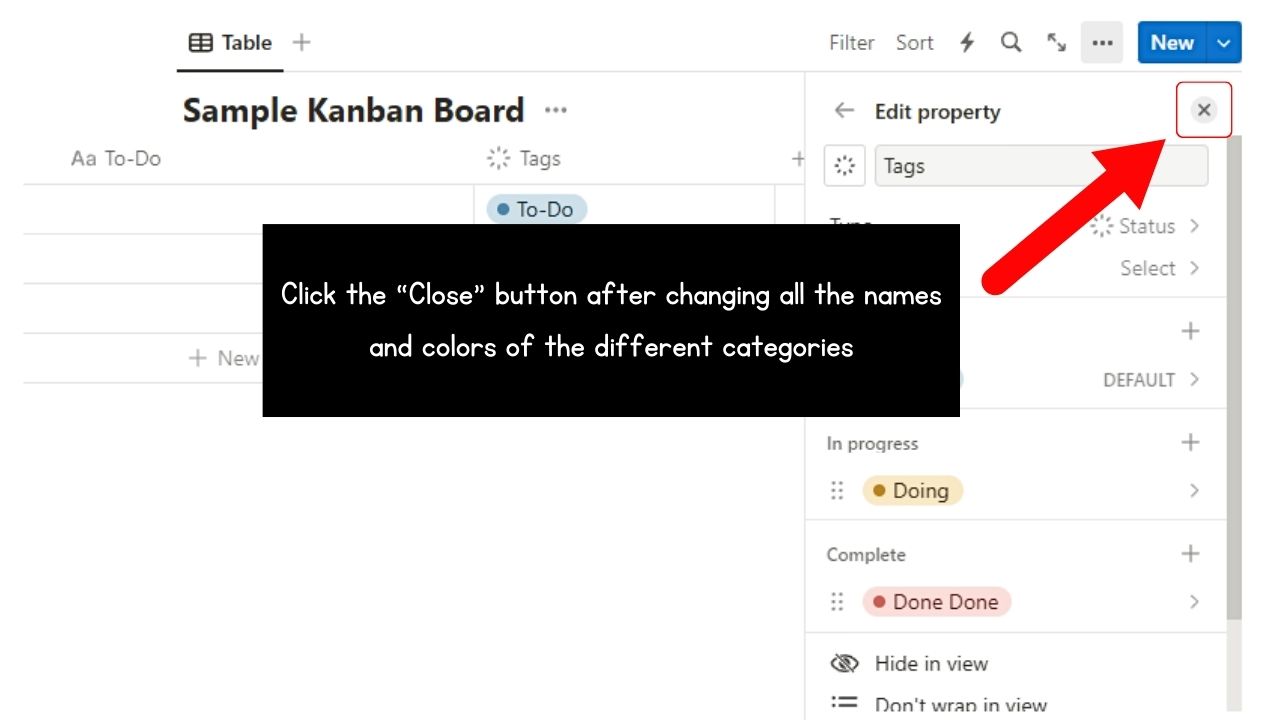
This is the “X” icon of the “Edit property” pane.
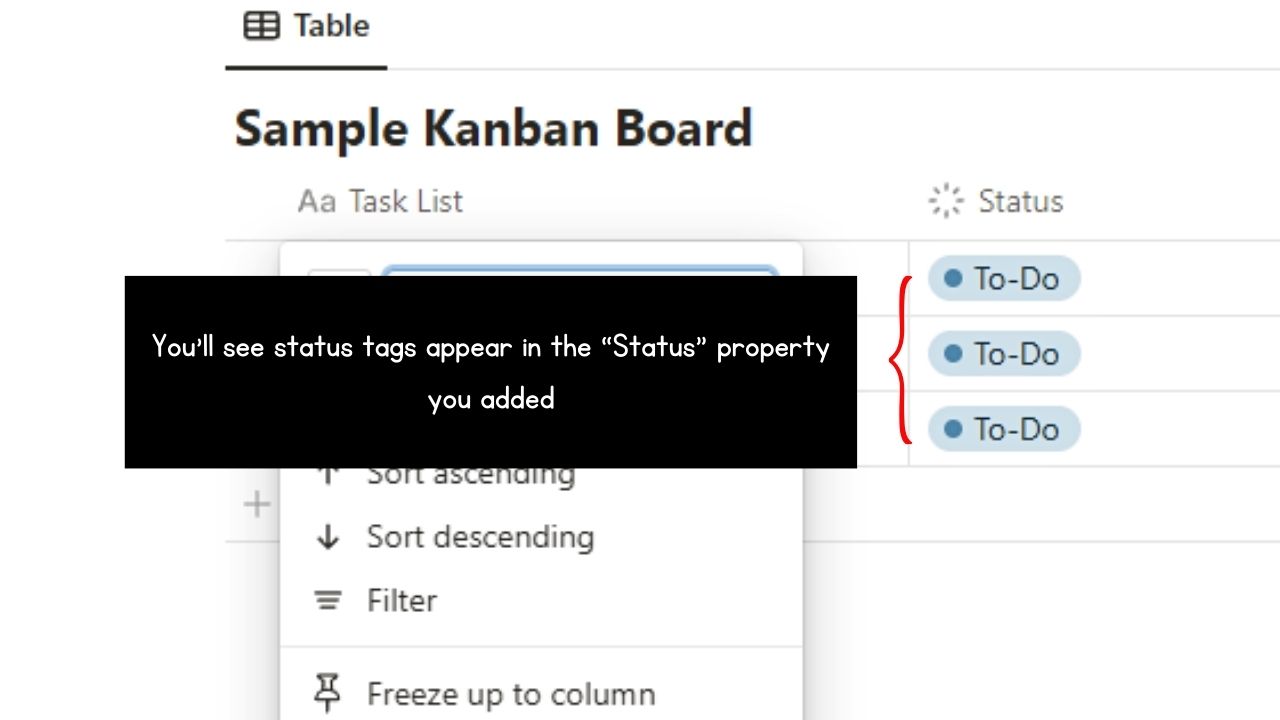
You should now see the status tags in the “Status” category.
6. Create a board view for the database.
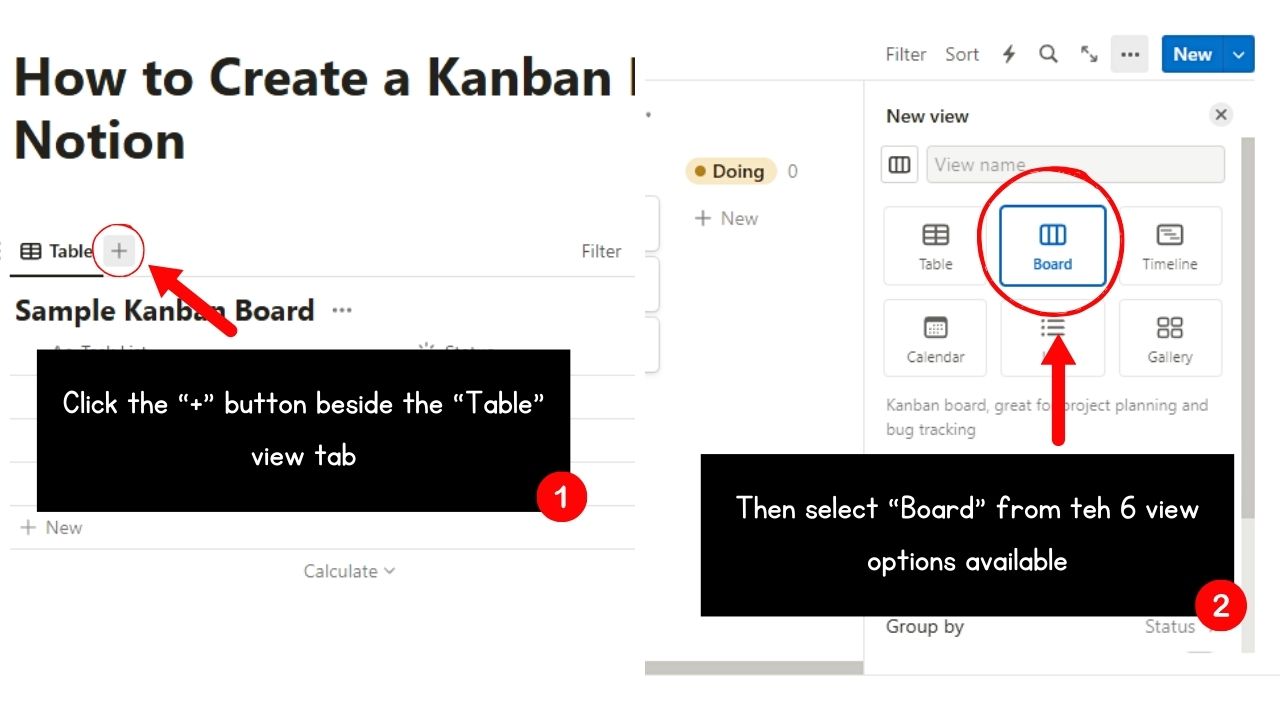
Select “+” on the current “Table” view’s right side. Then select the “Board” option in the “New View” pane.
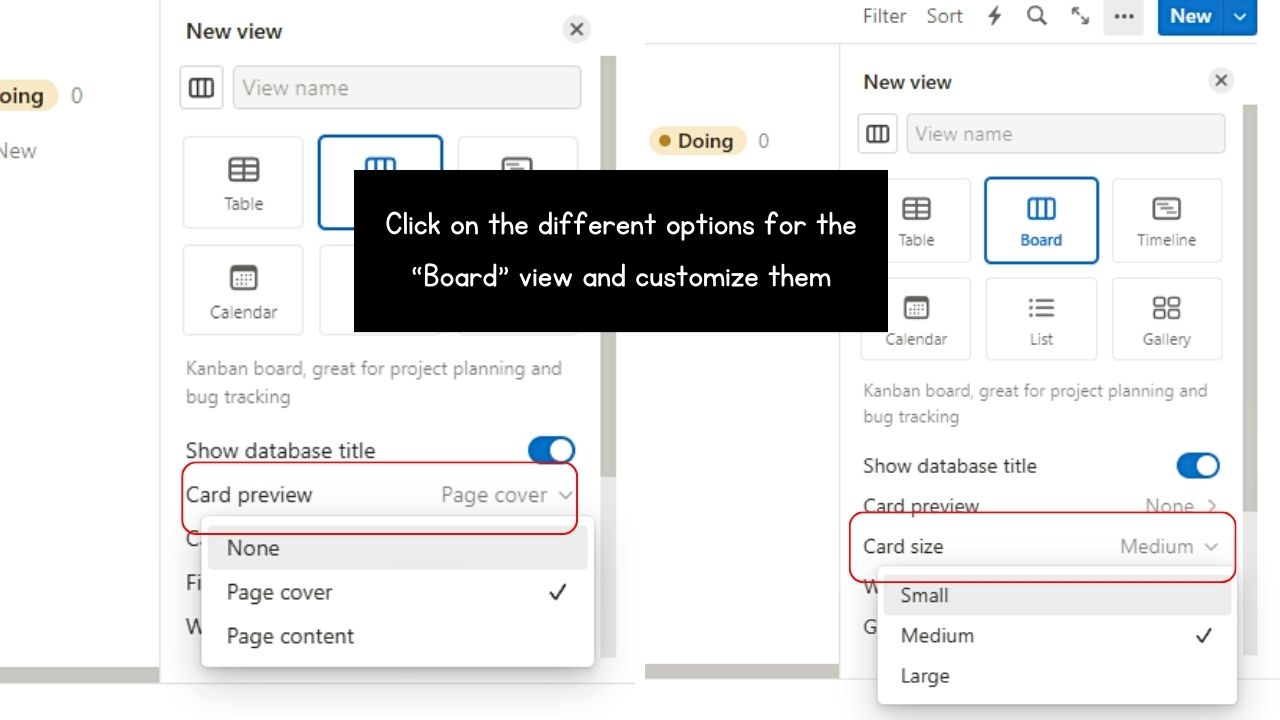
Then scroll down to edit the “Card Preview,” “Card size,” “Group by” and other options for the Kanban board you’re creating.
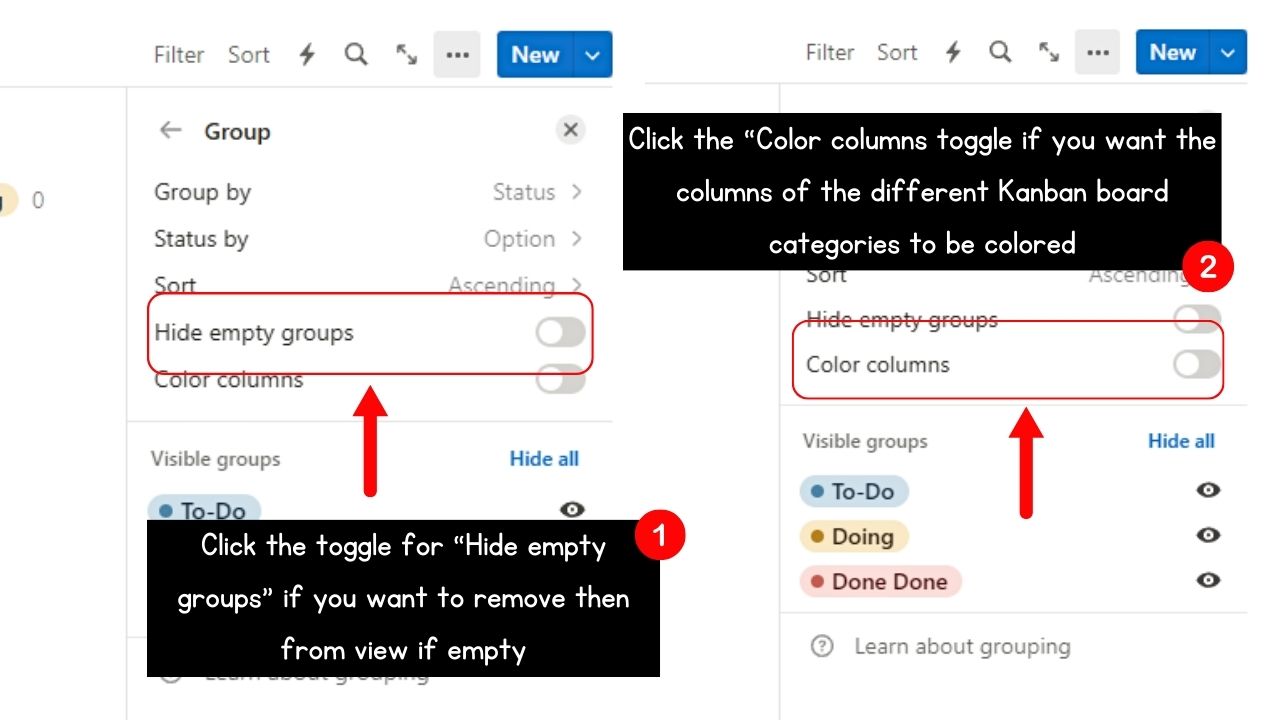
If you want to hide empty groups, click the “Hide empty groups” option. But it’s better to keep this deactivated so you won’t find it hard to add new items later.
If you want the columns to be colored, select the “Color Columns” toggle.
7. Click the groups you’ll hide.
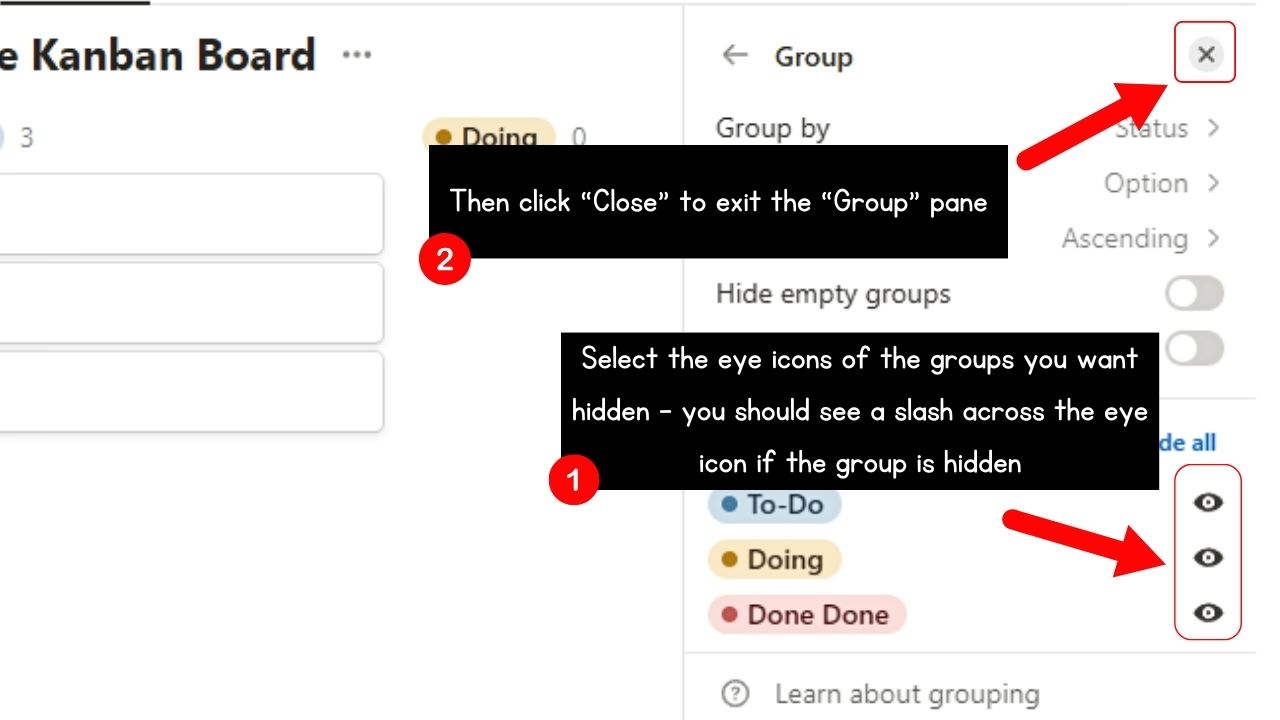
Go to the “Visible groups” section and click on the eye icons to the right of each status. When you see a slash across the eye icon, the group is hidden.
Then select “Close” to exit the “Group” editing pane.
8. Click “Done.”
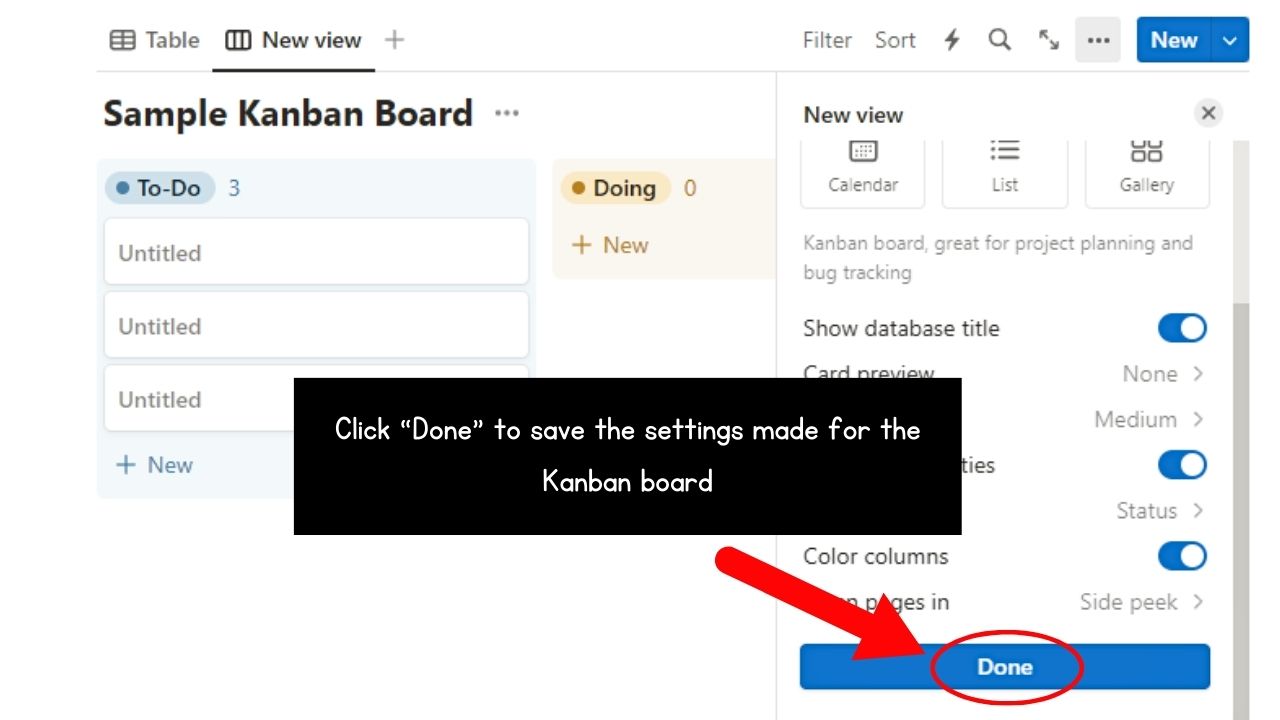
This saves the settings you made for your Kanban board.
9. Select the “Close” button twice.

This closes the “New view” and “View options” side panels after the settings for your Kanban board are tweaked.
You should now see the new Kanban board you created along with the entries categorized under their statuses.
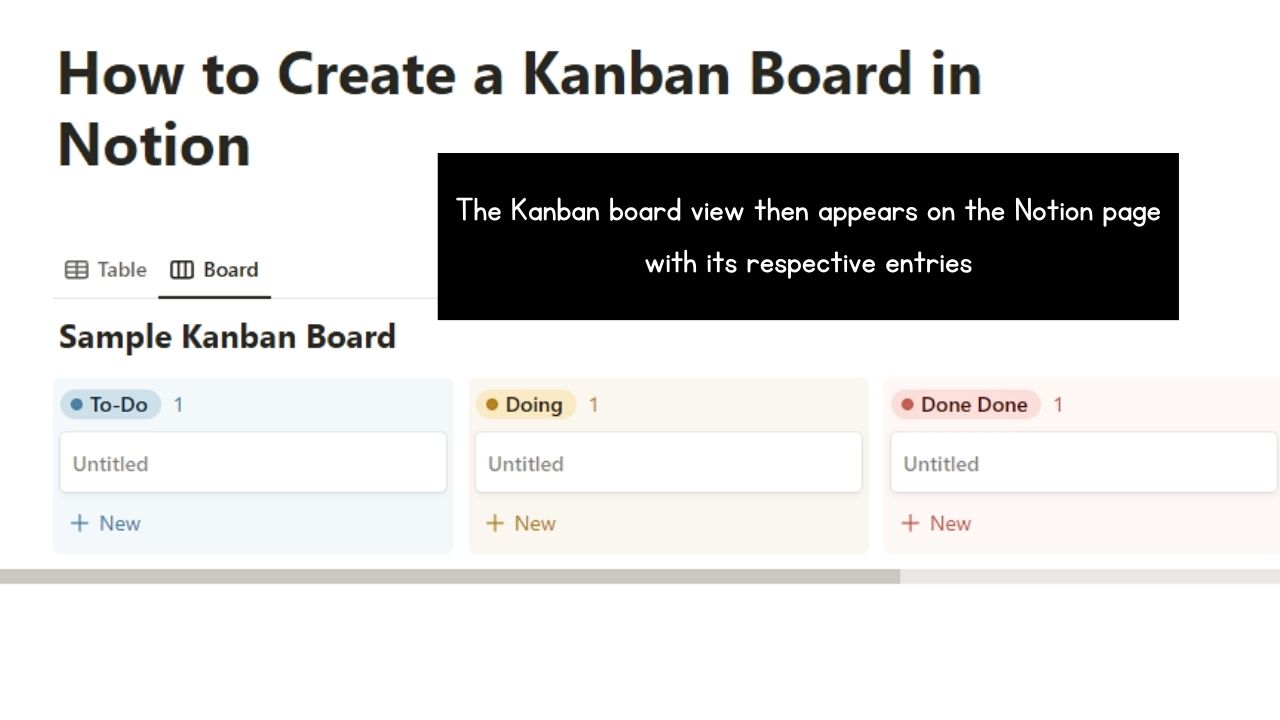
Move the task cards by clicking and dragging them to the status category they belong to.
If you need to add new status categories, you can just switch to the “Table” view and add a few more “Status” properties.
You can even add checkboxes to your Kanban board task cards for tagging tasks as “Done.”
Conclusion
Learning and mastering how to create a Kanban board in Notion empowers you to manage your tasks. Now that a big project is broken down into bite-sized chunks, you don’t have an excuse to miss a single deadline.
Plus, you enhance collaboration while staying organized if you know how to use Notion’s Kanban boards feature.
