You are in the middle of writing notes on Notion when red lines appear under them. You then realize those underlined words are misspelled.
This only means that Notion’s spell check works. While it is helpful in spotting errors, you can turn it on and off if it distracts you.
Table of Contents
How to Remove Red Lines in Notion (Spell Check Off)
The red lines under the words in Notion show that its spell check is activated. Every time a word is misspelled, a red underline appears, reminding you to correct it the soonest.
If you want to turn off Notion’s spell check and remove those red lines, refer to the steps below.
Note: Open the Notion app on your Mac or Windows computer, not on the web browser. The web browser’s spell-checking app overrides Notion’s native spell-checker.
1. Select the misspelled word in the text.
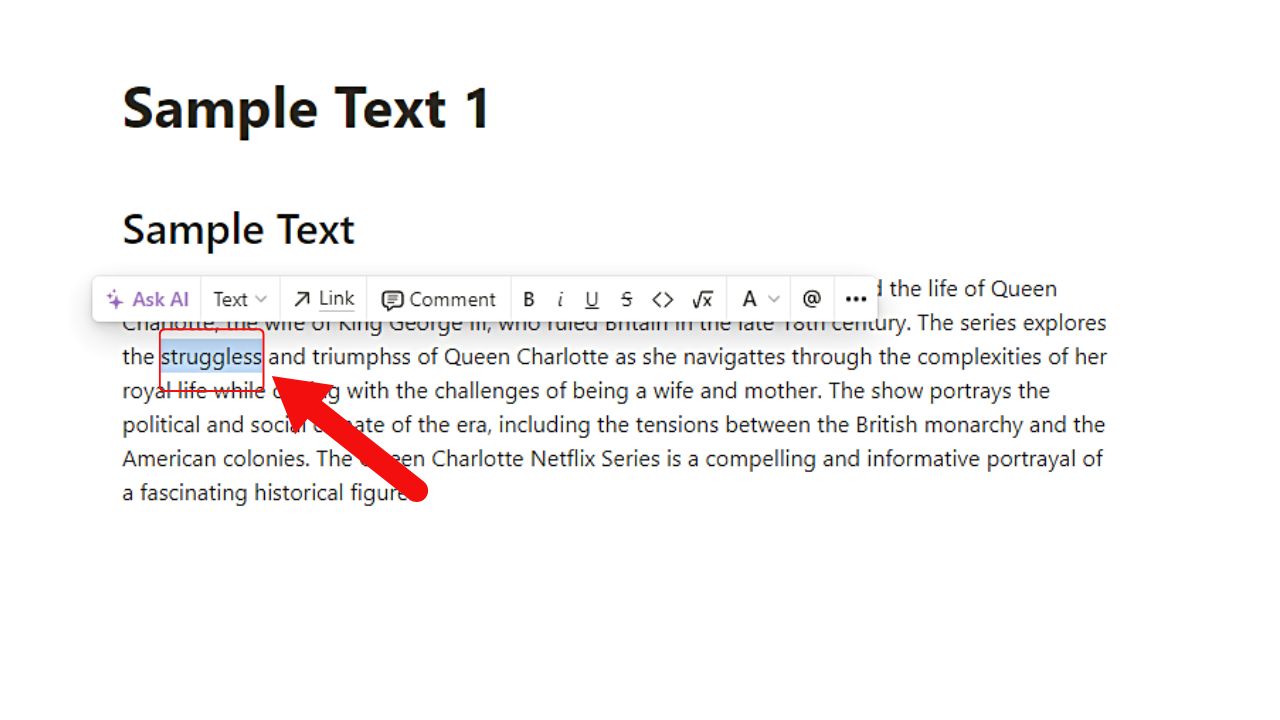
Just drag the cursor across the word with red underlines until it’s covered in blue highlight.
2. Right-click on the selected word.
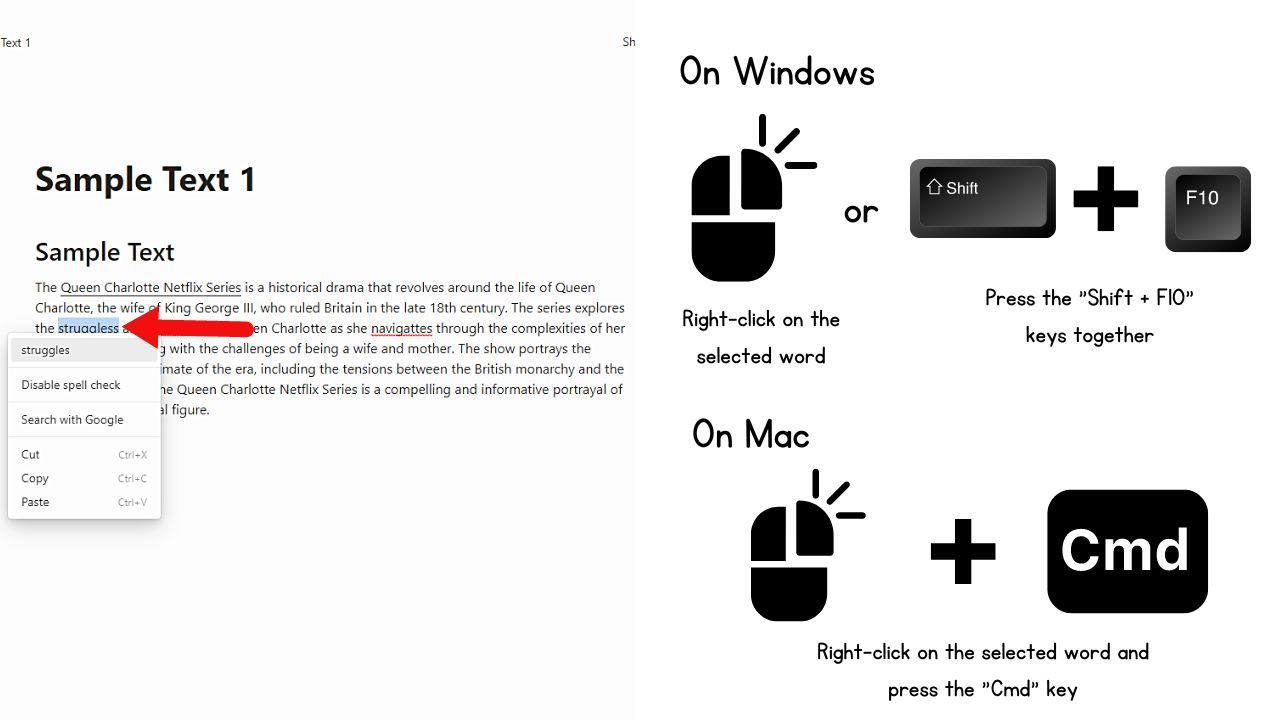
This move then opens a dropdown menu. Another way to right-click on Windows is by pressing “Shift + F10” together. But these functions apply to Windows computers.
On a Mac, you can make a right-click by clicking the mouse and pressing the “Cmd” key.
3. Click “Disable spell check.”
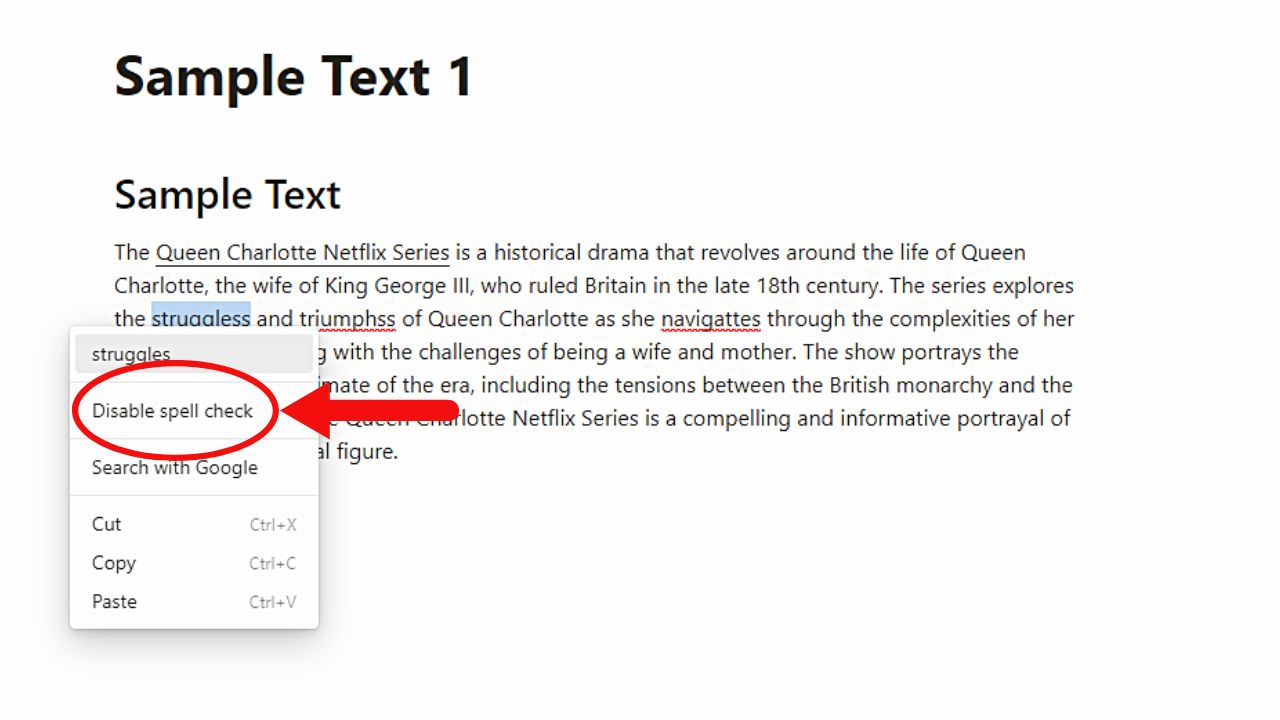
This is the second option after the word suggestion on the dropdown menu.
You will then see all the red underlines disappear.
How to Make Red Lines Appear in Notion (Spell Check On)
Before proceeding, ensure you open Notion as an app on your Mac or Windows computer.
1. Select the misspelled word on your notes.
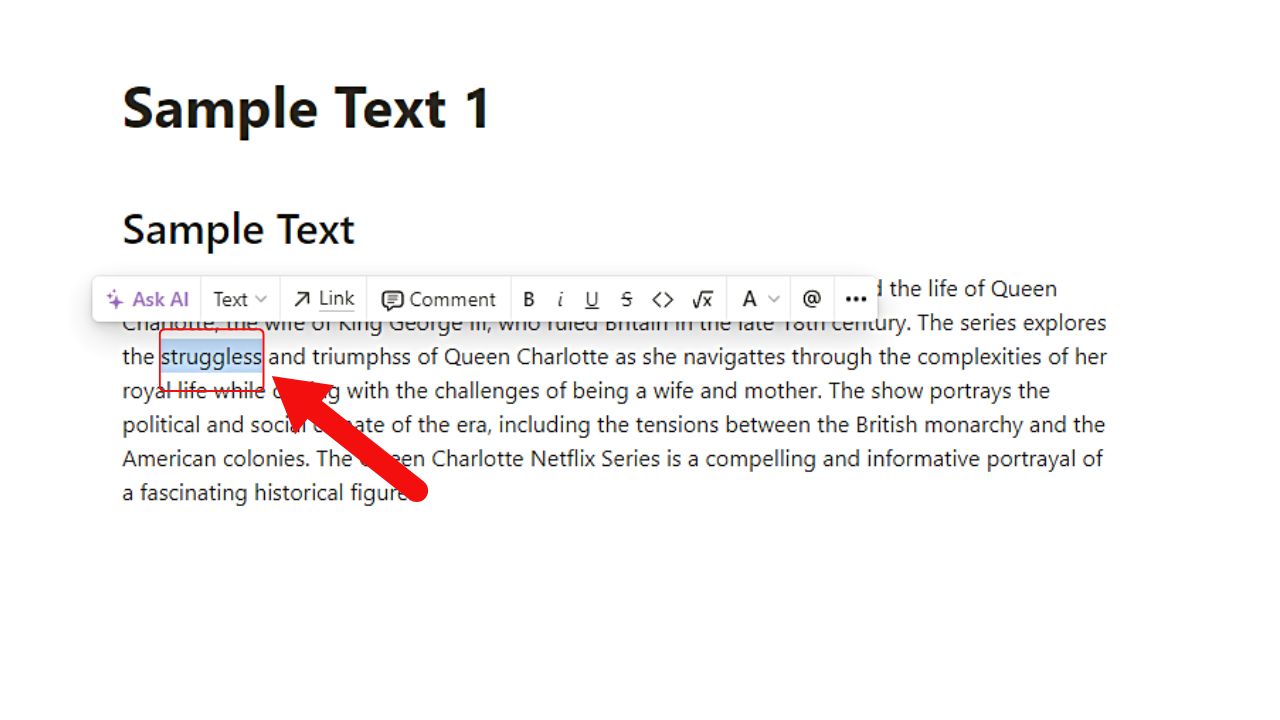
You can drag the cursor across the word until a blue highlight covers is.
2. Right-click on the selected word.
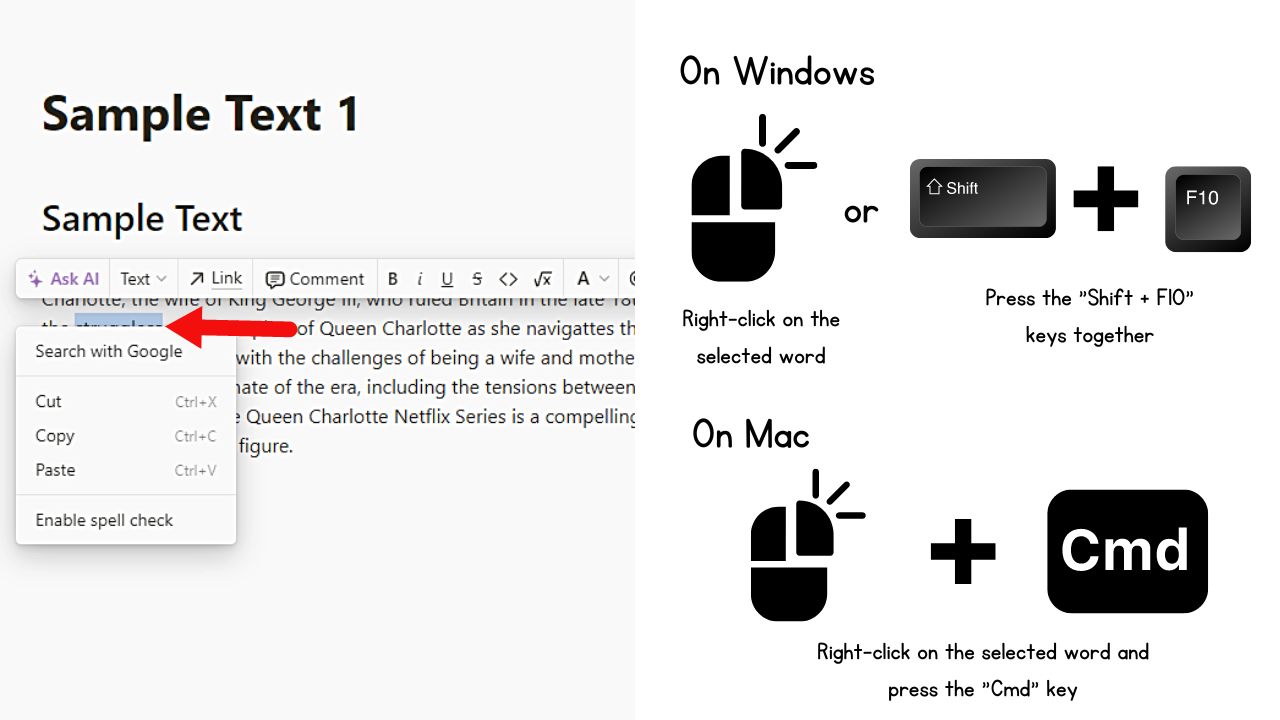
This then opens a dropdown menu. Another way to right-click on Windows is by pressing “Shift + F10” together. But these functions apply to Windows computers.
On a Mac, click the mouse while pressing the “Cmd” key to right-click on the misspelled word.
3. Click “Enable spell check.”

Red lines then appear under any misspelled words your notes in Notion may have.
Removing Red Lines in Notion Mobile
With a smaller screen size, removing the red lines in Notion mobile is different as compared to doing it on the desktop app.
1. Tap on the misspelled word
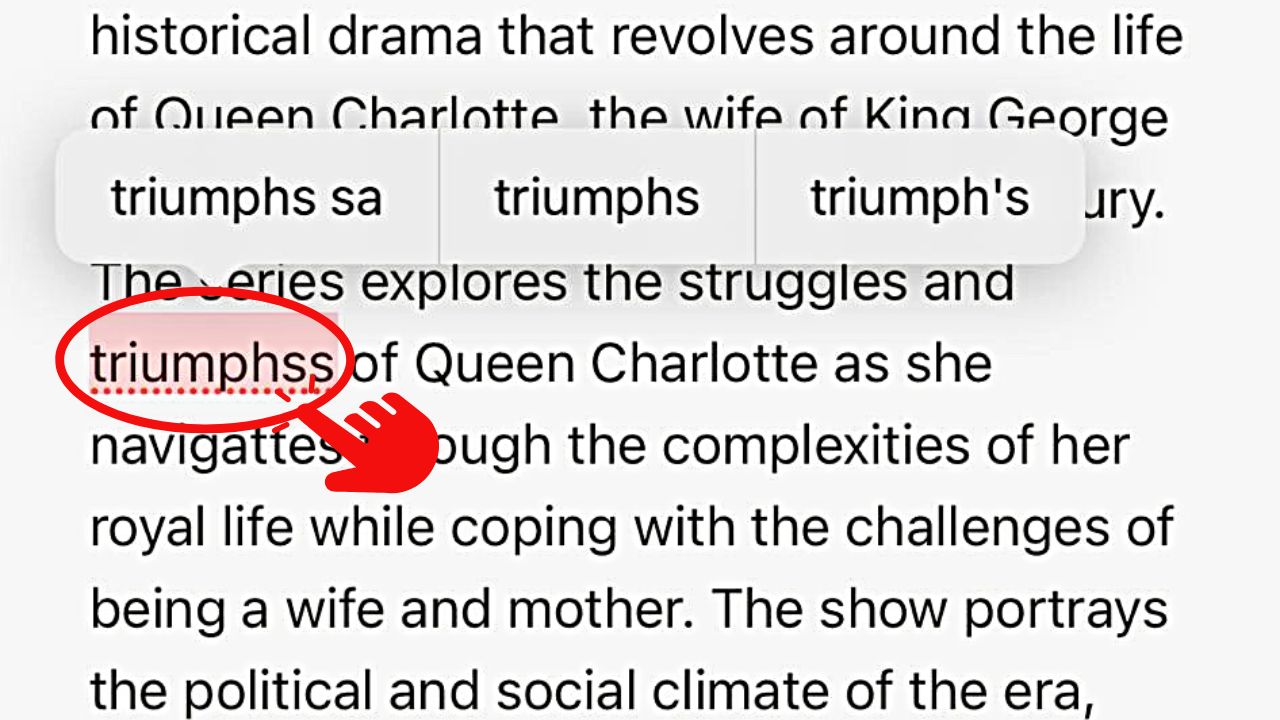
This action then highlights the word in red and makes a floating taskbar appear.
2. Tap the correctly spelled word from the word suggestions
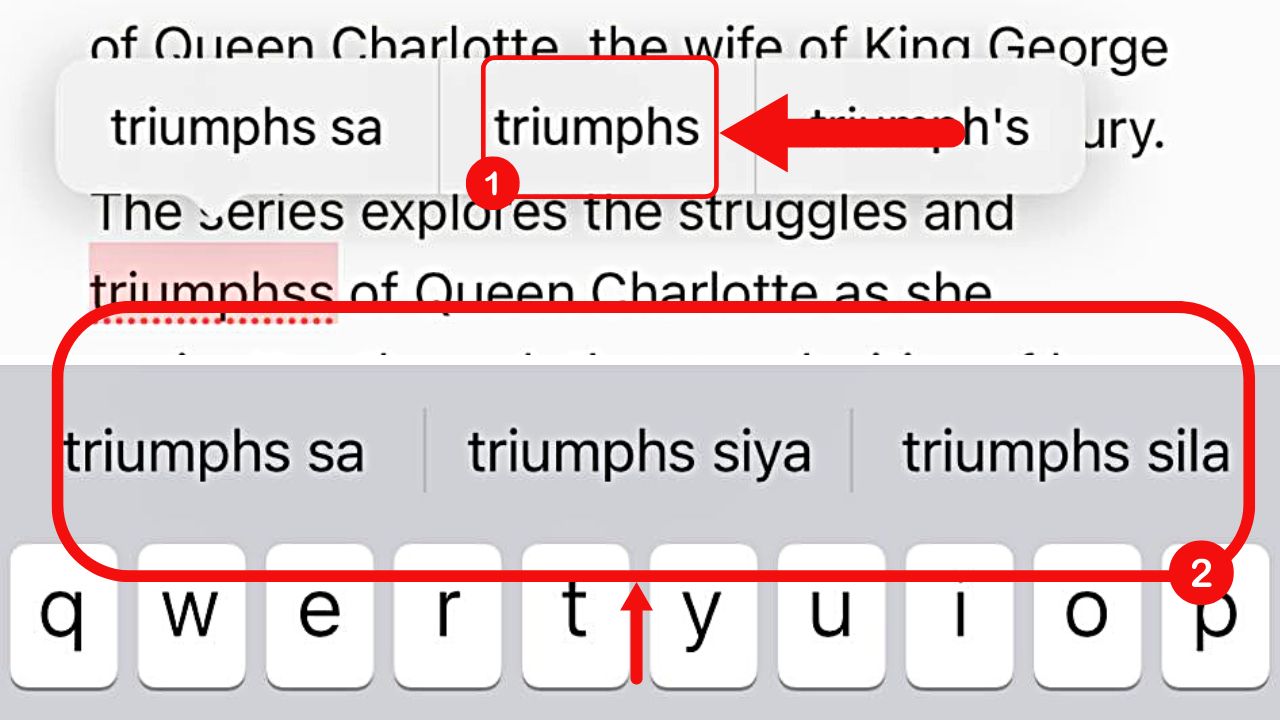
You can find these word suggestions on the floating taskbar or above the onscreen keyboard.
After choosing the correct word spelling, the red line under it disappears. But unlike on the desktop app, removing one red underline won’t disable the spell-check for the other words.
Hence, repeat steps 1 and 2 for every word with a red underline.
Conclusion
Congratulations! You have now mastered turning on and off Notion’s spell checker. You can now remove the red lines momentarily or proceed to type with the spell check on.
Whatever your decision is, using Notion’s spell-checker tool will aid you with your spelling woes quickly!
